

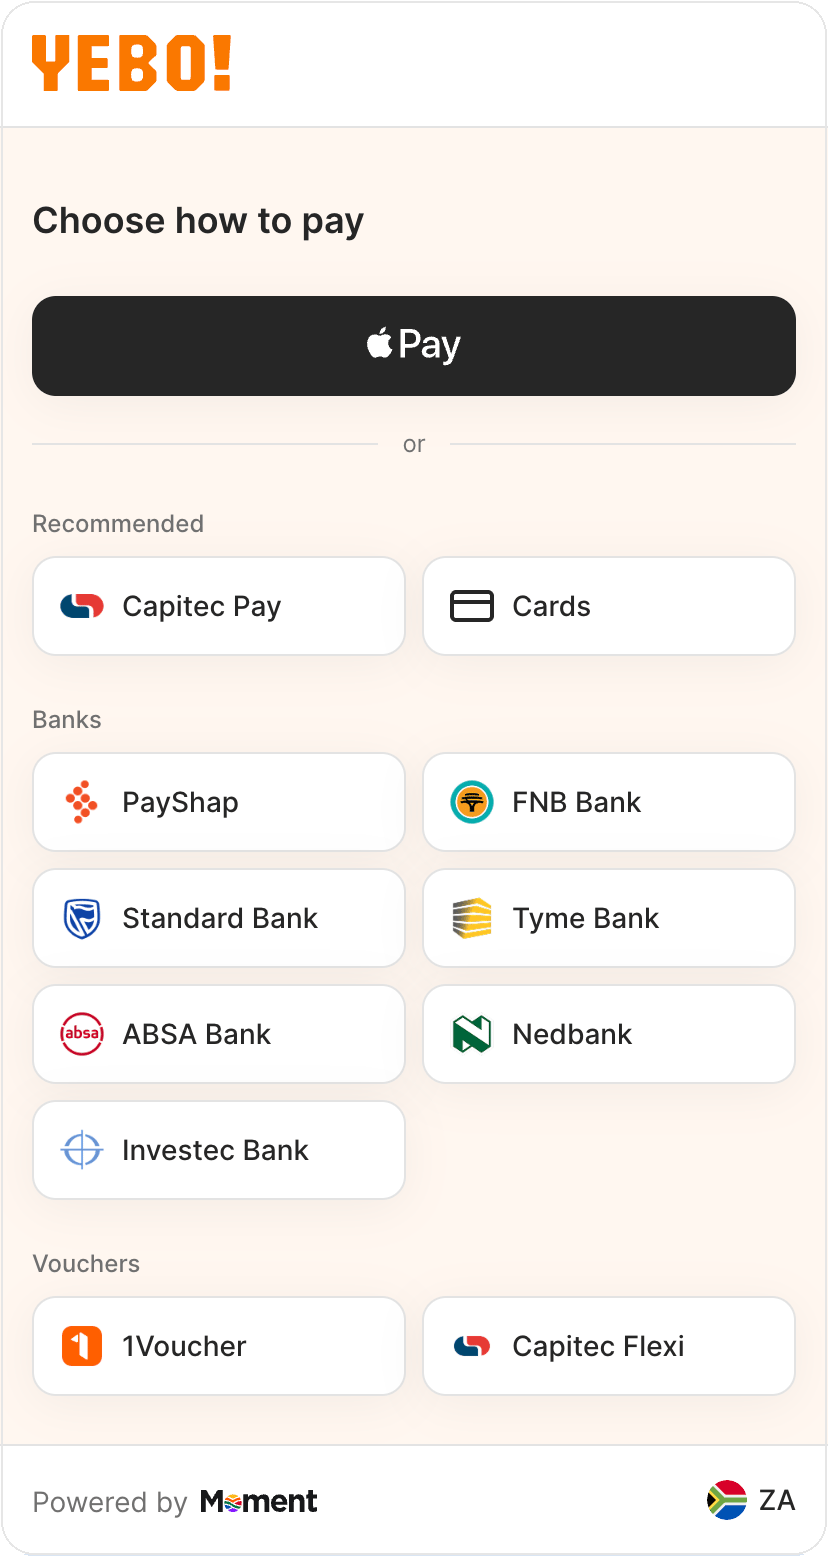
Step 1: Select PayShap in Checkout
On the Choose how to pay screen, PayShap is listed under Banks.
- PayShap only appears if the merchant has enabled it and the customer is in a supported region.
Step 2: Follow the PayShap instructions
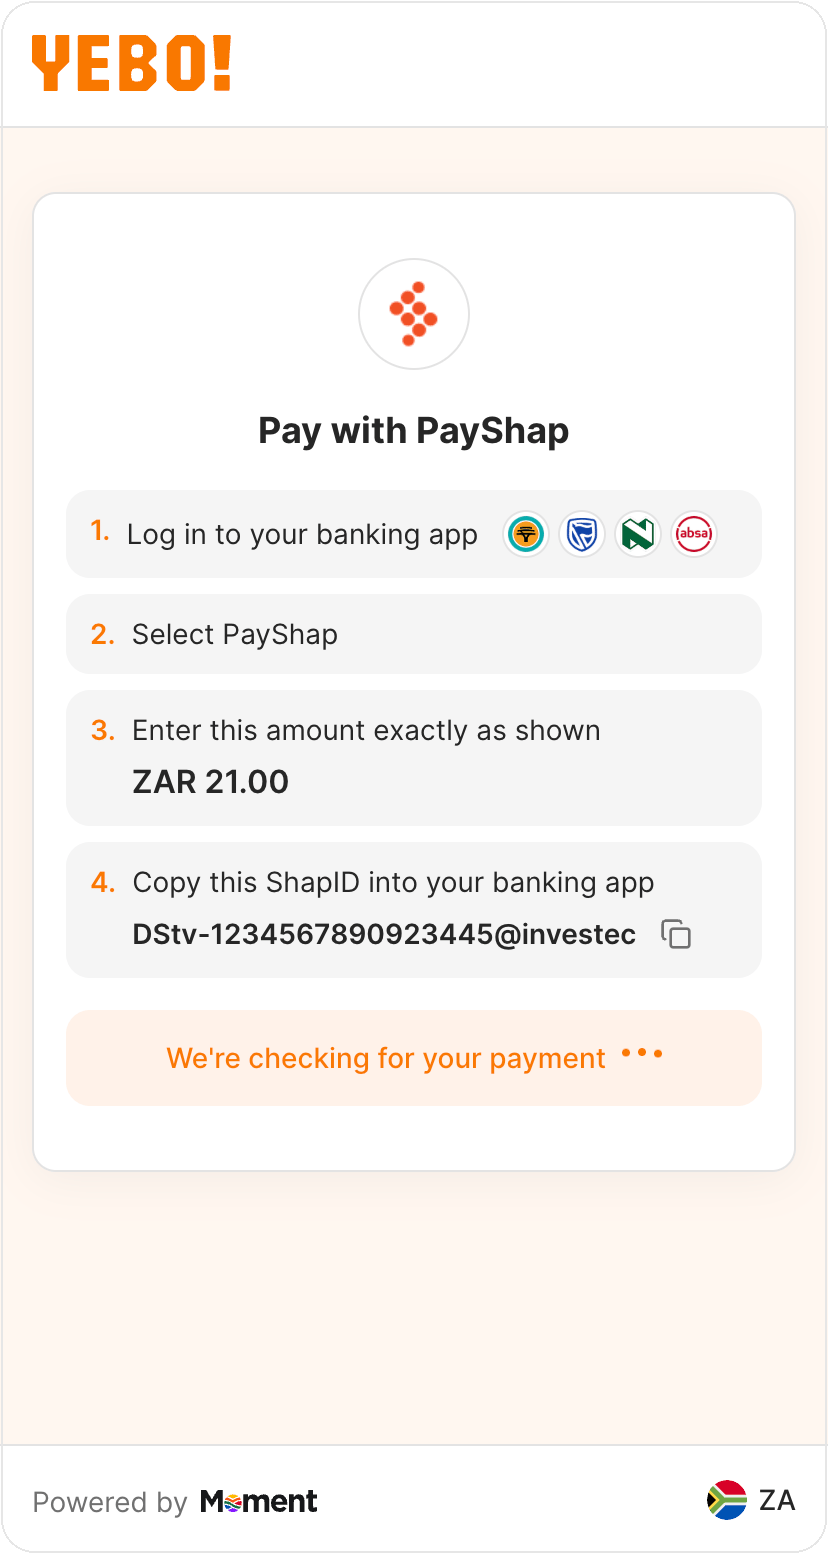
Checkout displays four instructions:
- Log in to your banking app: the customer opens their own bank’s app (not Moment’s).
- Select PayShap: inside their banking app, not in Checkout.
- Enter this amount exactly as shown: the amount must match exactly, for example
ZAR 181.68. - Copy this ShapID into your banking app: this is Moment’s ShapID for the transaction (for example
momt-30434631710782@investec), not the customer’s own ShapID. The customer can tap the copy icon to copy it.
Step 3: Complete the payment in a banking app
Once customers have the amount and ShapID from Checkout, they need to enter these into their own bank’s app. The exact menu names differ by bank. Use the tabs below for bank-specific navigation.- FNB
- Standard Bank
- Absa
- Nedbank
- Open the FNB App and log in.
- Tap Pay, then select PayShap.
- Choose to pay using a ShapID and enter the ShapID shown in Checkout.
- Enter the exact amount shown in Checkout.
- Review the recipient details shown by the app, then confirm and authorize the payment.
Opting in to PayShap
To pay with PayShap, a customer’s bank account needs to be opted in to PayShap already. This is a one-time setup step done directly with their bank, outside of Checkout. If a customer can’t find PayShap in their banking app, they likely need to register first. Registering a ShapID is only required to receive PayShap payments. Customers can typically still make a PayShap payment (paying Moment’s ShapID, as in this flow) once PayShap is enabled on their profile, even without registering their own ShapID, but each bank’s own app will prompt for anything further that’s needed.- FNB
- Standard Bank
- Absa
- Nedbank
FNB customers can register a ShapID from the FNB App: tap Pay > PayShap > ShapID, or from Online Banking under Payments > Add > PayShap.See FNB’s own instructions: FNB Payments: PayShap
Bank app navigation changes over time. If a customer can’t find one of the menu items above, direct them to their bank’s own PayShap page linked in each tab, or their bank’s customer support.