

Create & Manage Payment Requests
Payment Request by Moment makes it easy to track, create, and manage payments — whether you’re sending individual requests or handling them in bulk. Follow these steps to streamline your payment collection process and keep everything organized in one place.Create a Single Payment Request
Step 1: Select to create a single payment request. Decide if you want to send it now or later.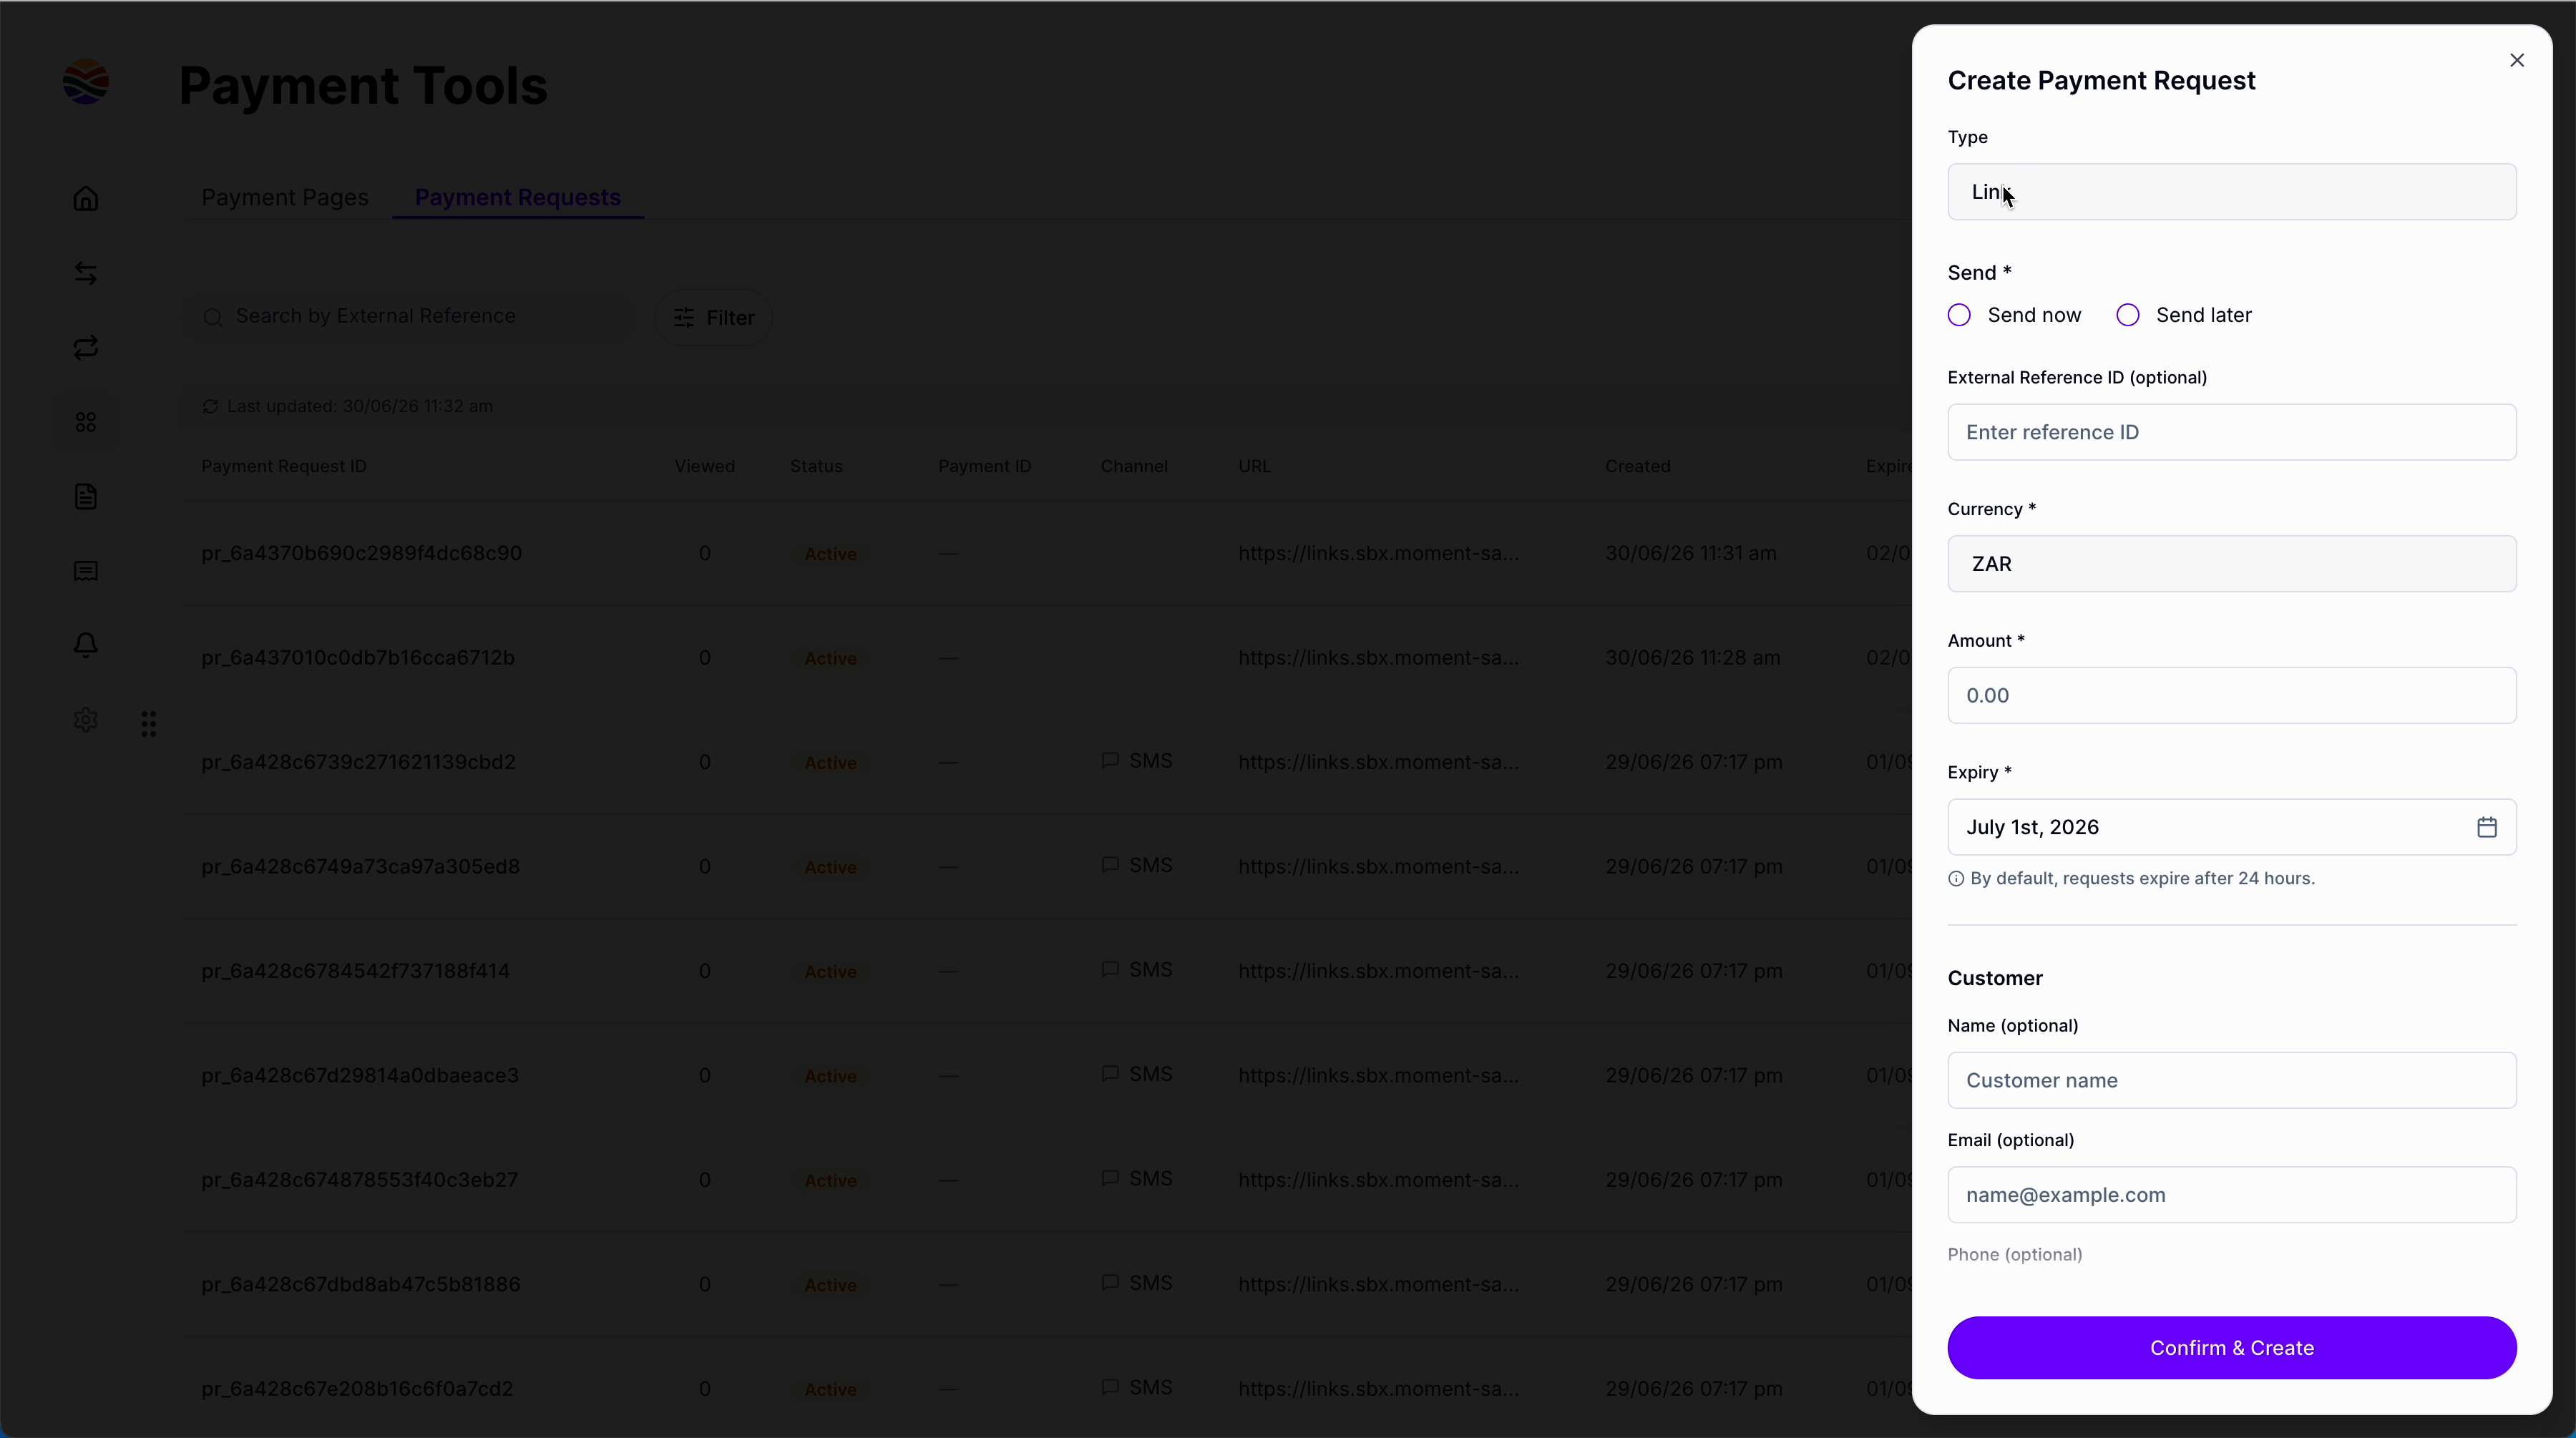
Step 2: If you’re sending it right away, pick the delivery channel and enter the customer’s phone number.
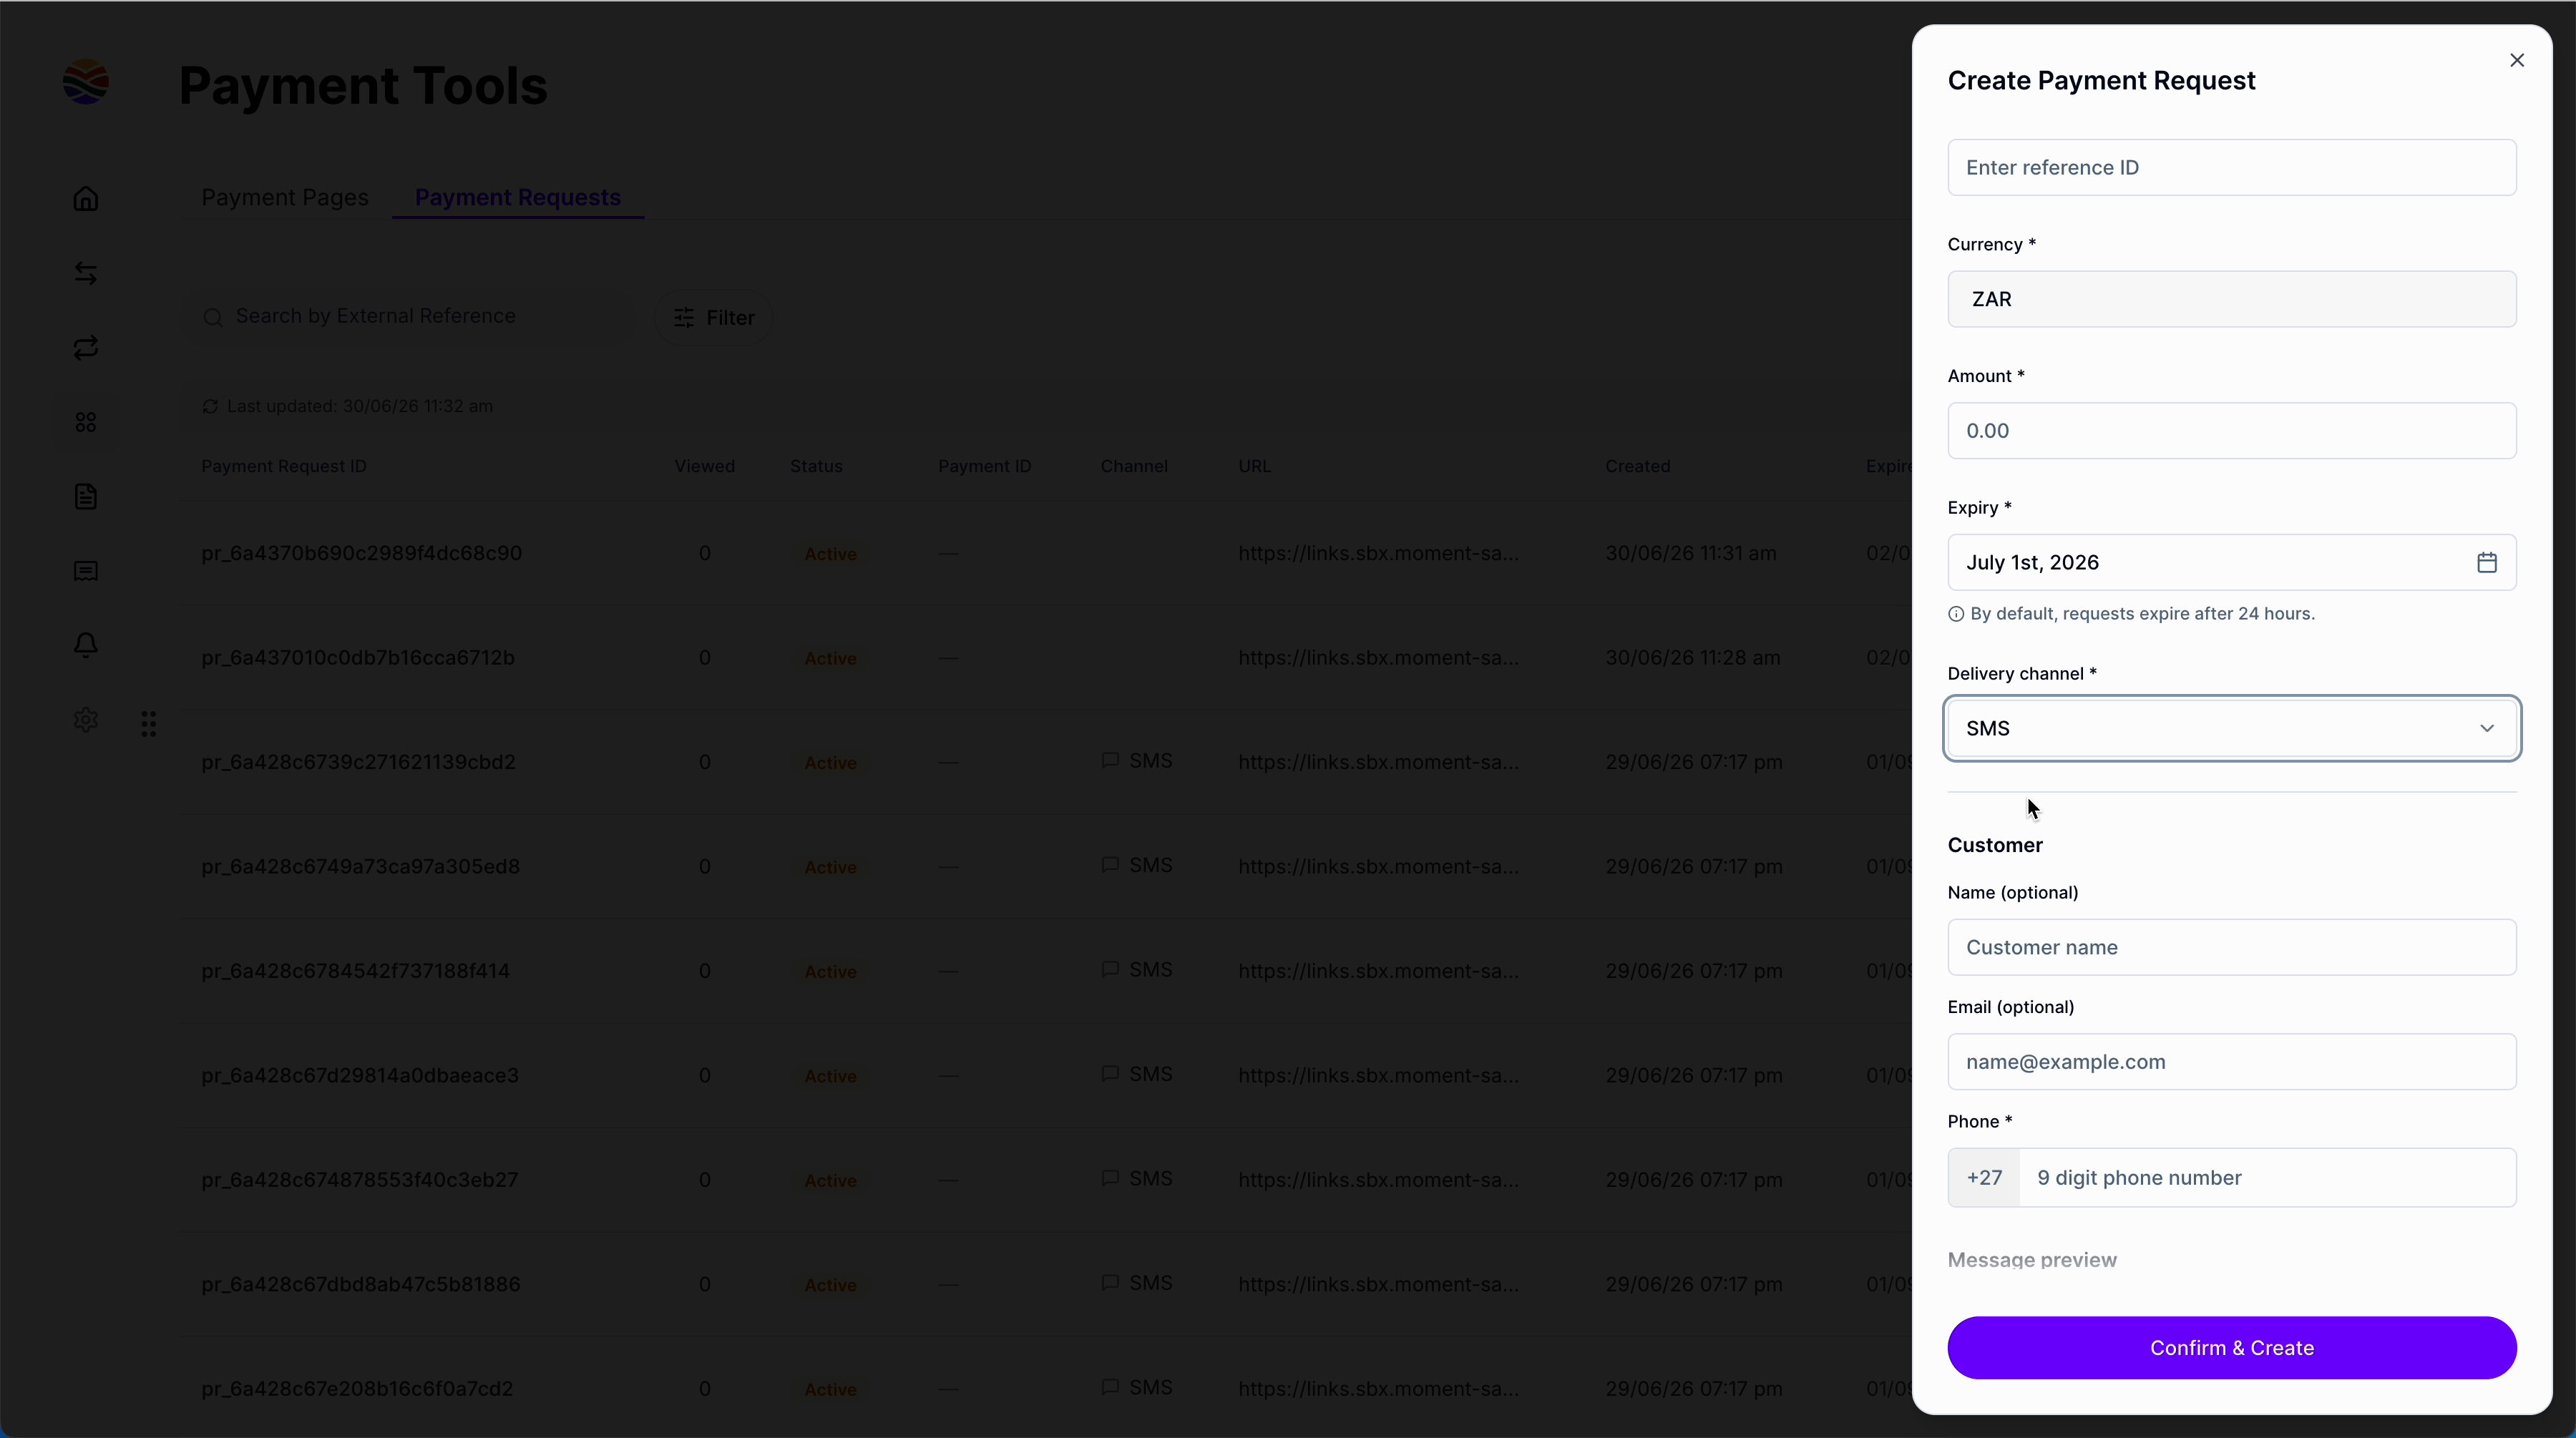
Step 3: Optionally, add an External reference ID — this helps you find the request later but isn’t required.
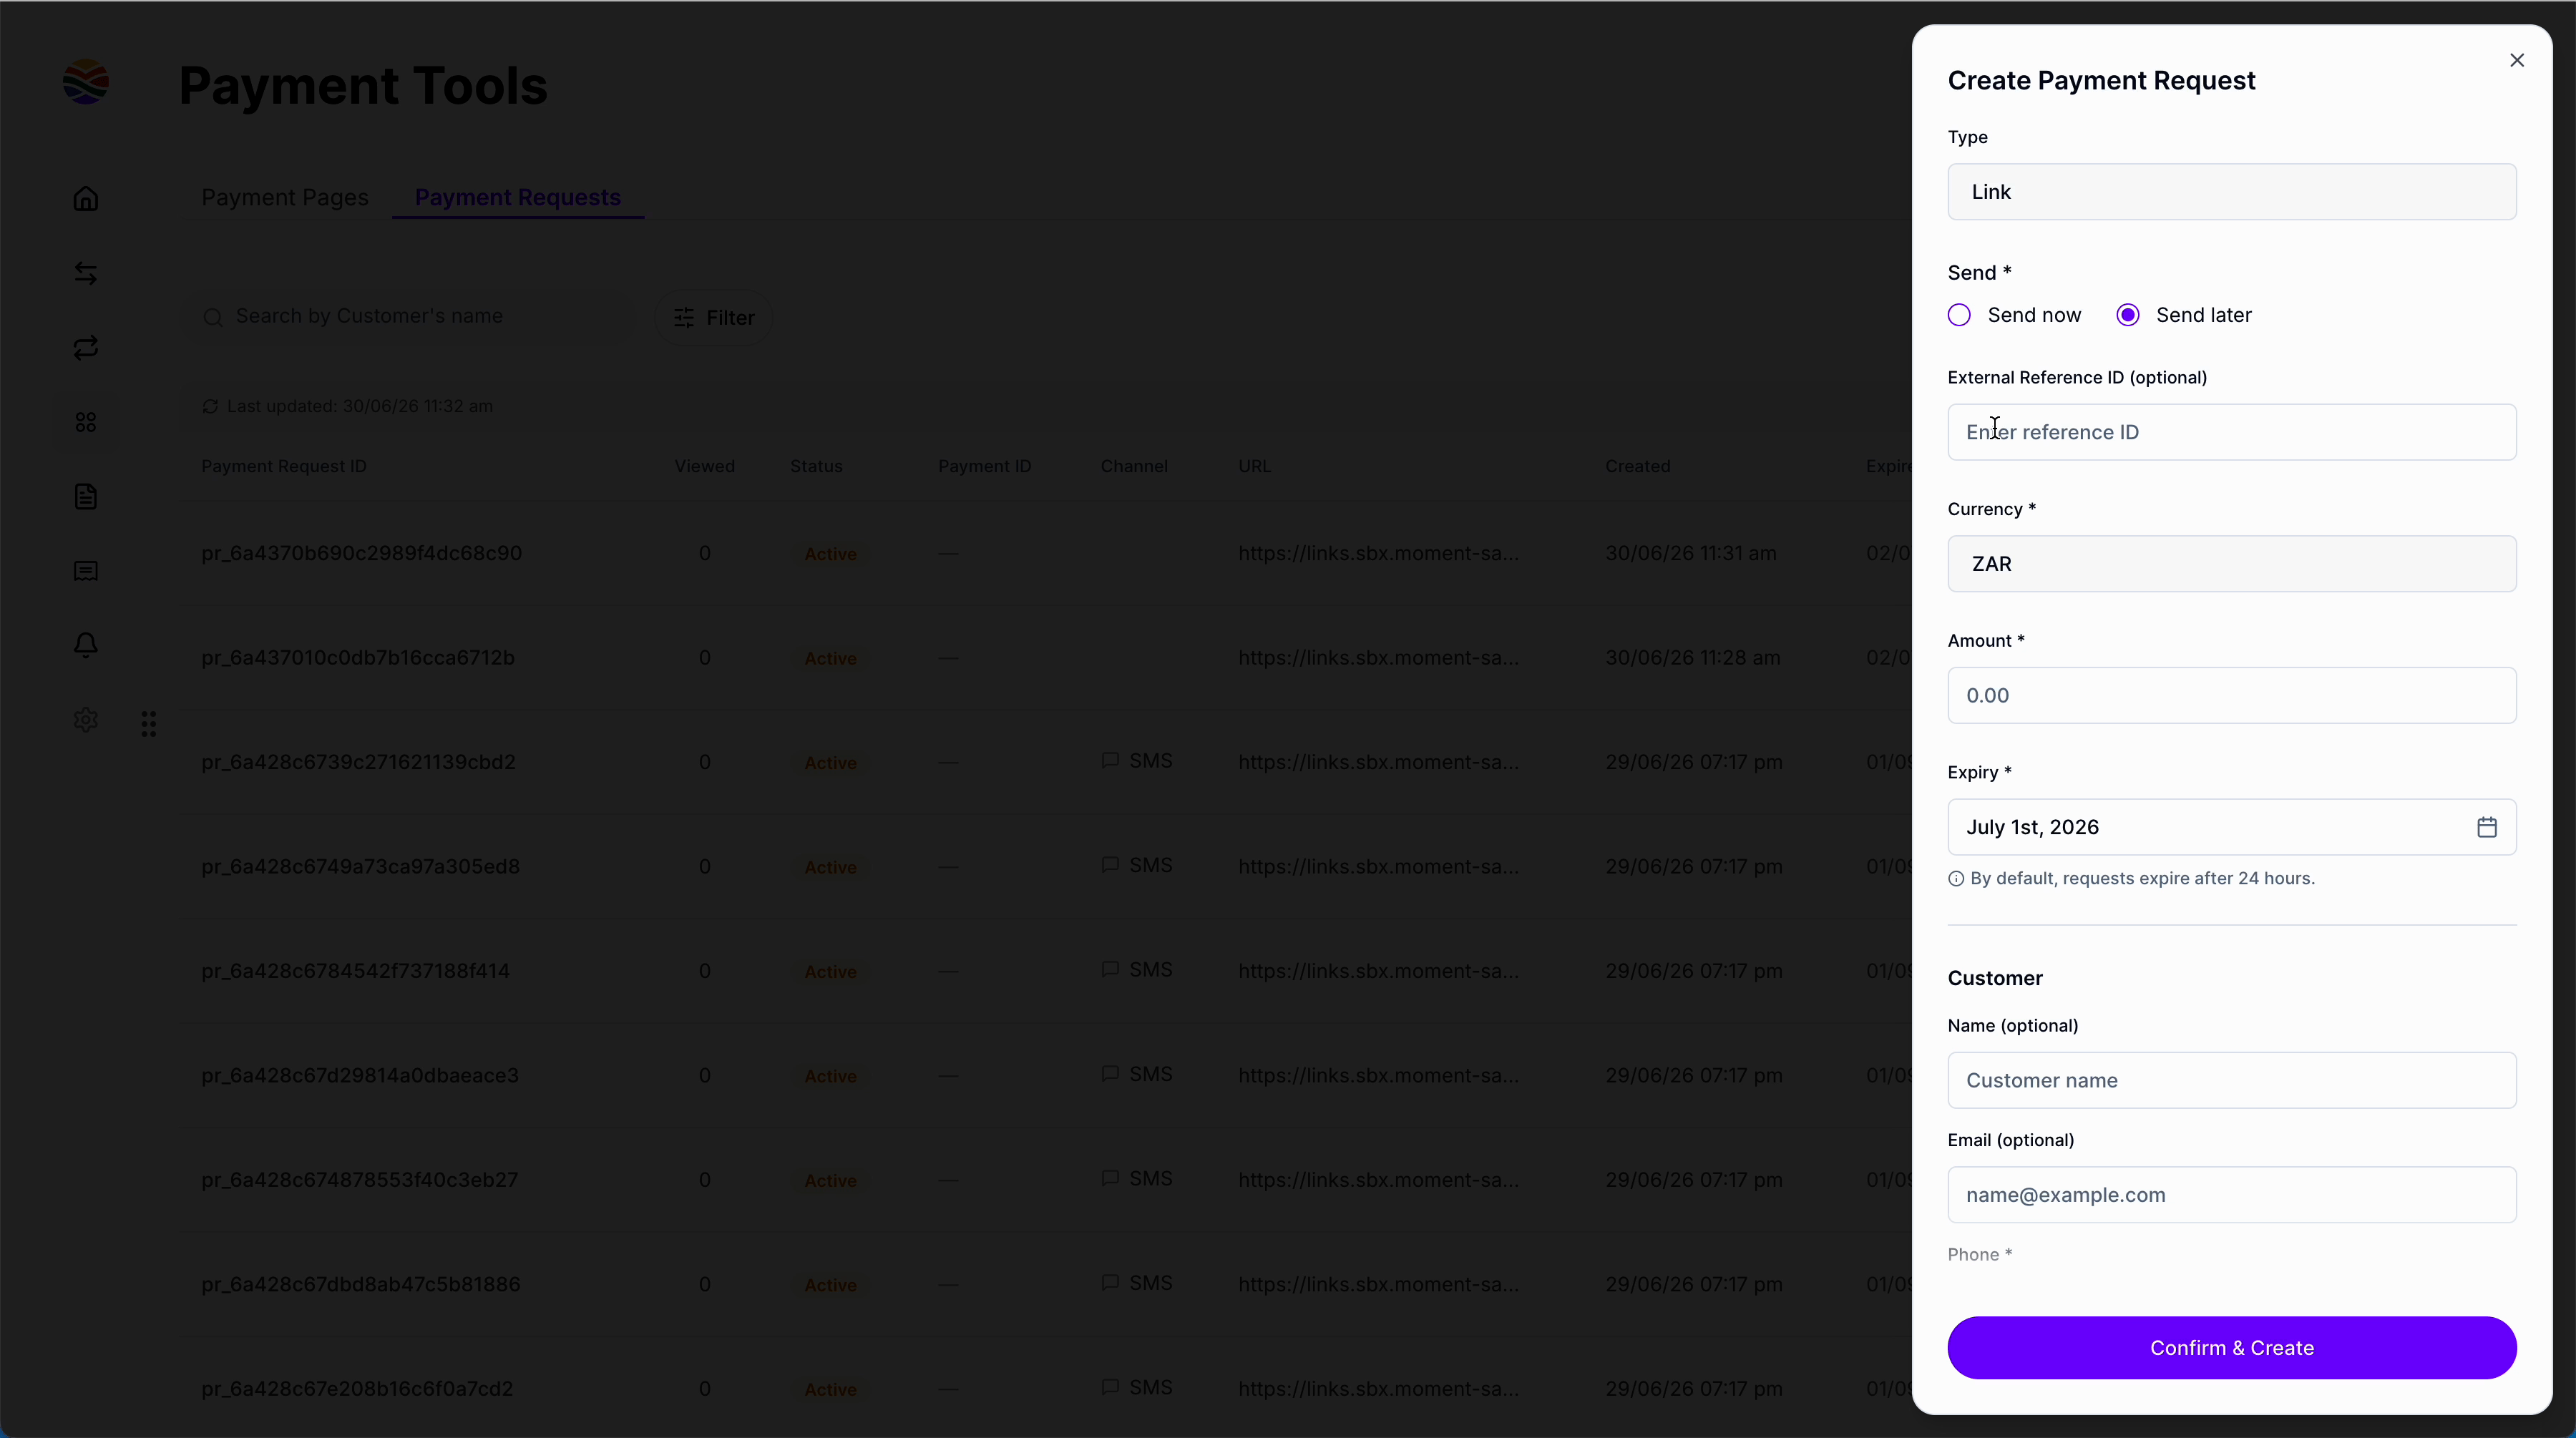
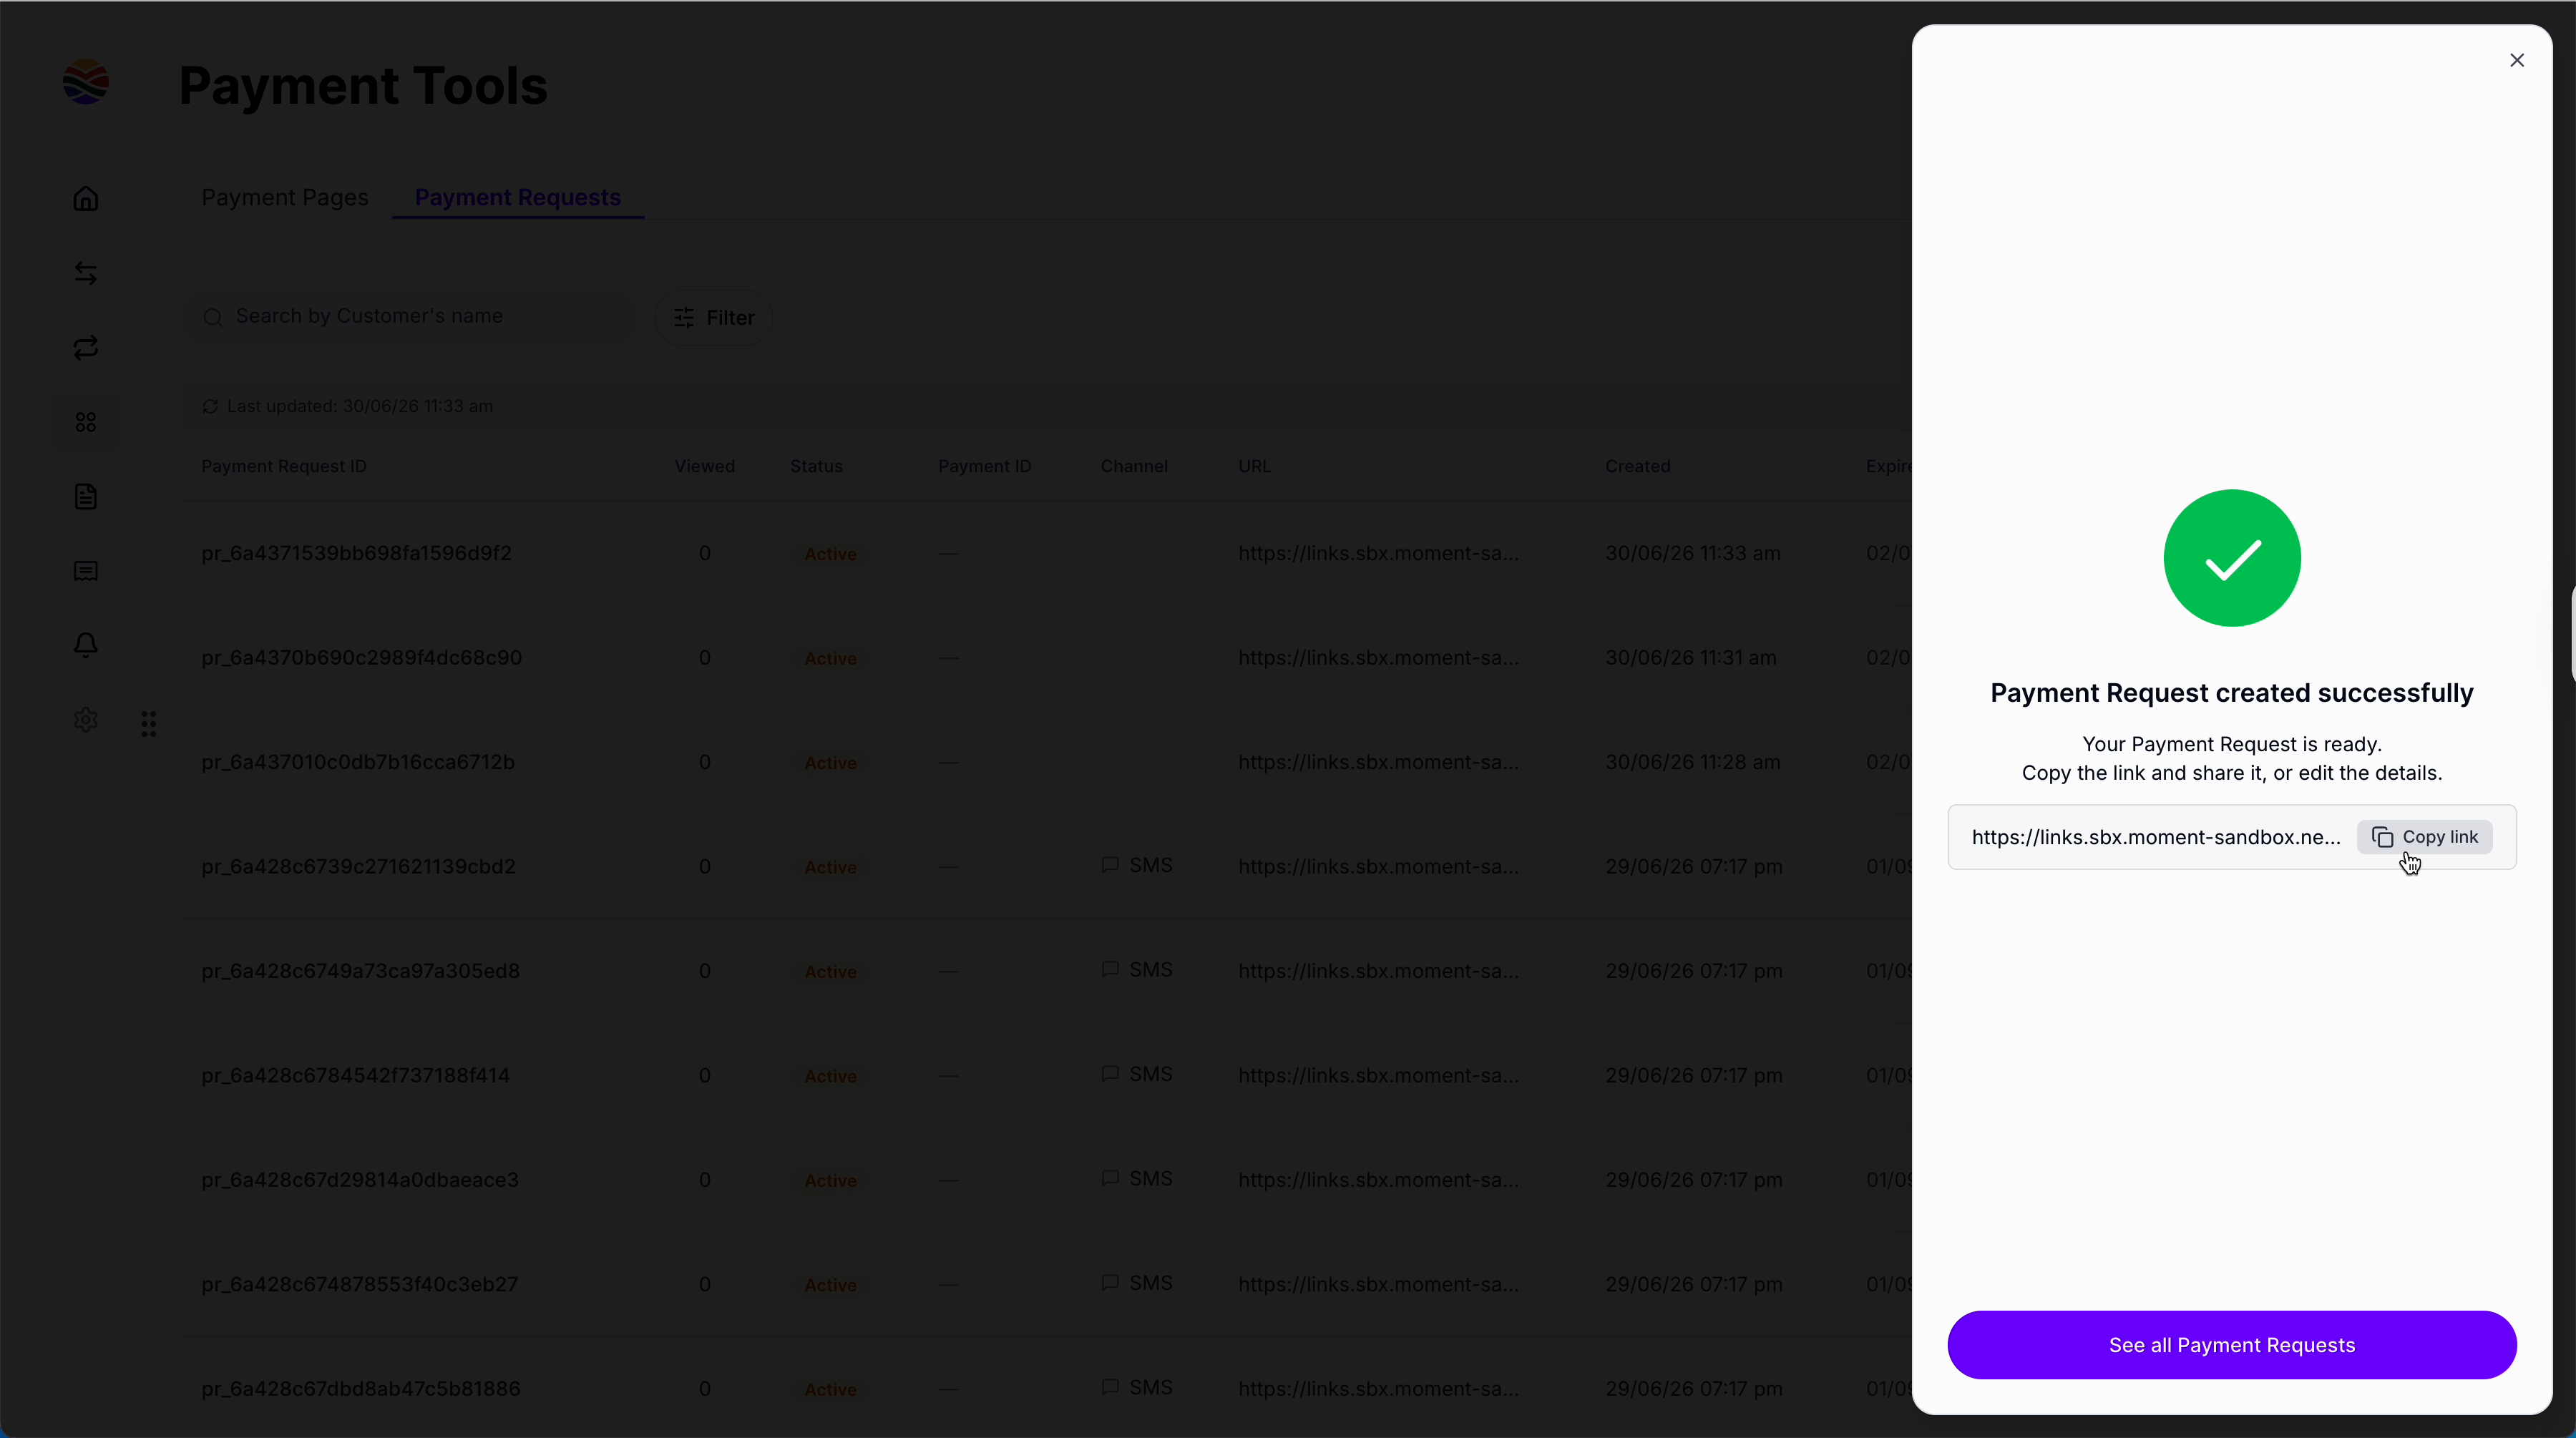
Step 4: Enter the amount, set the expiry date if it shouldn’t be the default 24 hours, and (optionally) include customer information for your records.
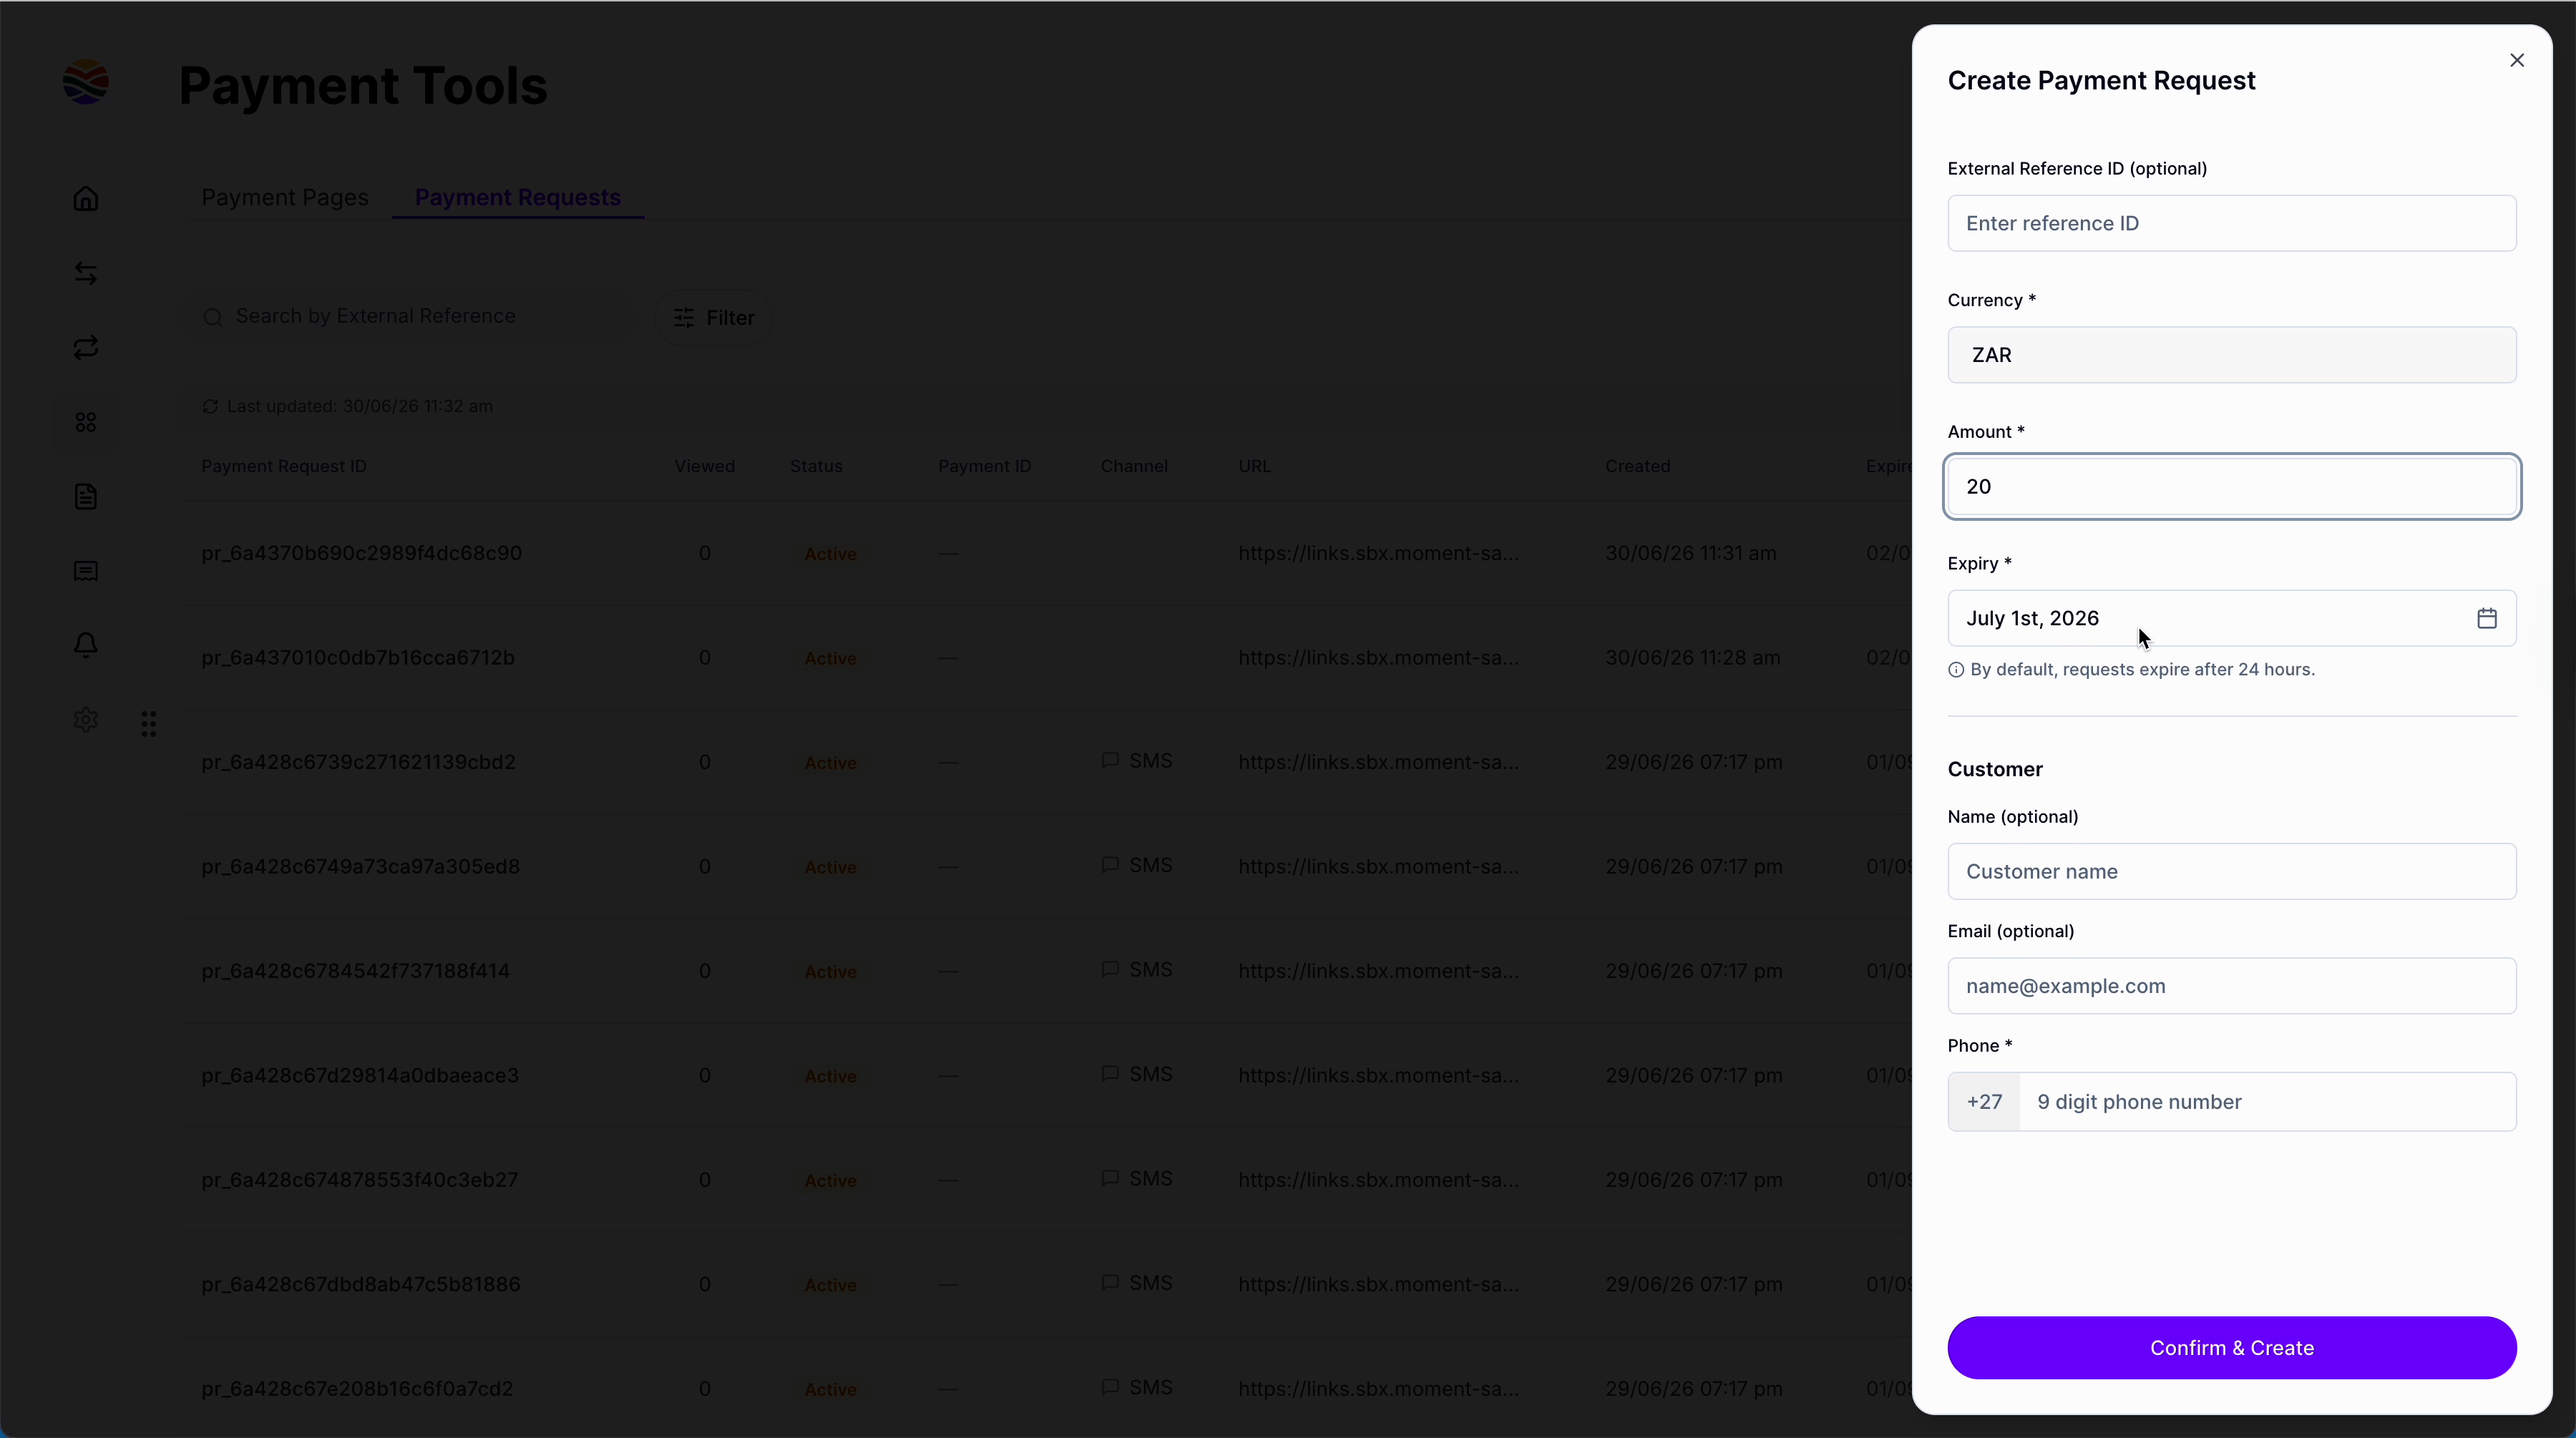
Step 5: After creating the request, copy the payment link to share with your customer, or go back to the payment request to edit details.
Create Bulk Payment Requests
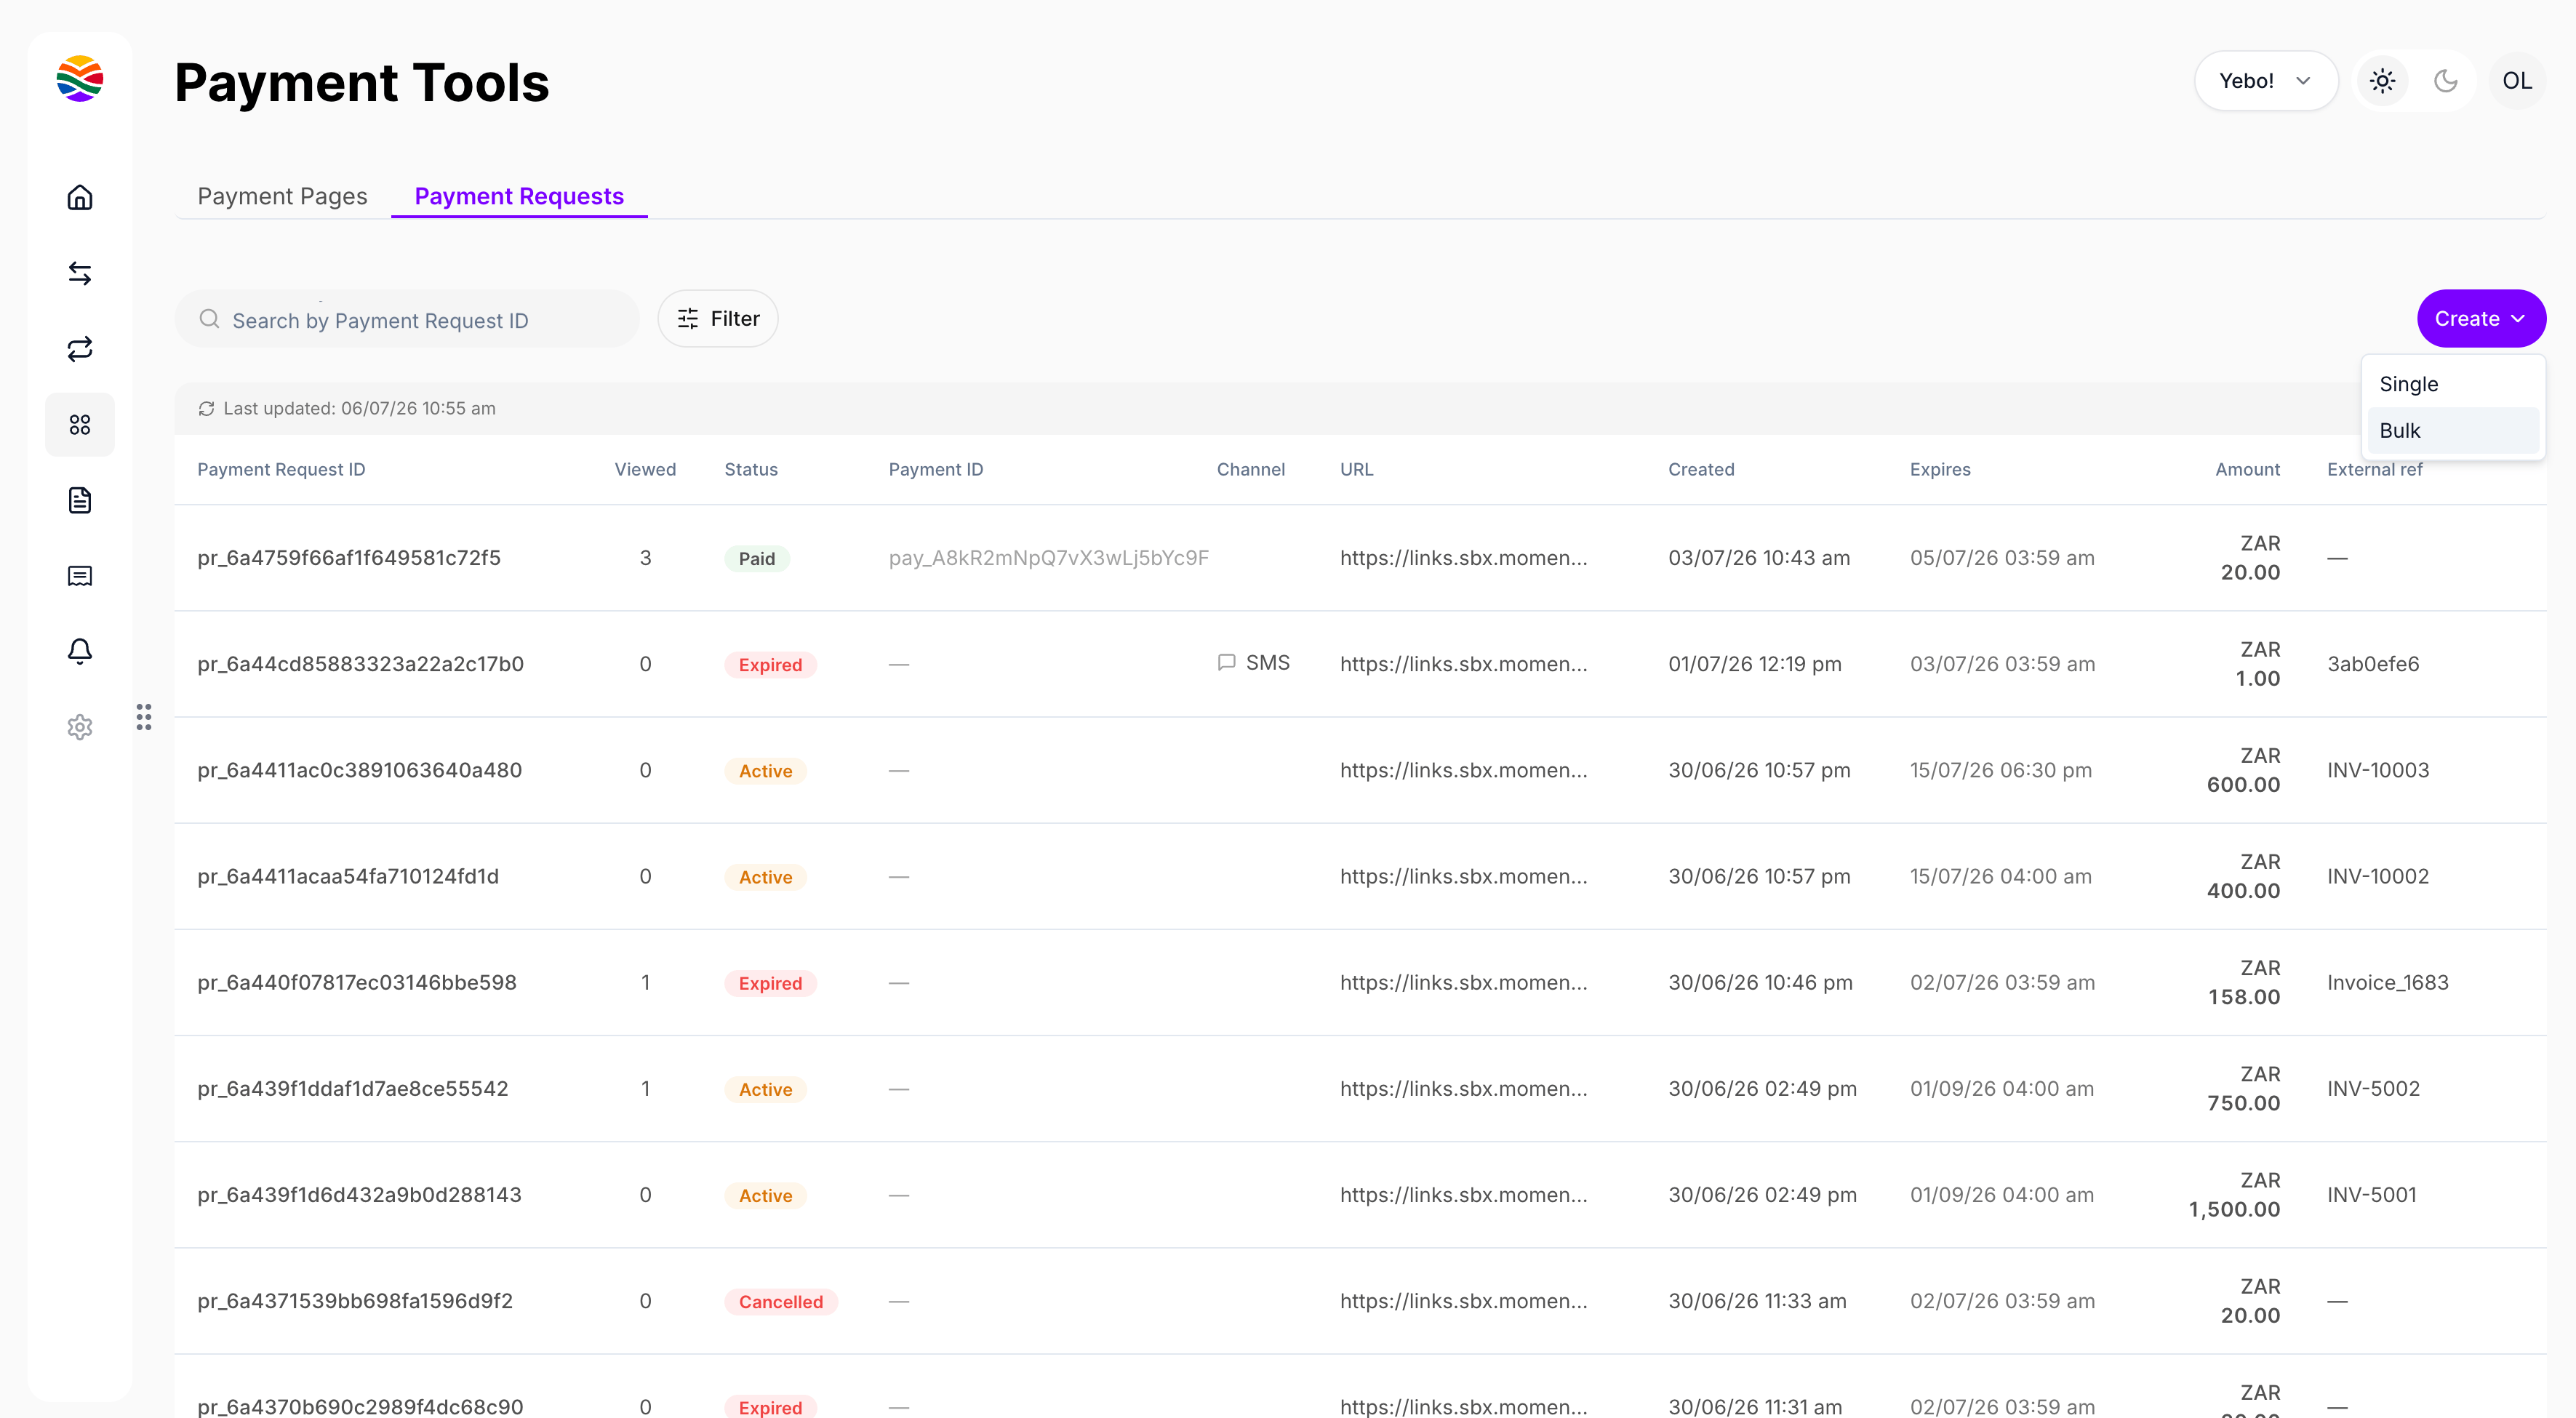
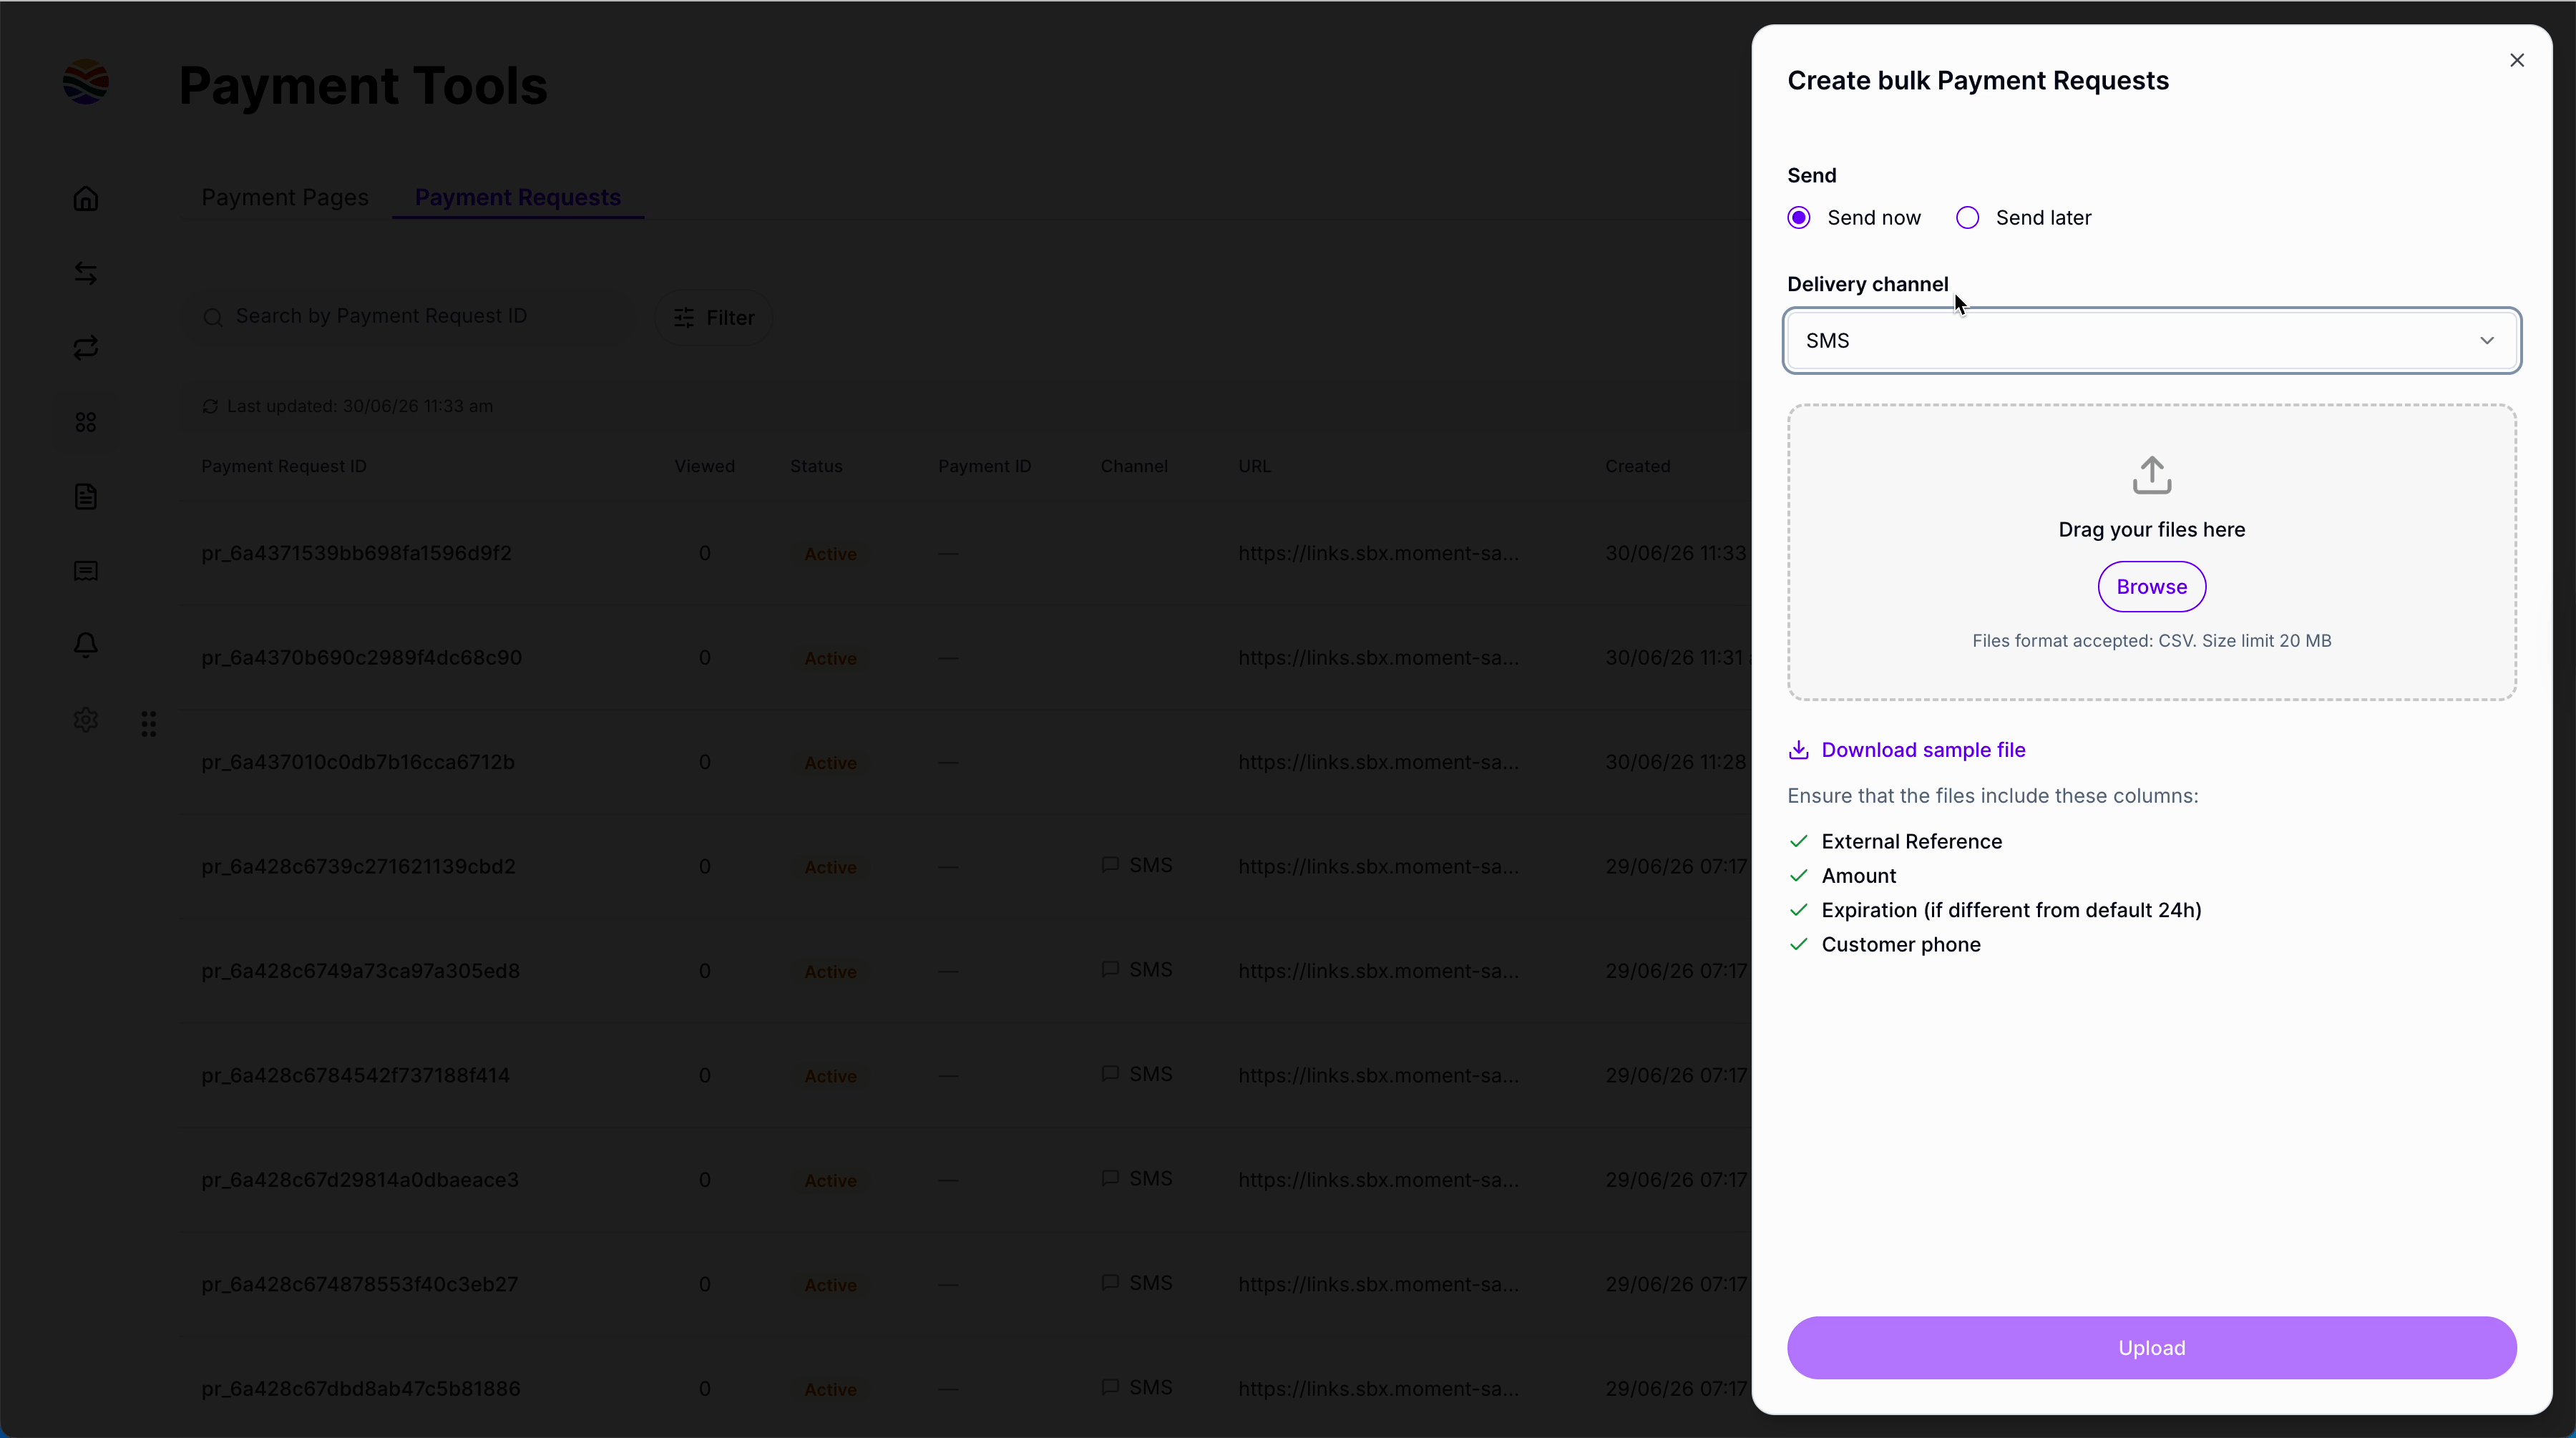
Step 1: Choose the bulk creation option. Decide whether to send the requests now or later.
Step 2: To send requests right away by SMS, make sure your upload file includes a phone number for each entry.
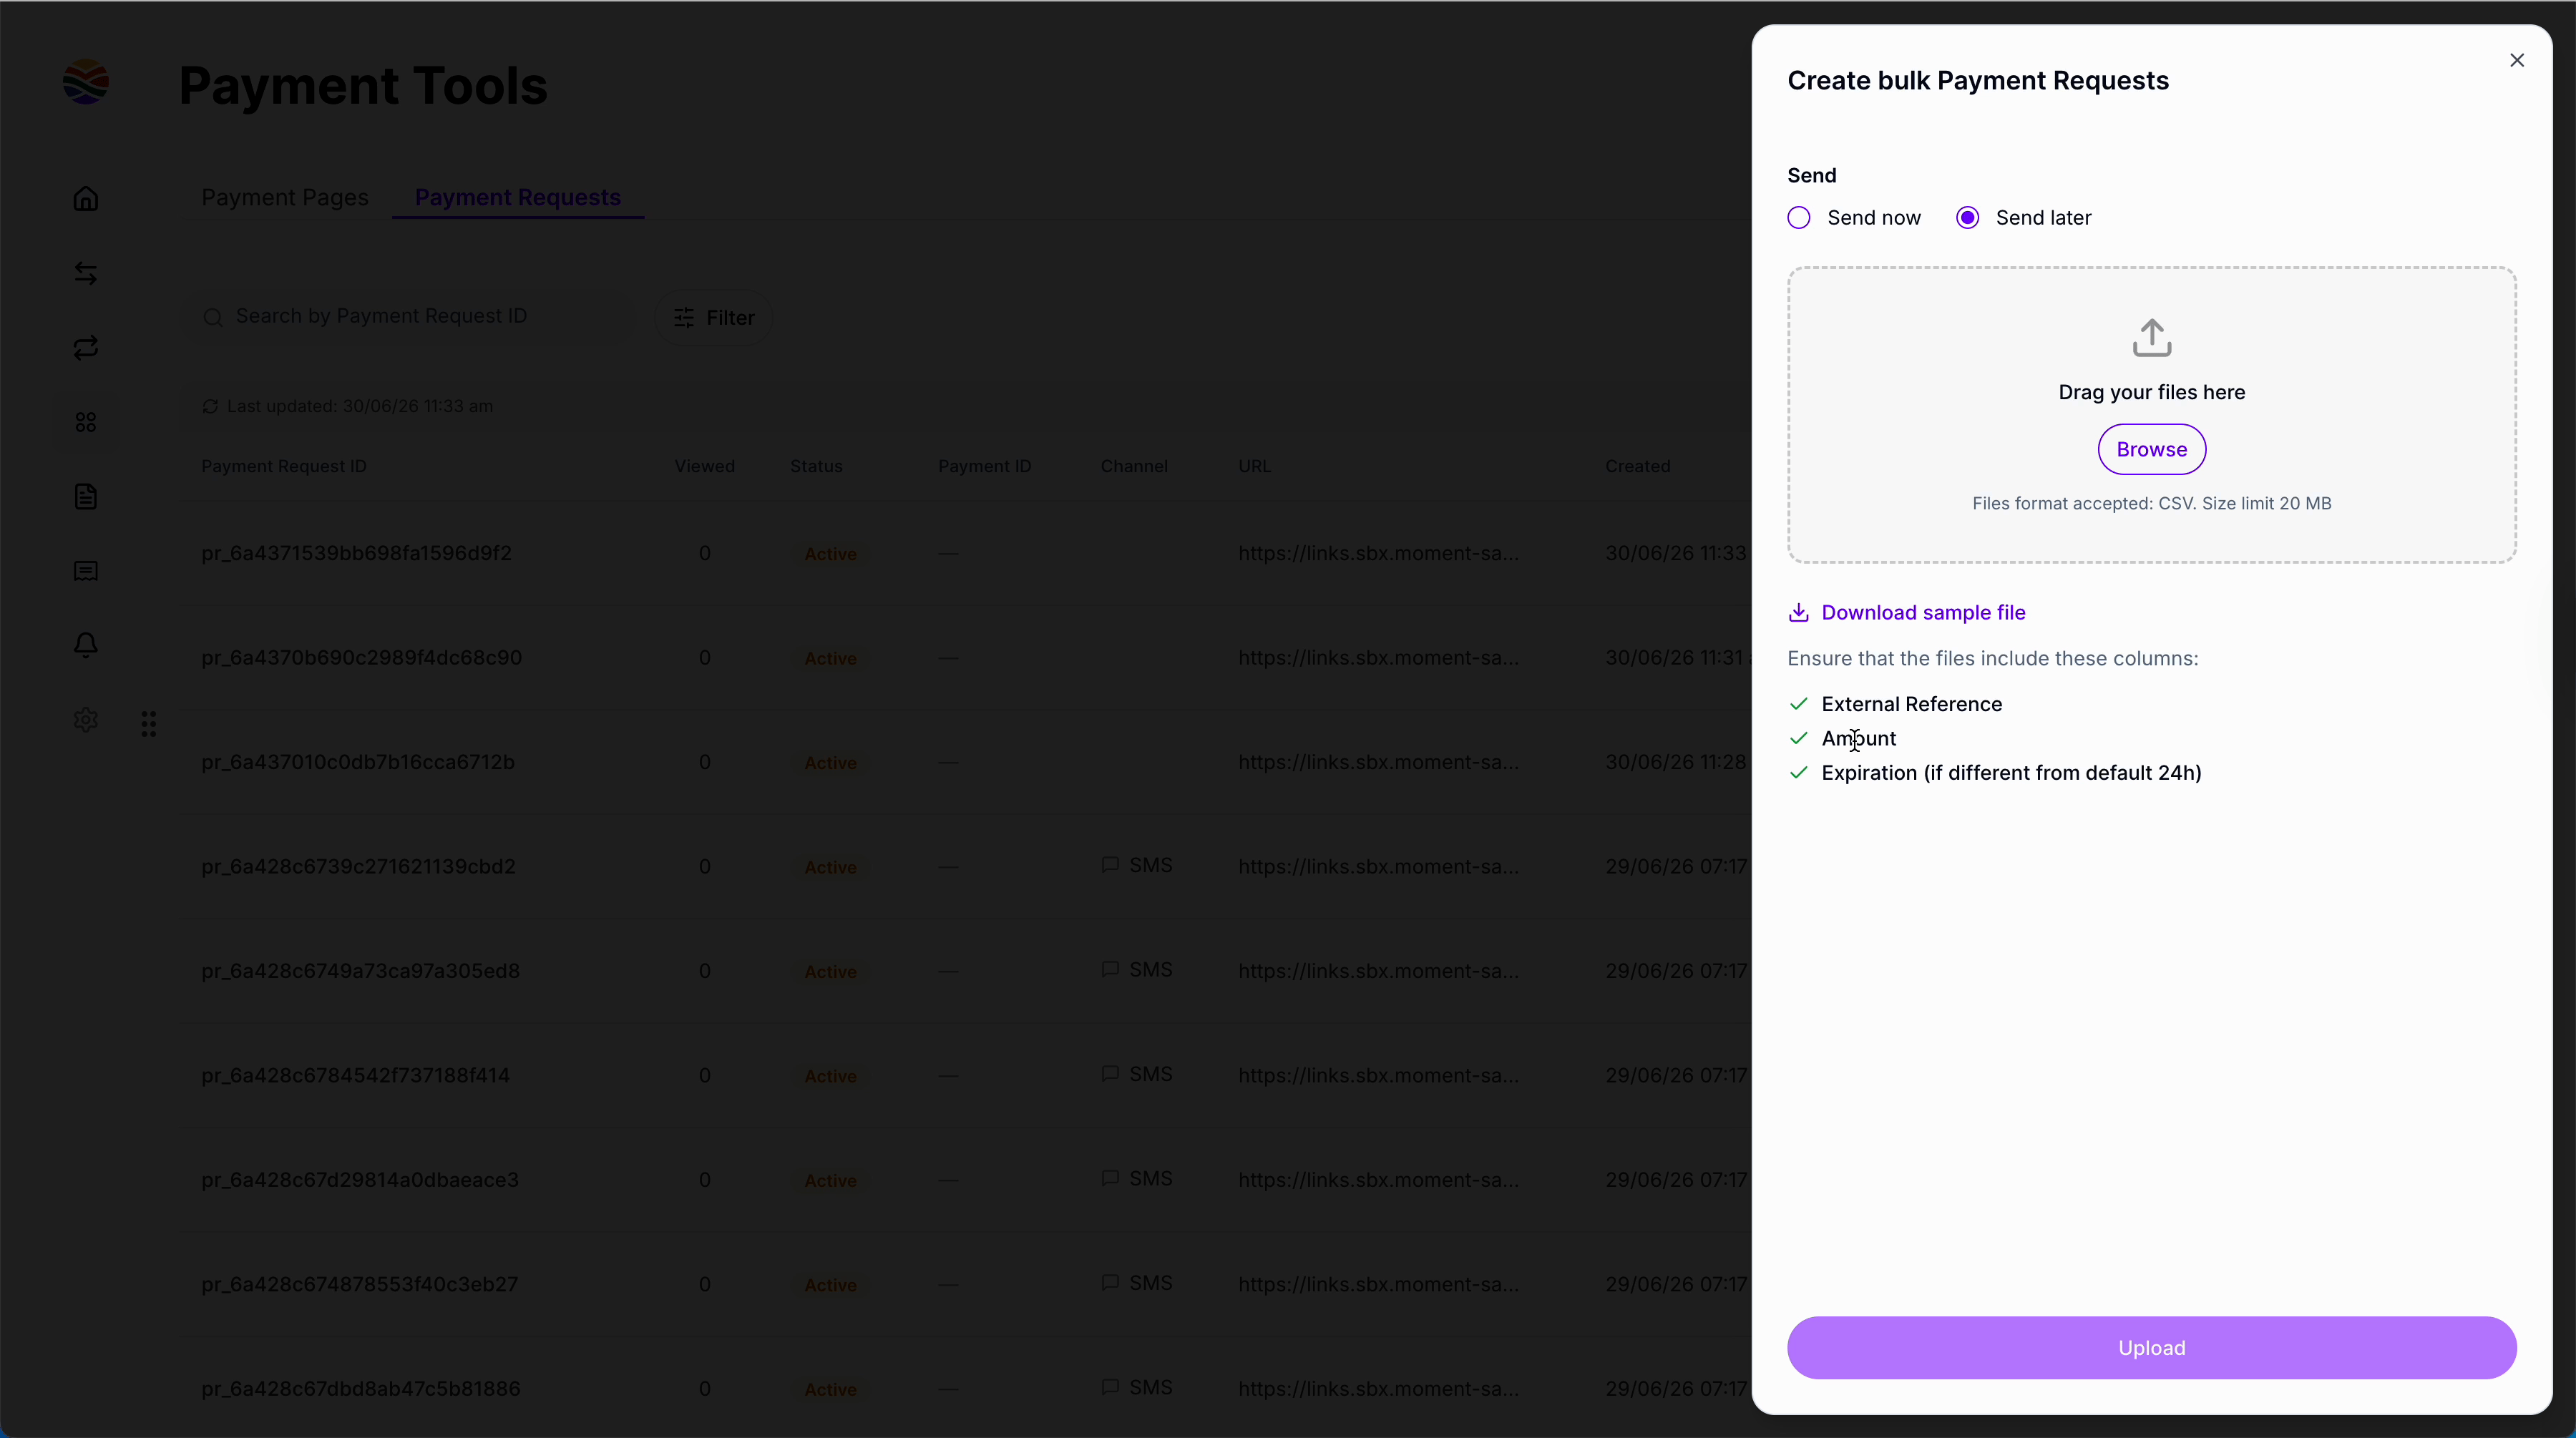
Step 3: If sending later, your file still must have all necessary details like External reference, Amount, and Expiry date (if not the default).
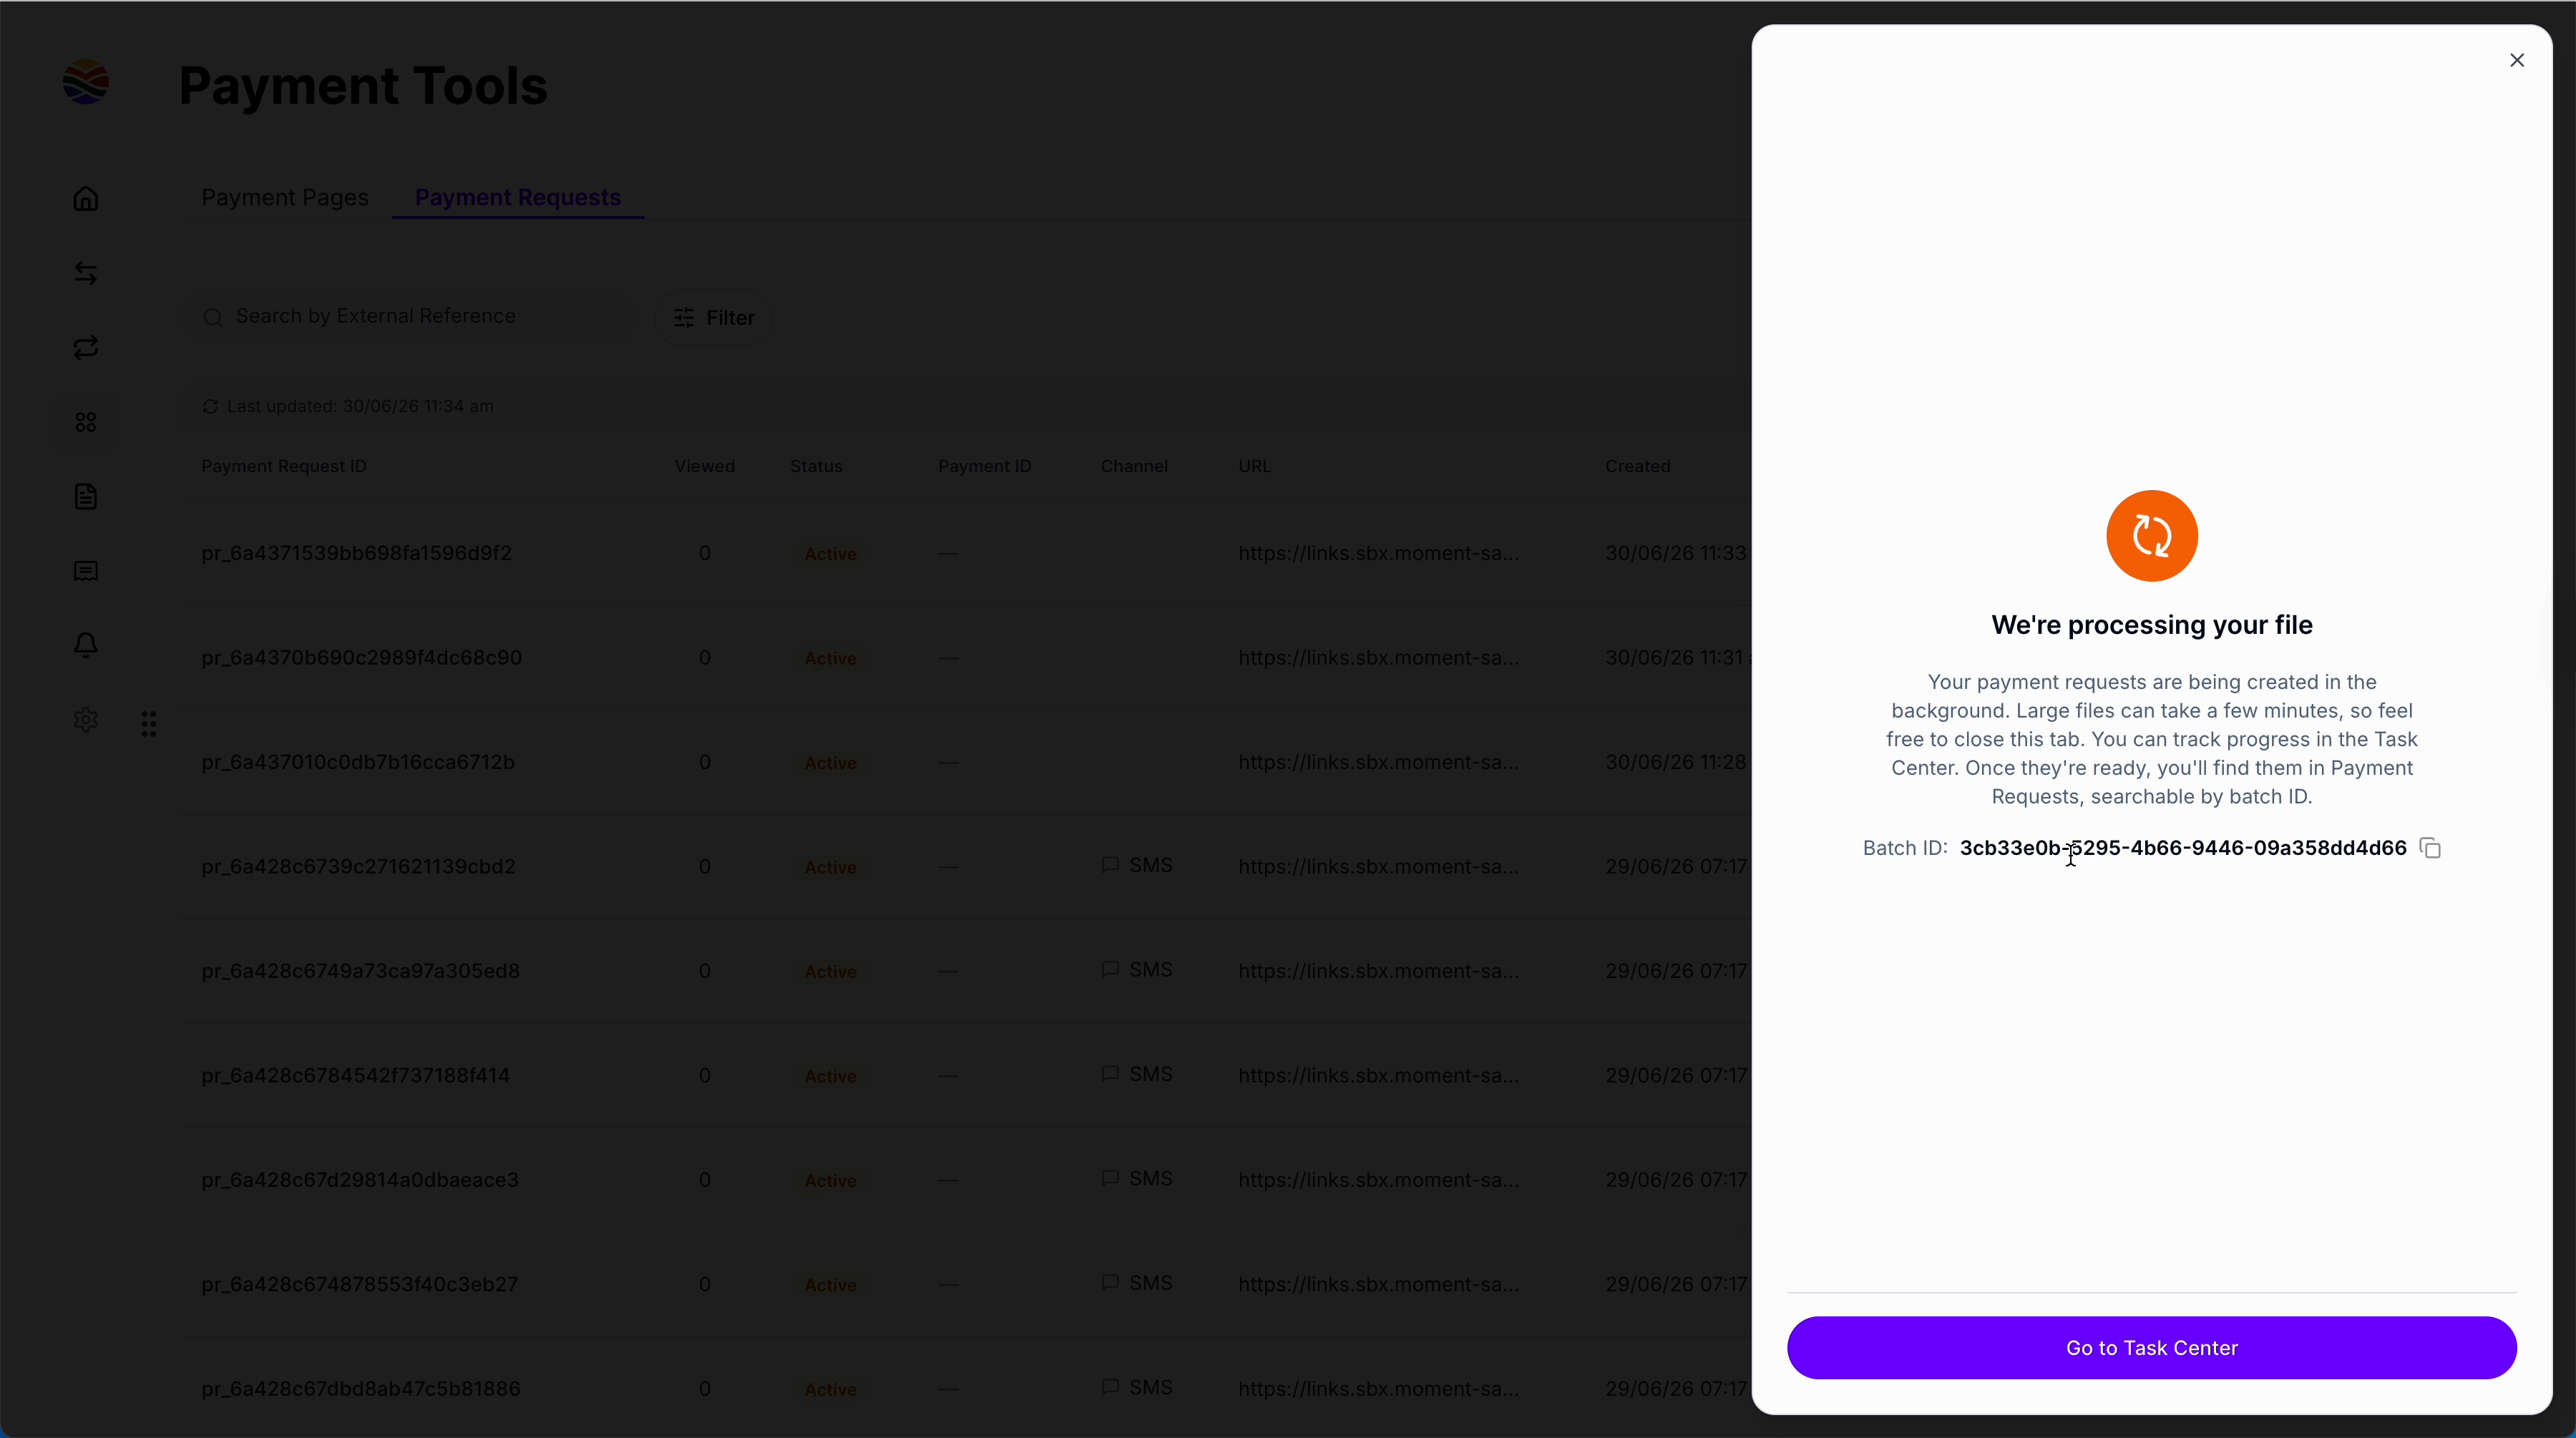
Step 4: Upload your file. It will be processed and appear in the Task center once ready.
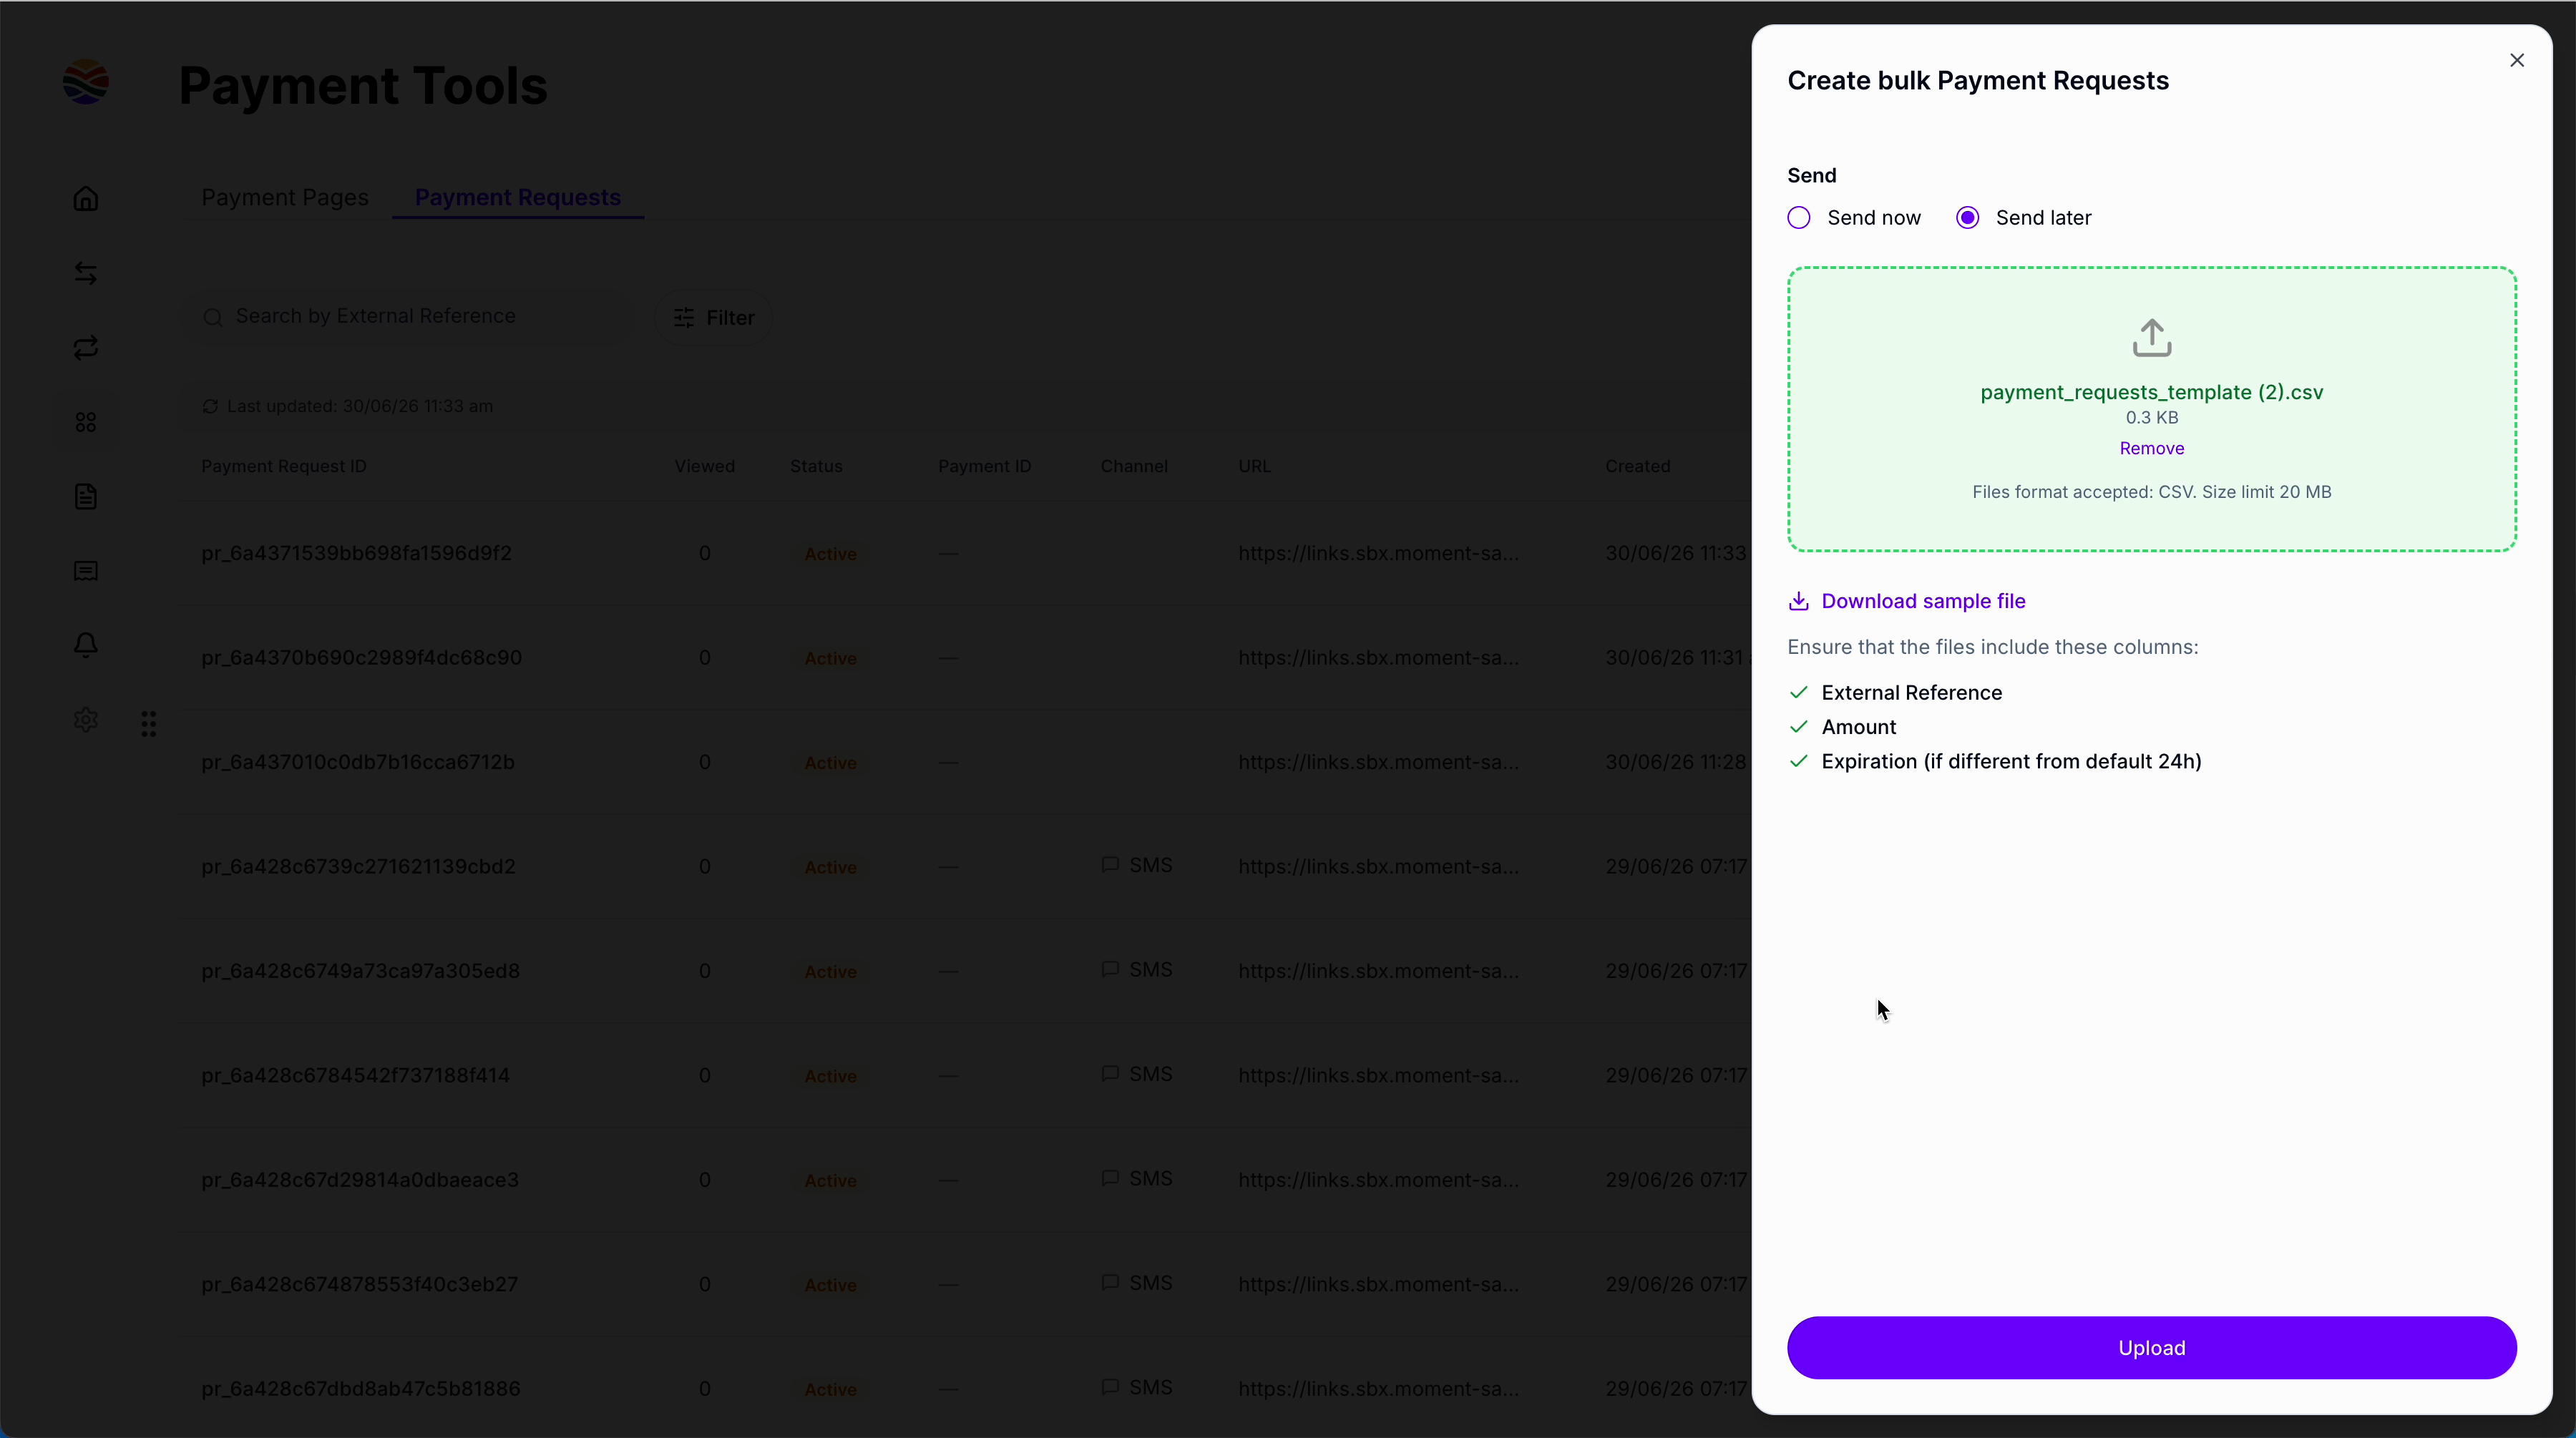
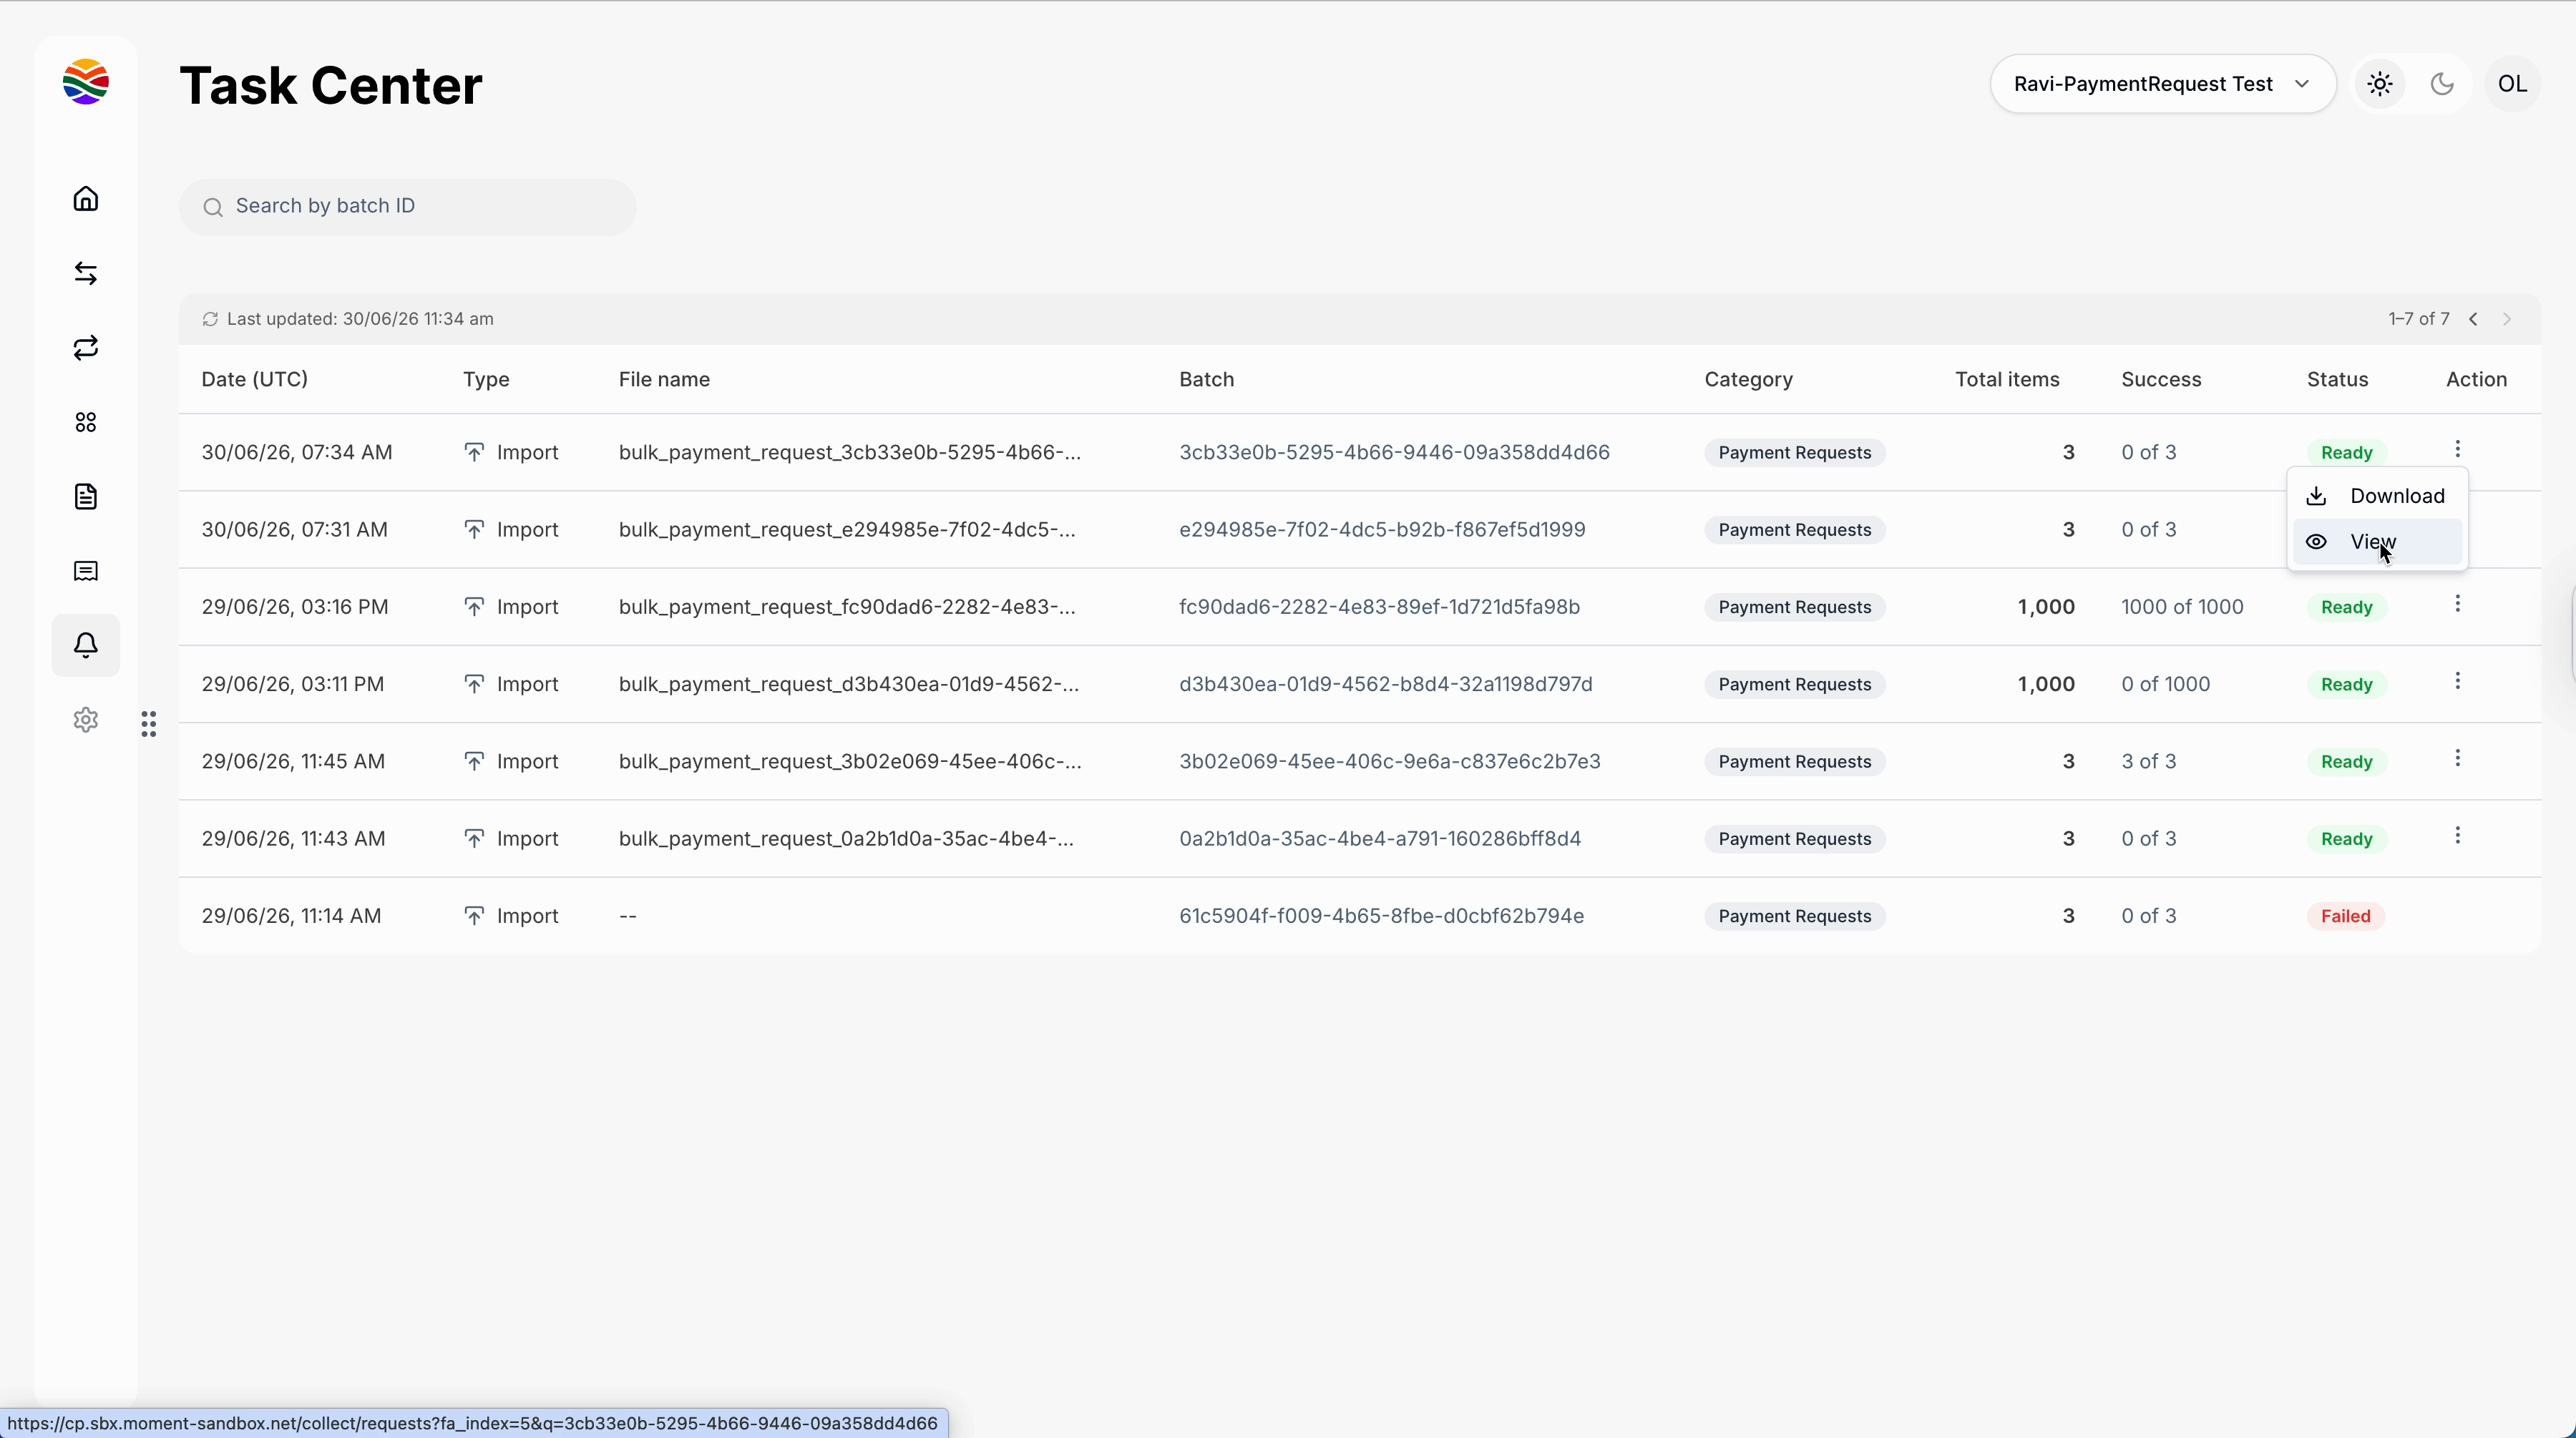
Step 5: Search payment requests in bulk by batch ID to manage or review their status.
Step 6: Review each payment request created in the batch, check the summary, and—if needed—add missing information one-by-one like the delivery channel of the customer phone number.
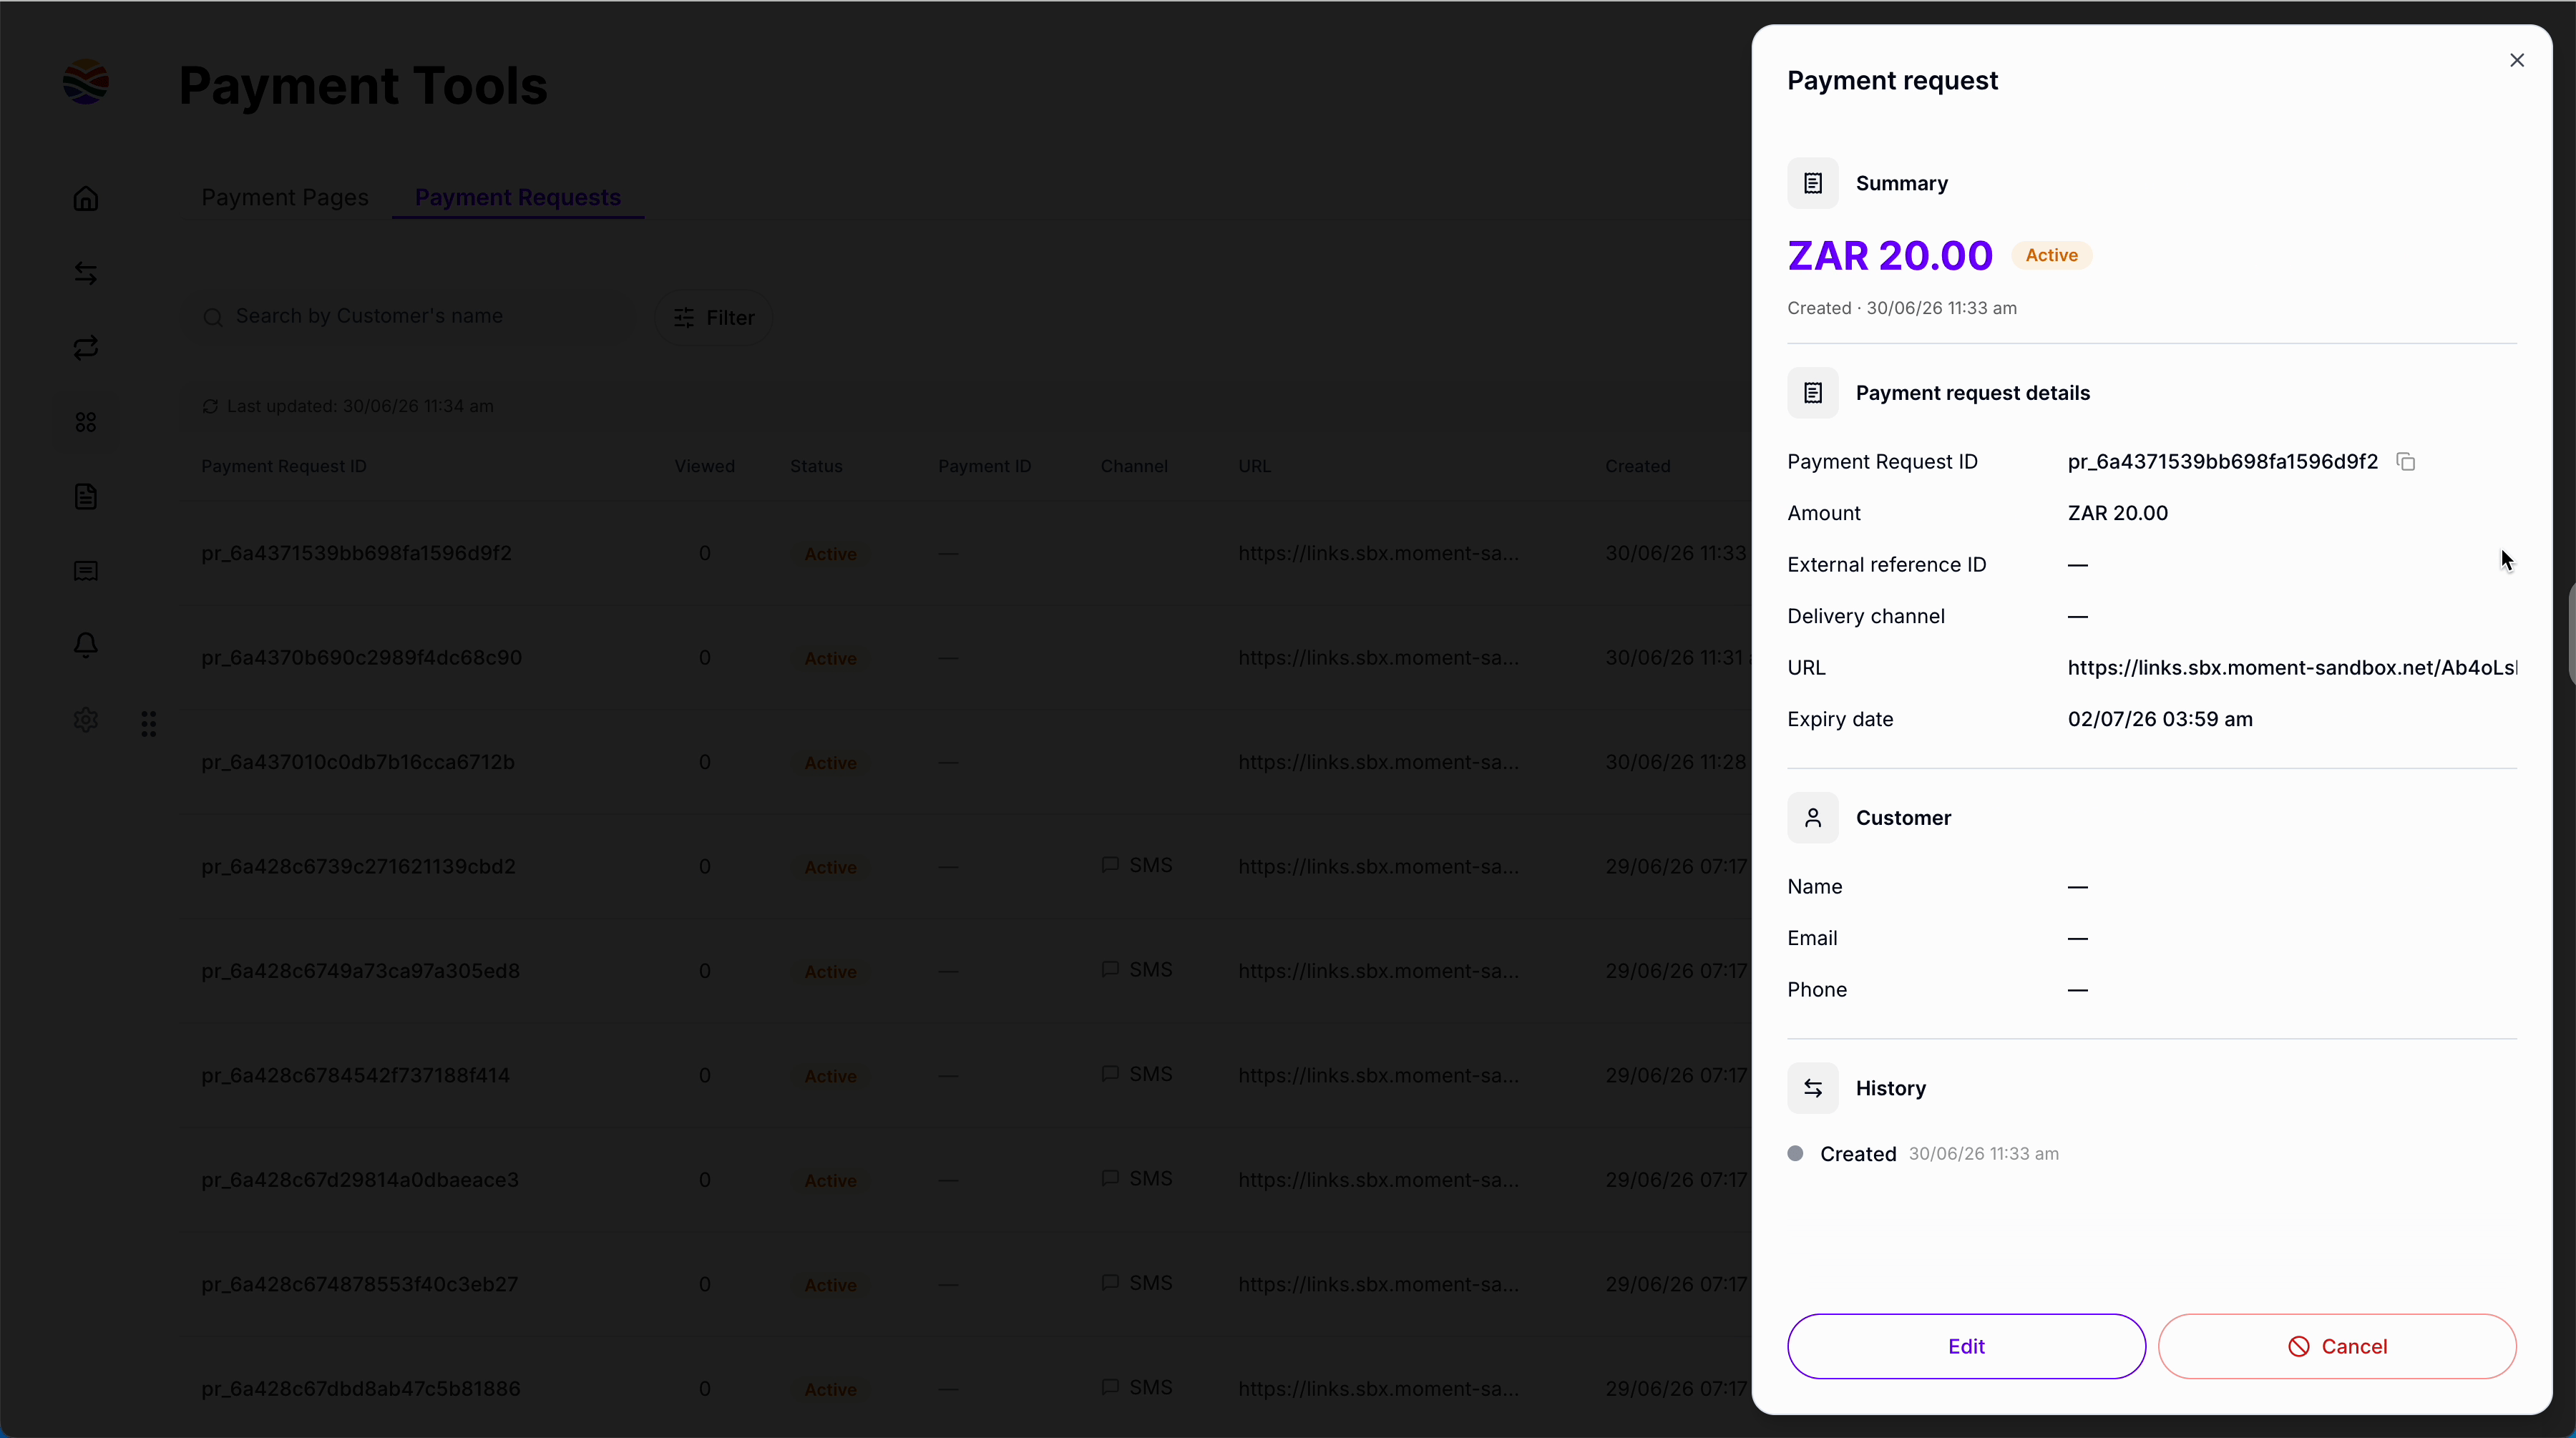
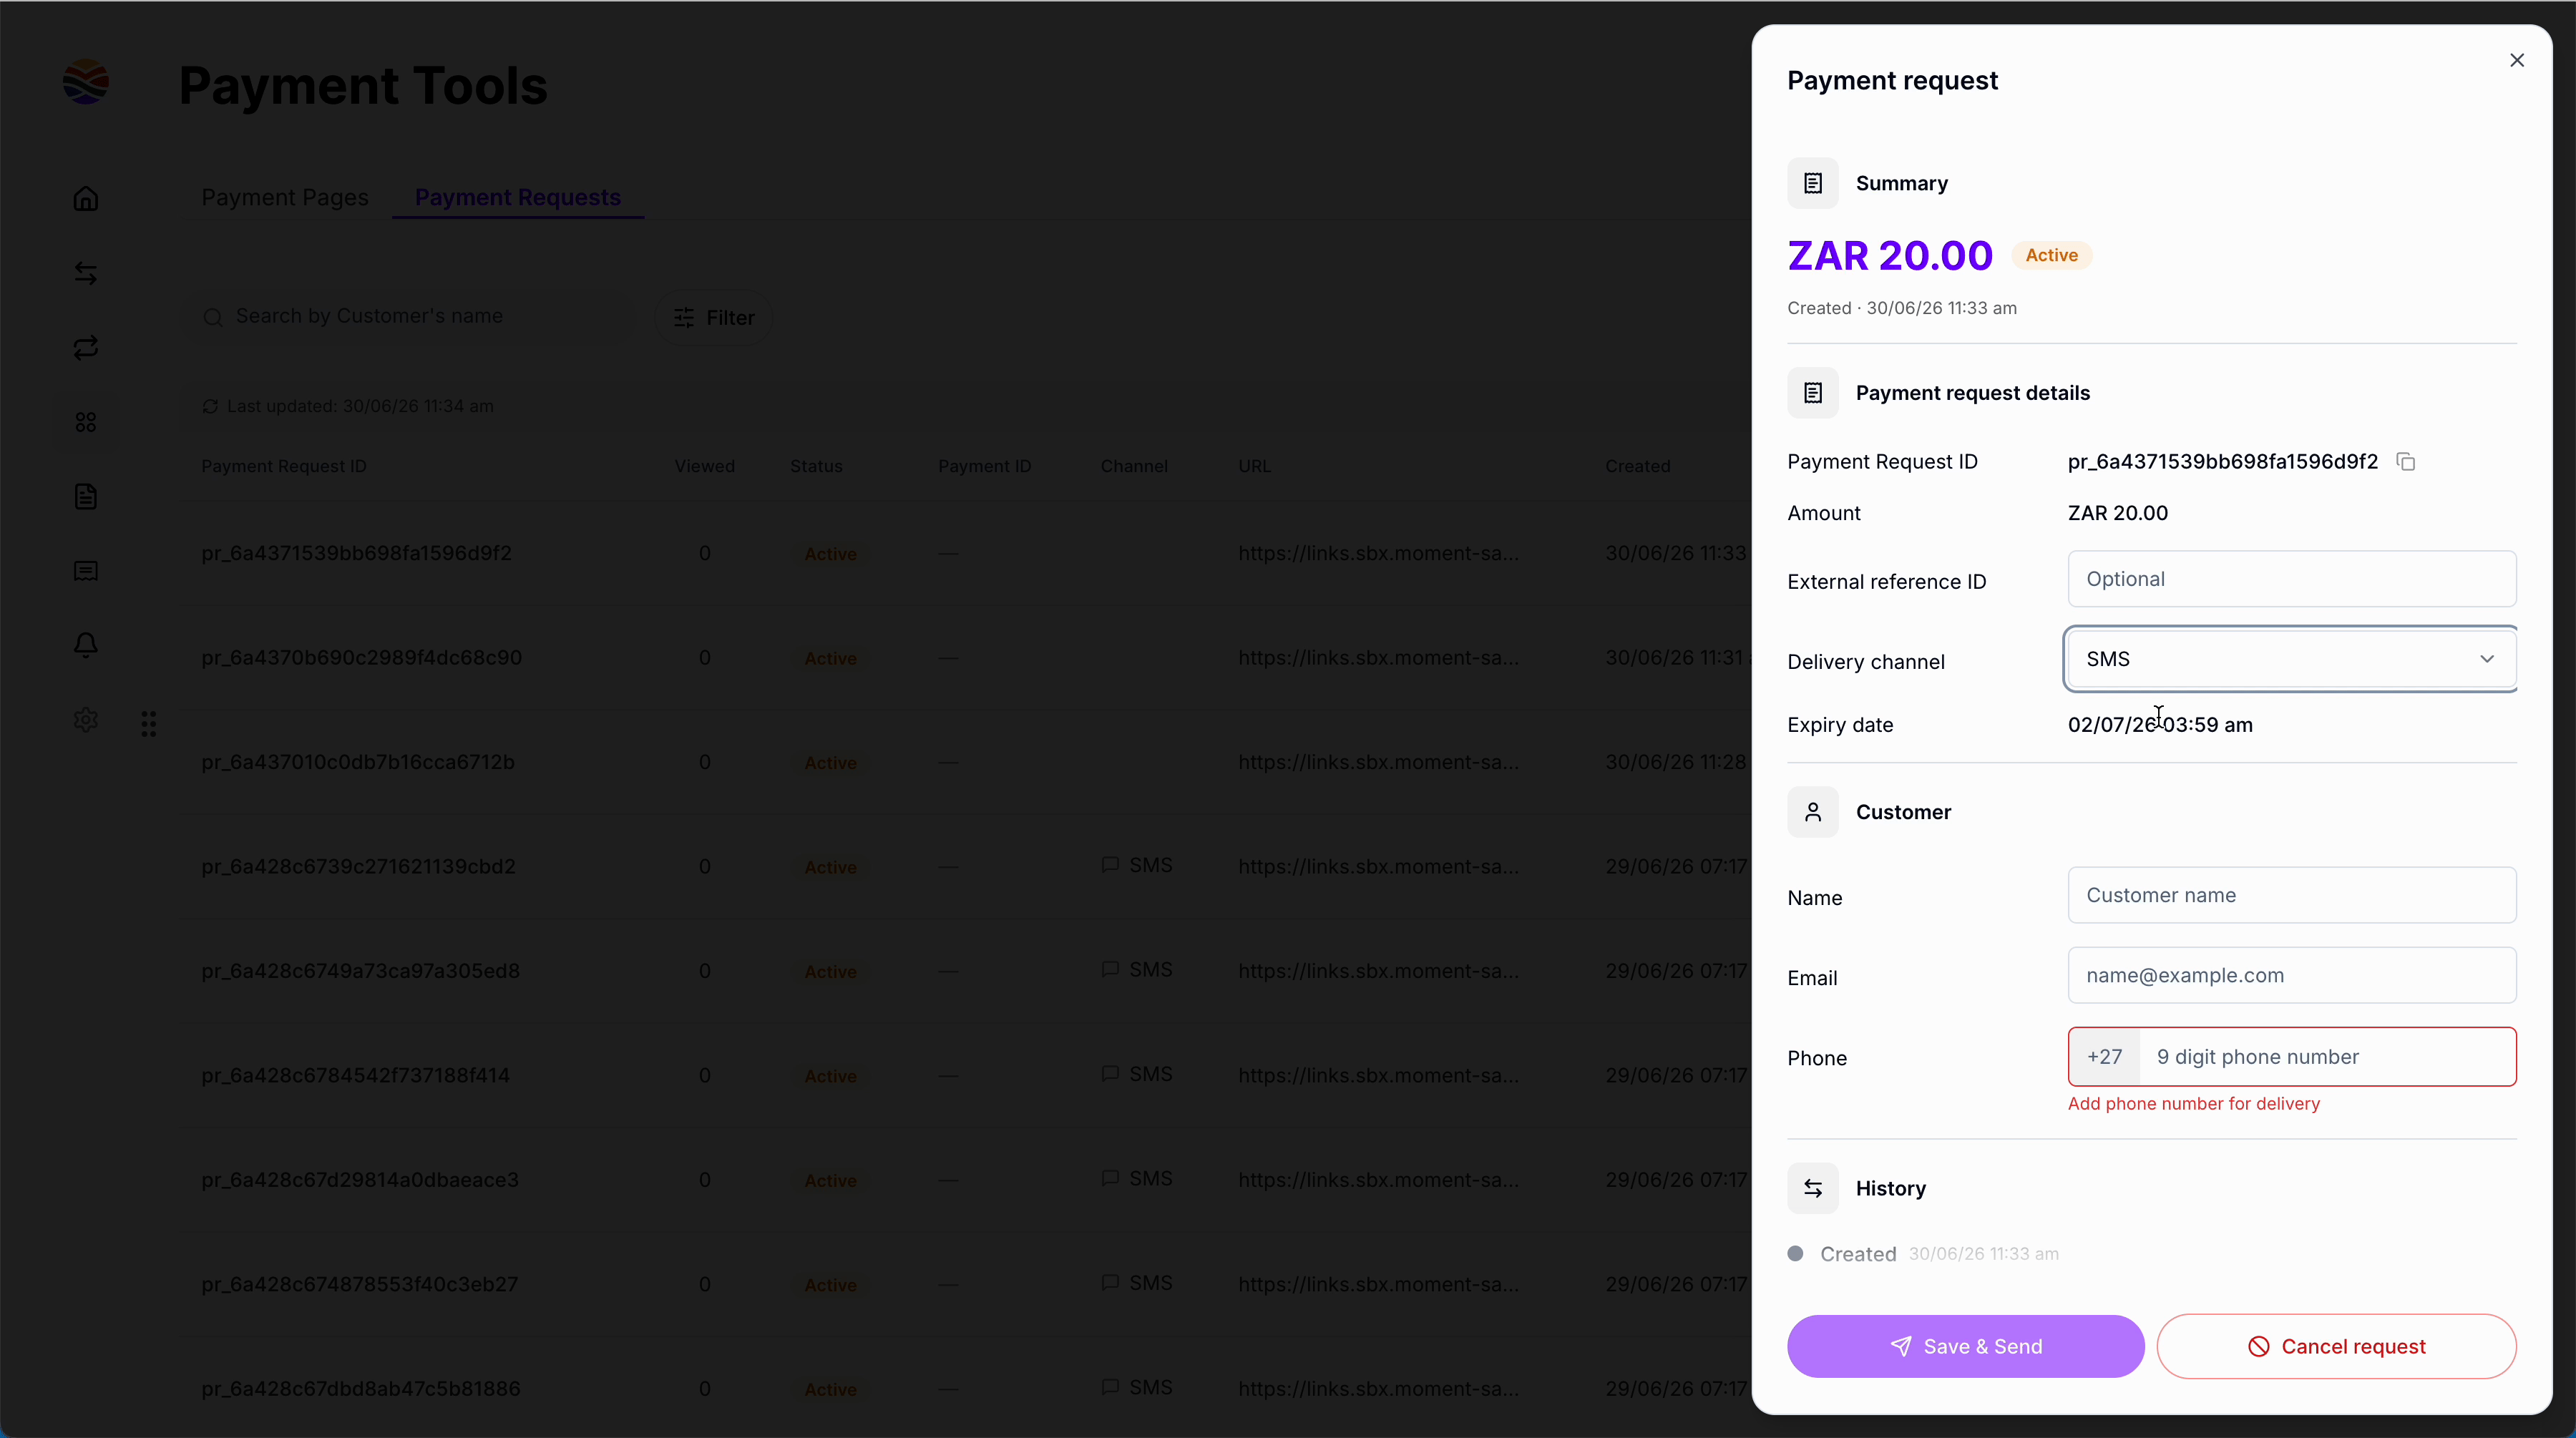
Step 7: If you need to cancel a payment request, simply select the option to cancel it.
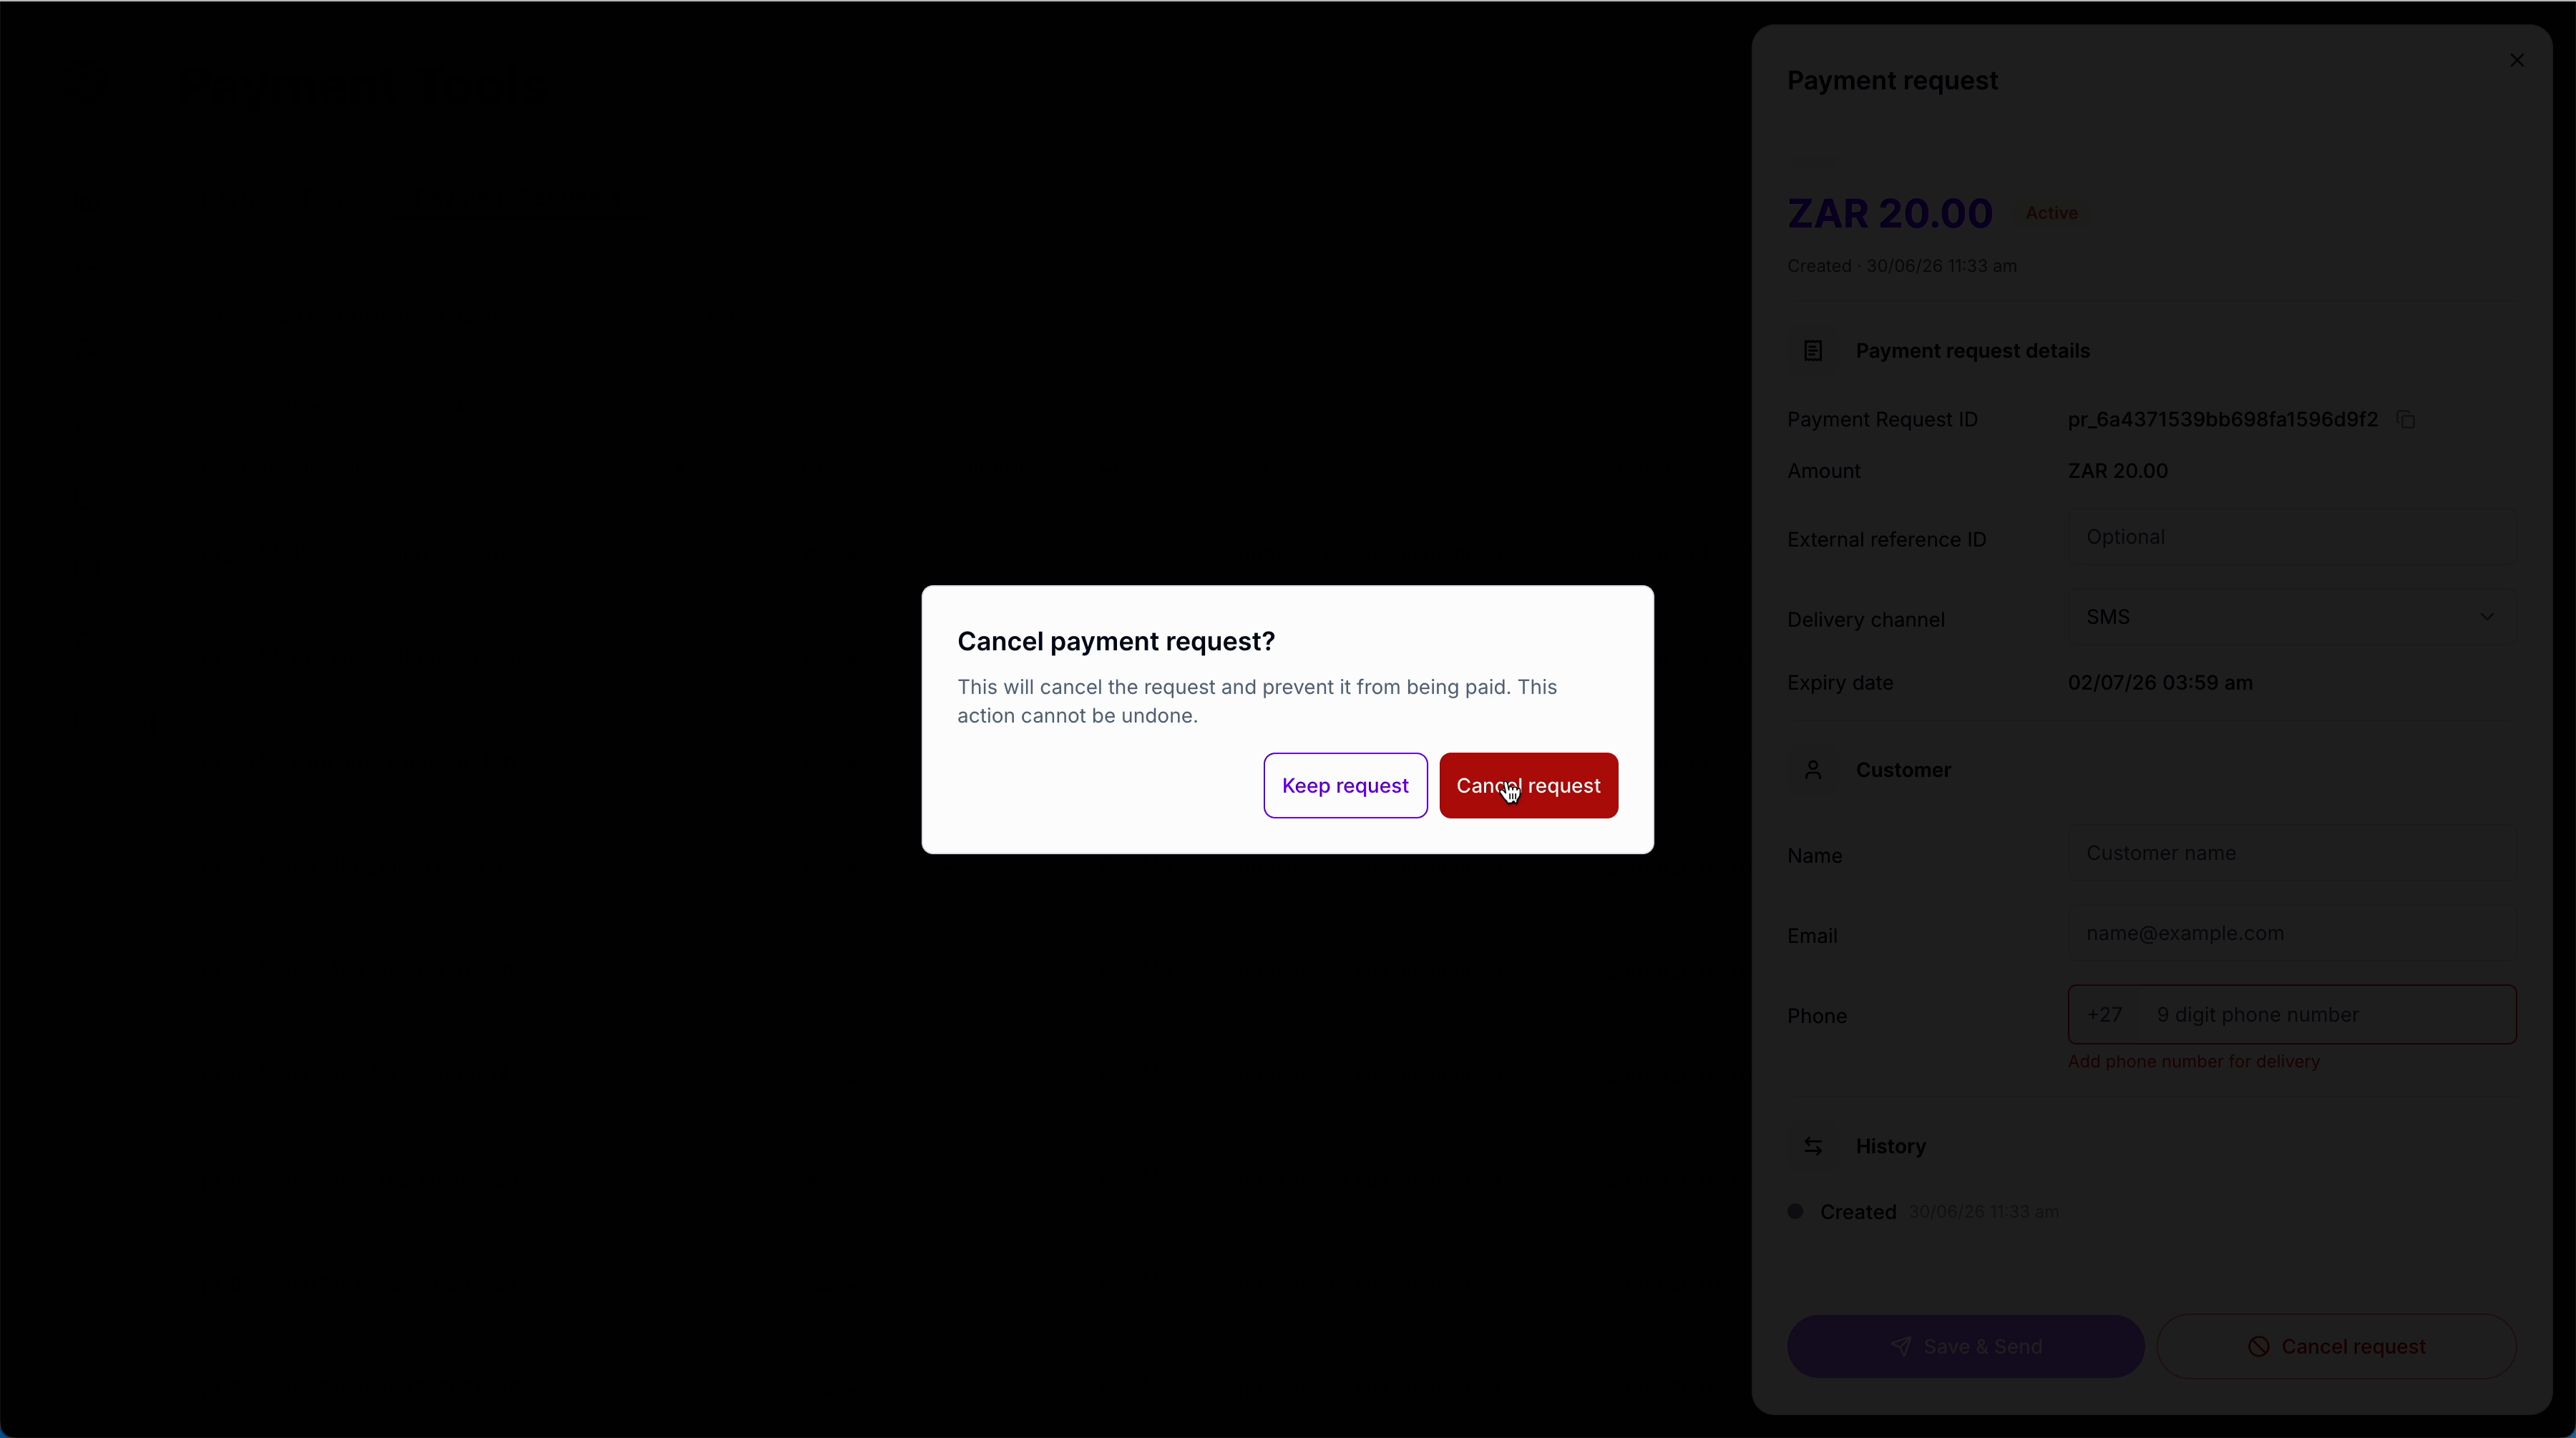
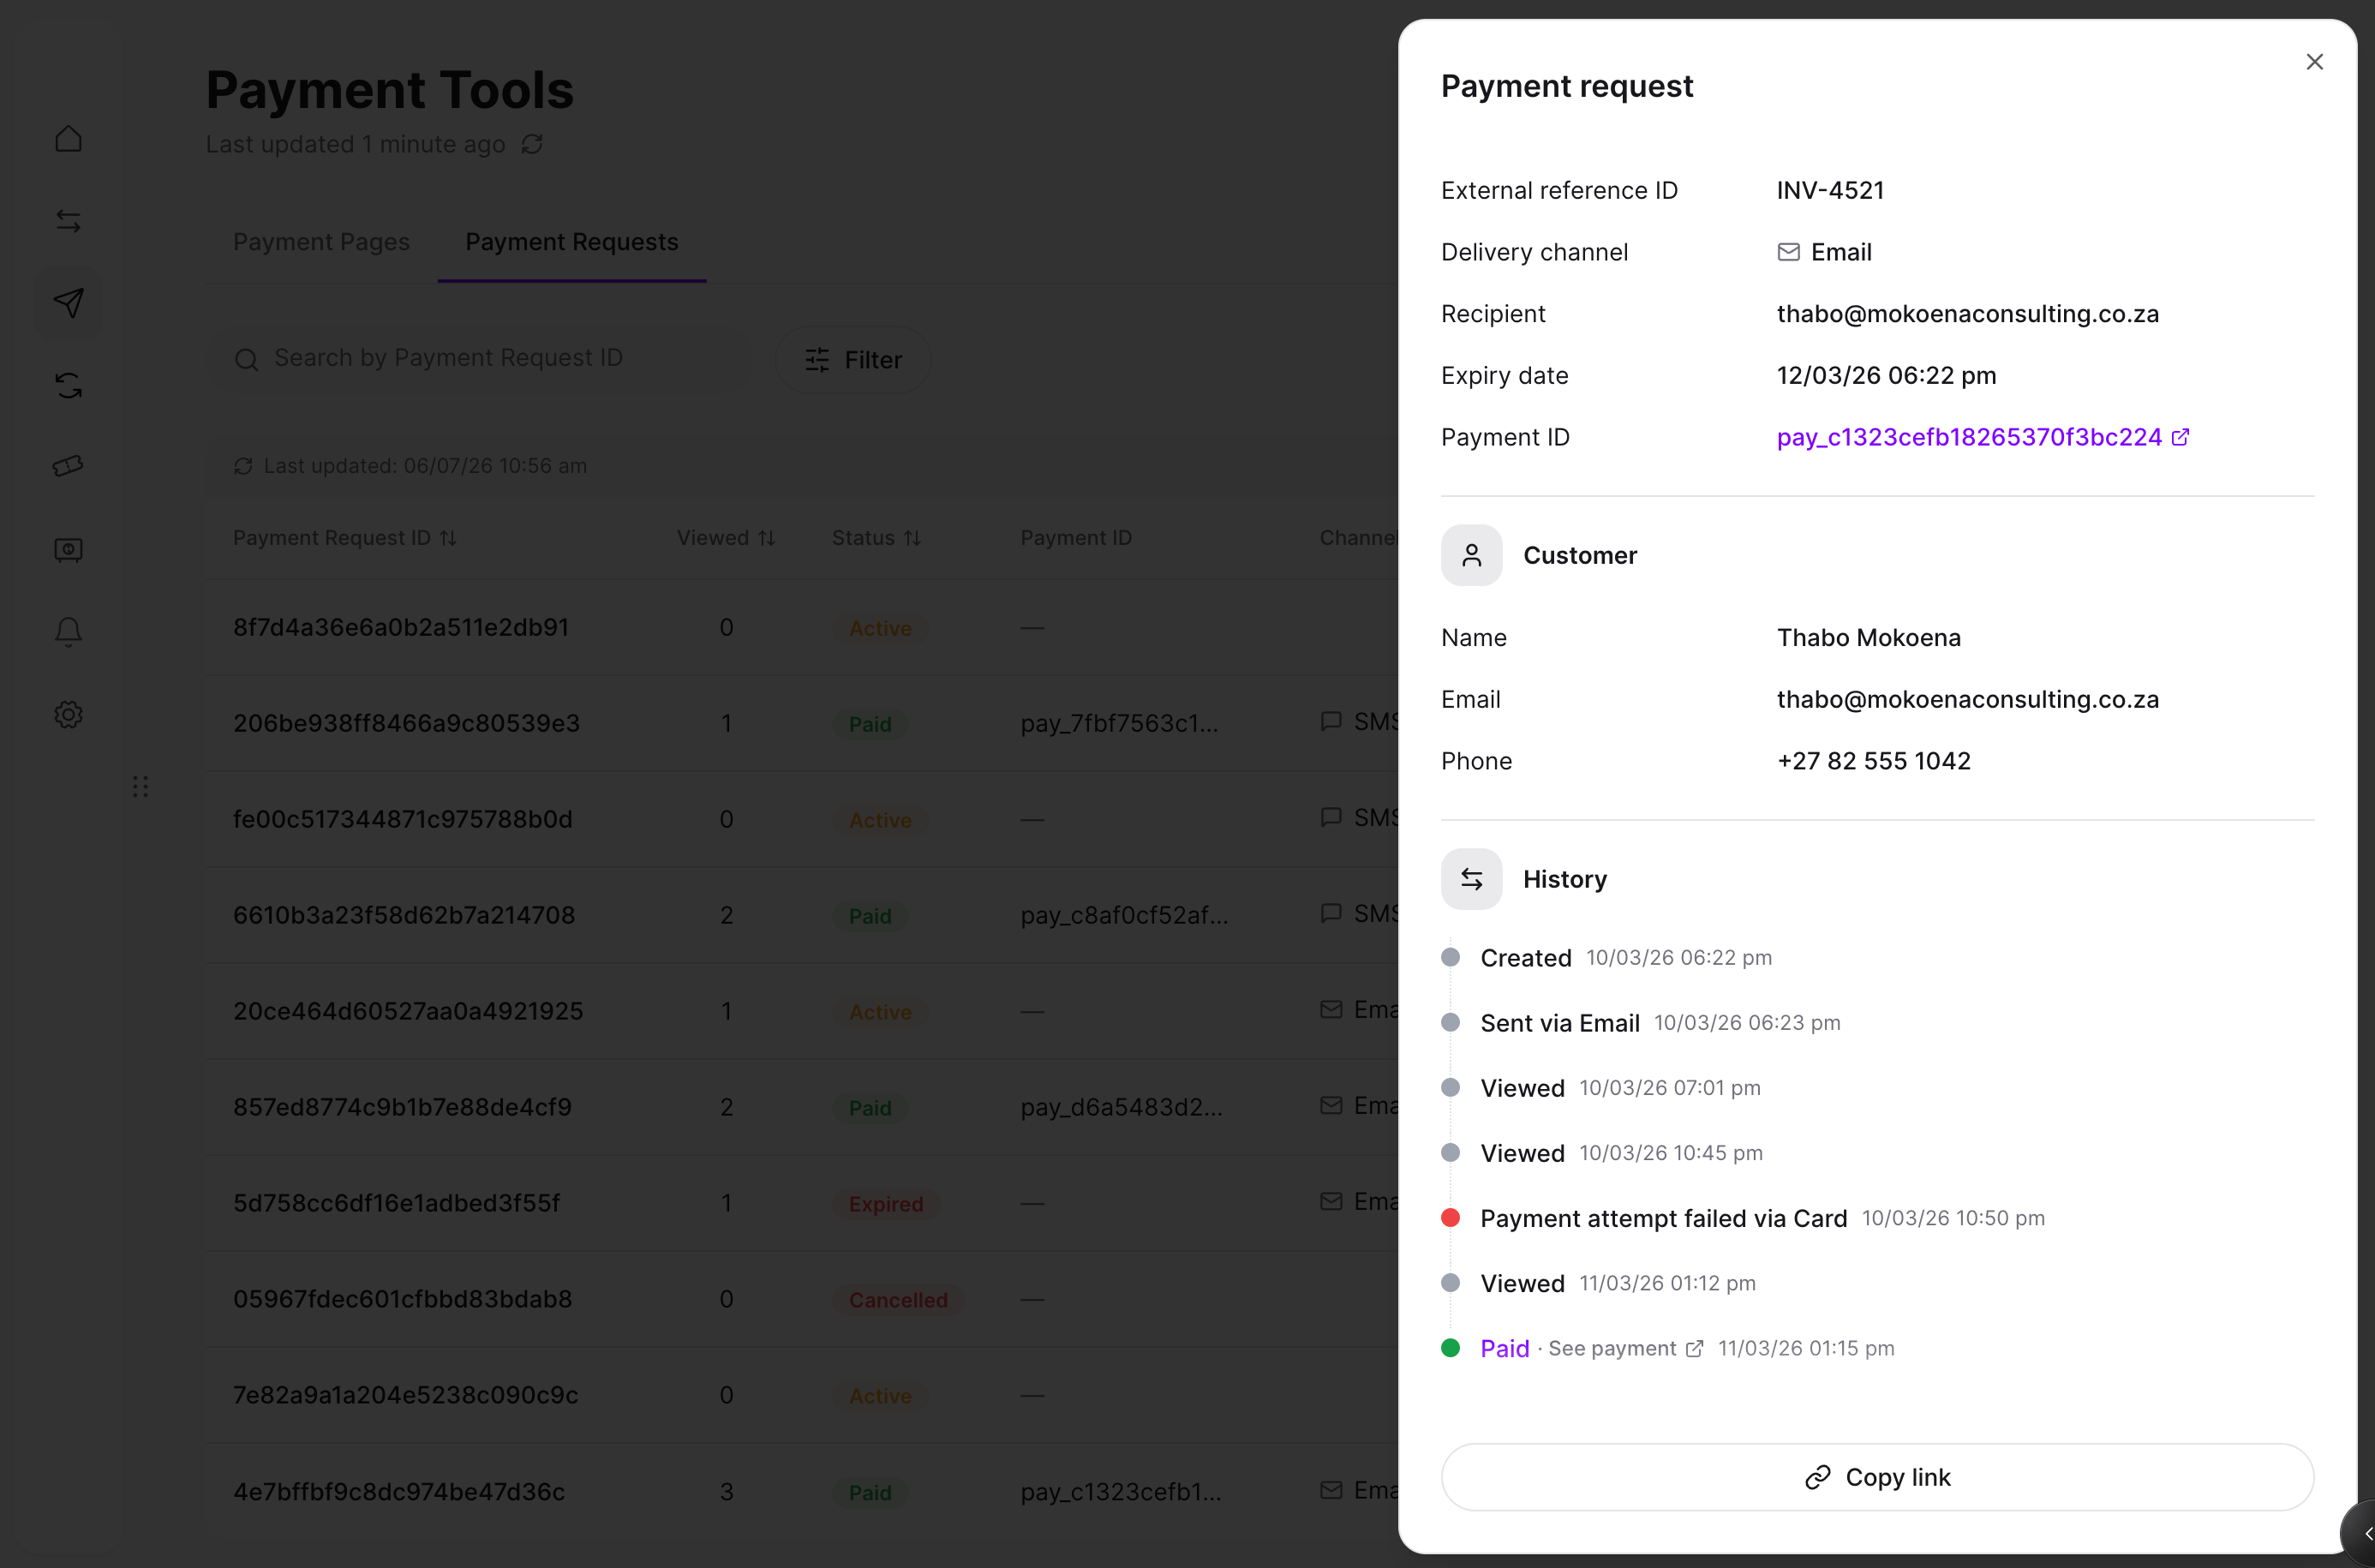
Step 8: Monitor your batch uploads in the Task center, see their completion status, and download payment requests if necessary. Step 9: Every payment request has a history with statuses.
Step 10: Task Center and batch statuses
- Processing: The batch has been received and is being validated; the output file is being generated.
- Ready: The batch was processed successfully. This means the output file was generated, not that every row succeeded — check the downloaded file to confirm which payment requests were created and which rows failed.
- Failed: The batch could not be processed. Check the file and resubmit, or contact support if this persists.
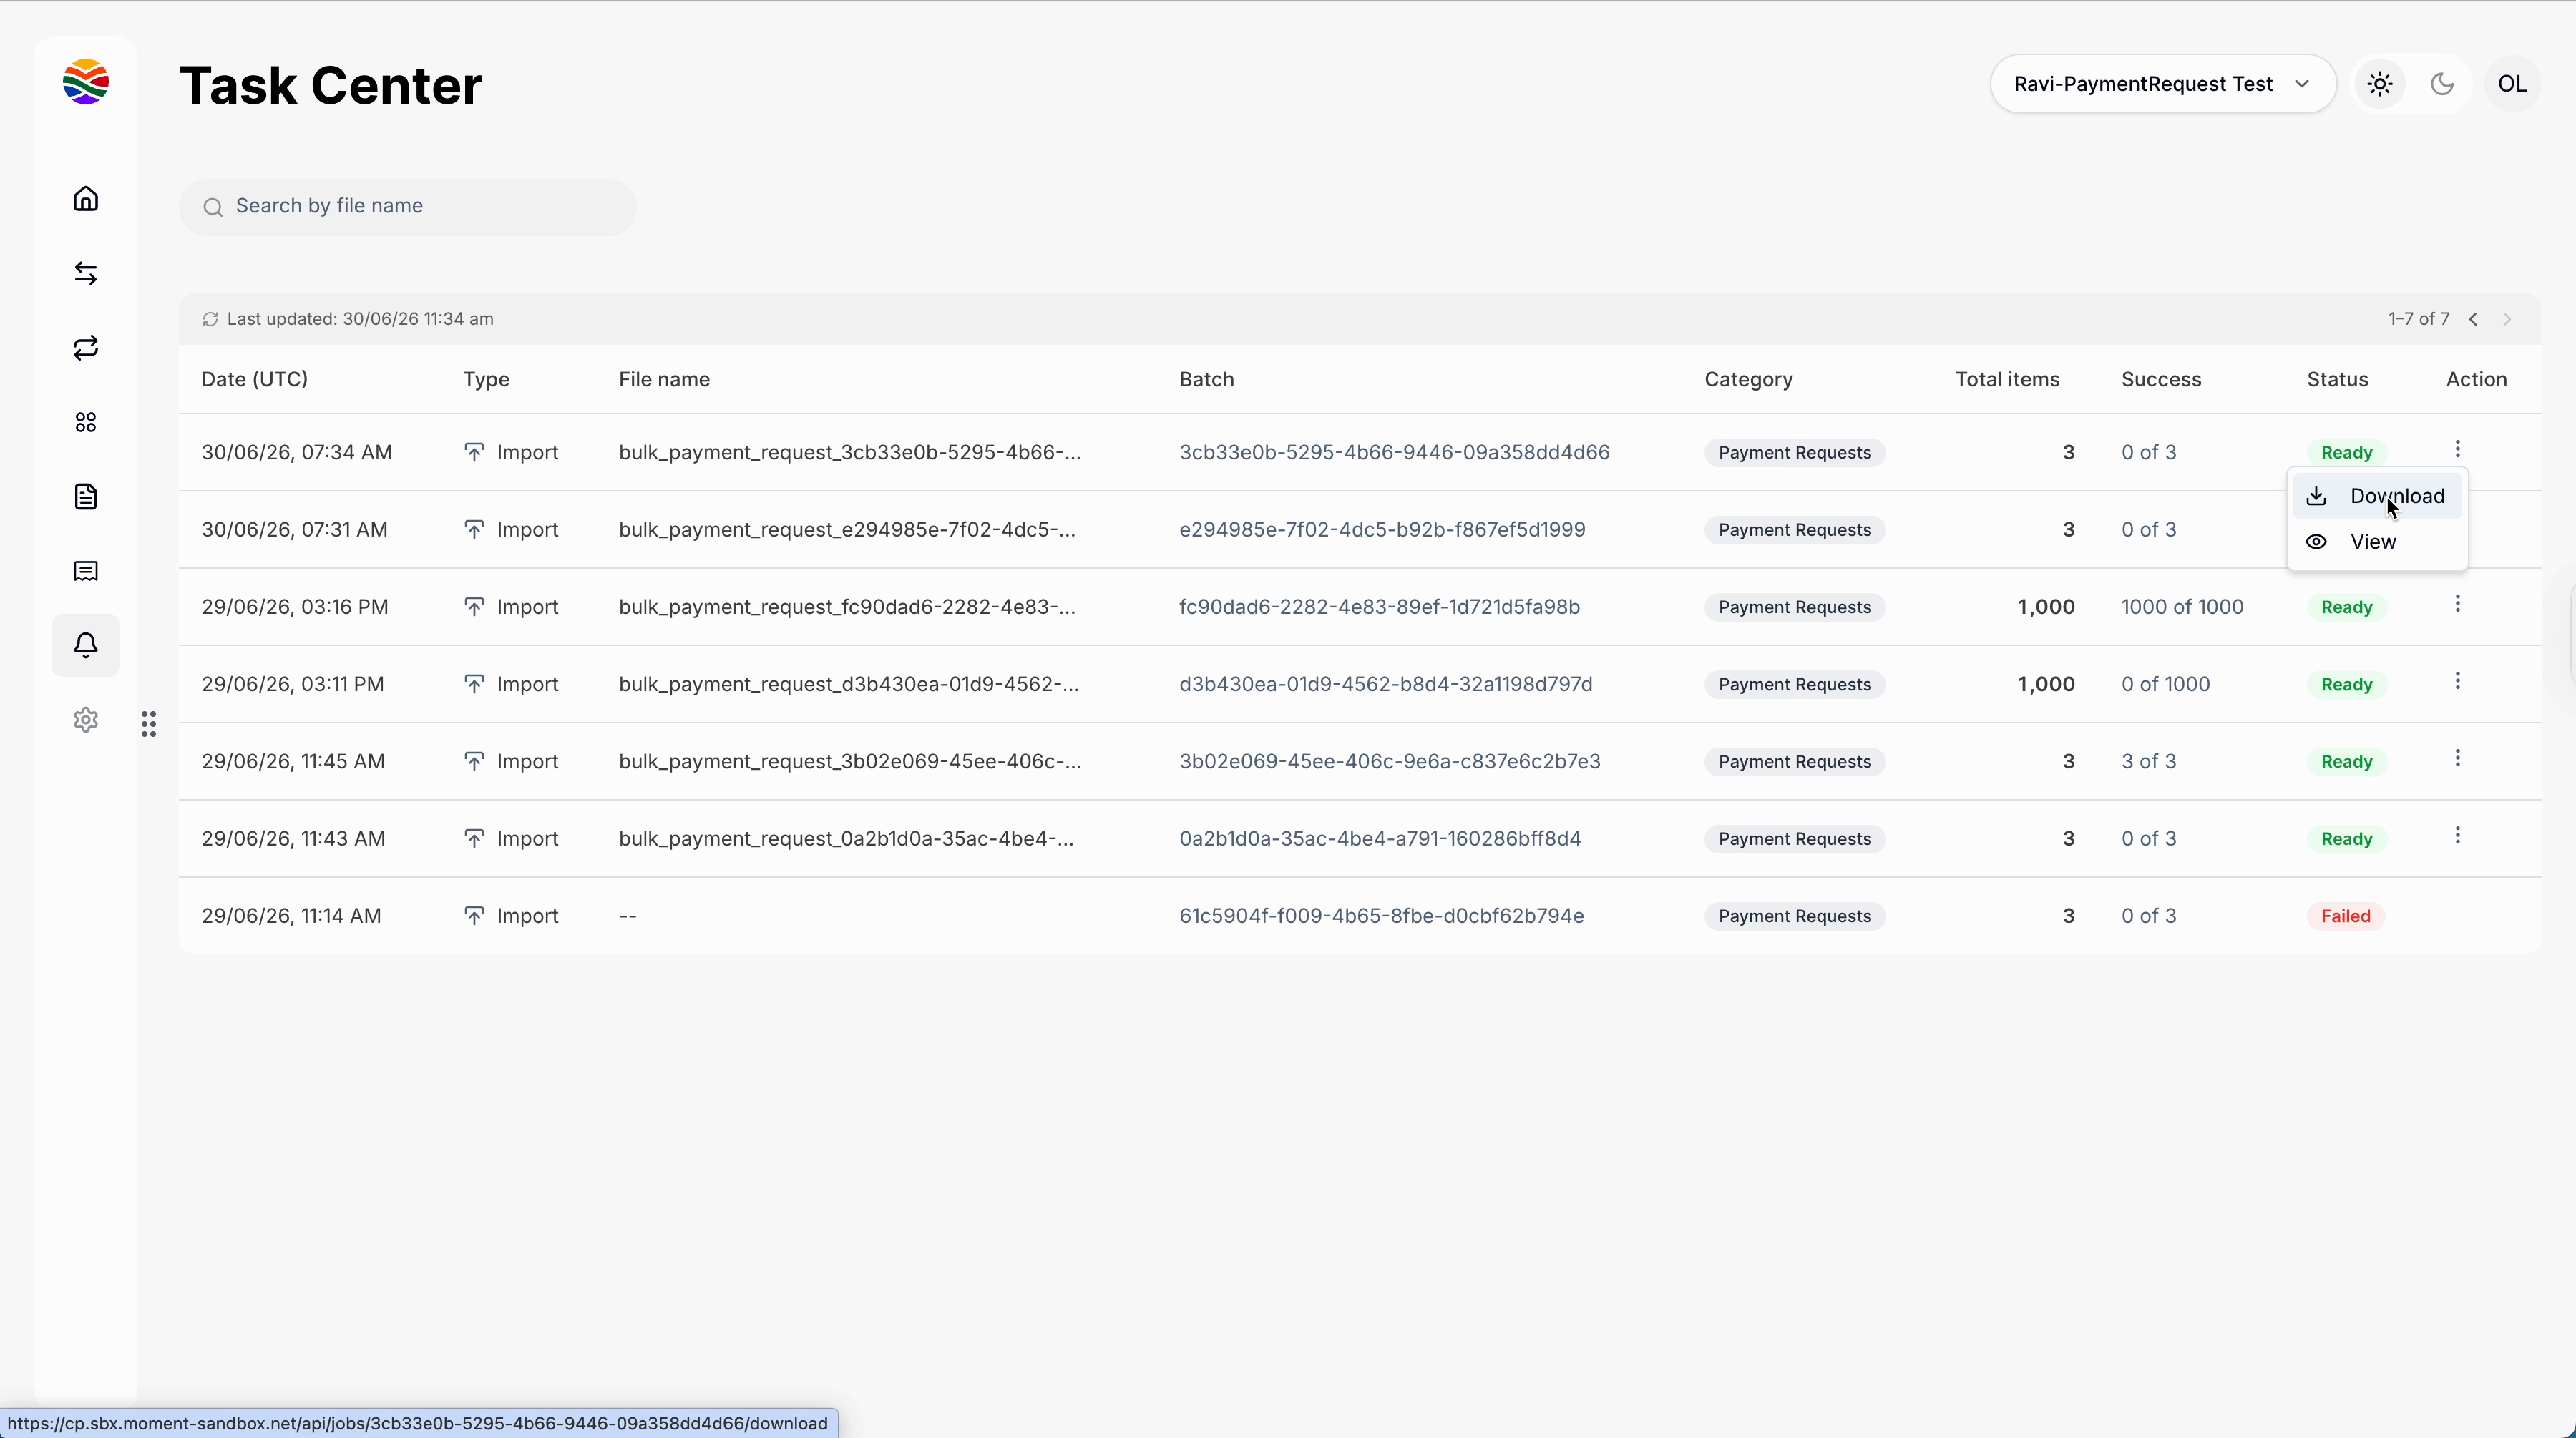
Step 11: Downloading a batch Download the batch to get payment request links for each row, so you can send them yourself, along with the failure reason for any row that didn’t succeed.
Viewing & Filtering Payment Requests
Step 1: Open the Payment tools page and find the Payment Request tab. The table lists all your payment requests, so you can keep track of every request you’ve created so far.
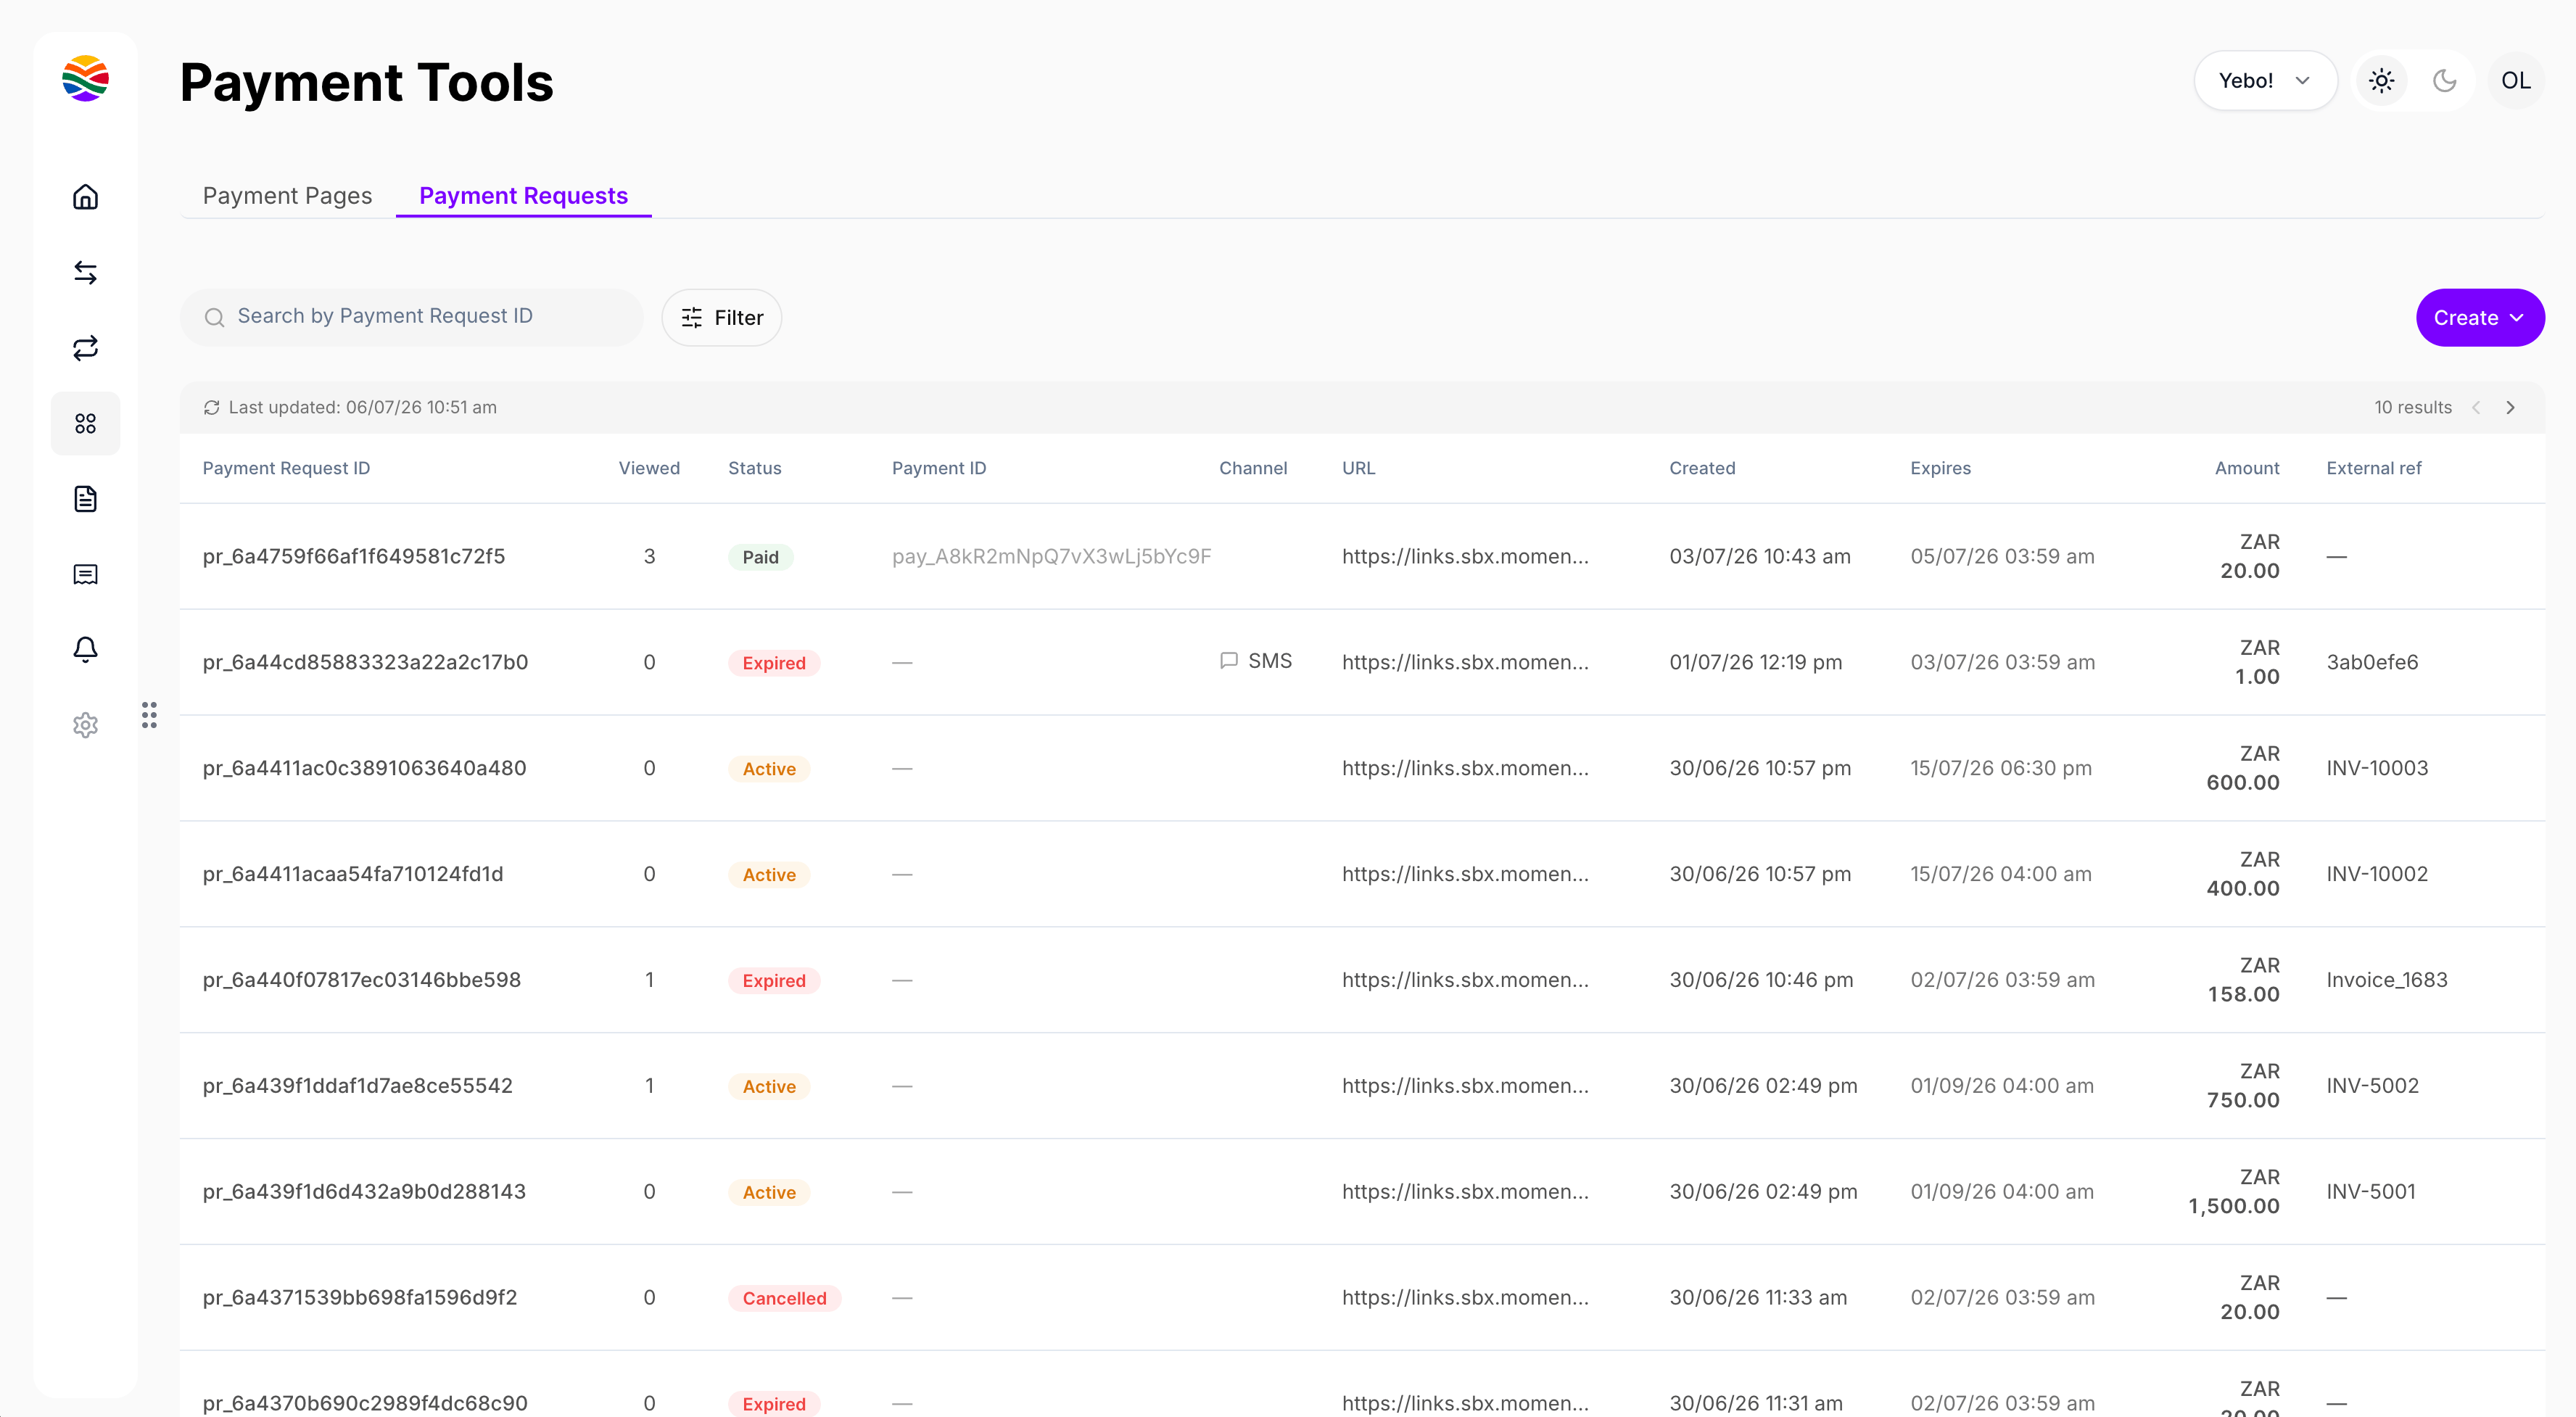
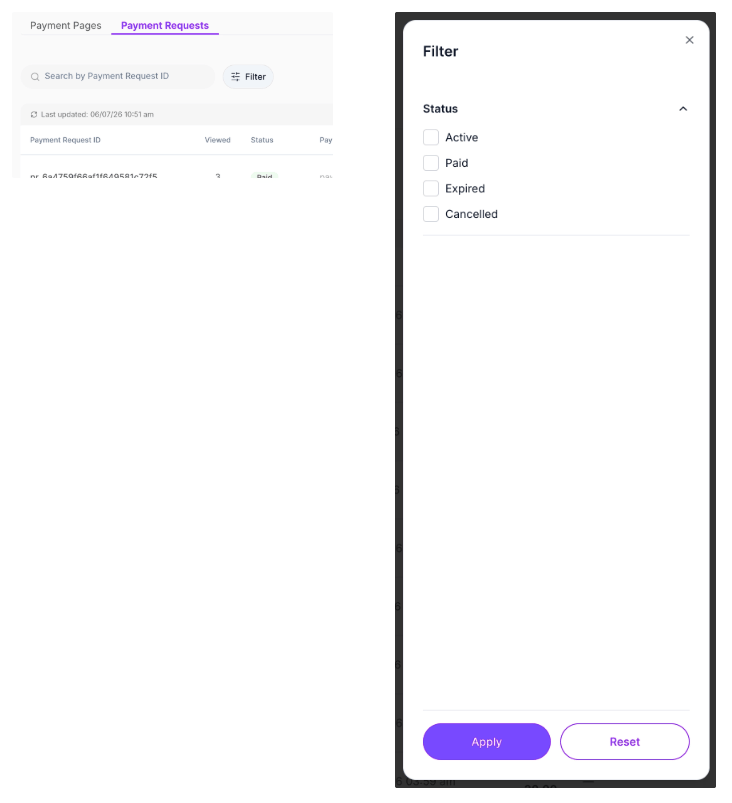
Step 2: Use the search bar to find payment requests by different identifiers. Filter your list by the status of each payment request to narrow down what you need.
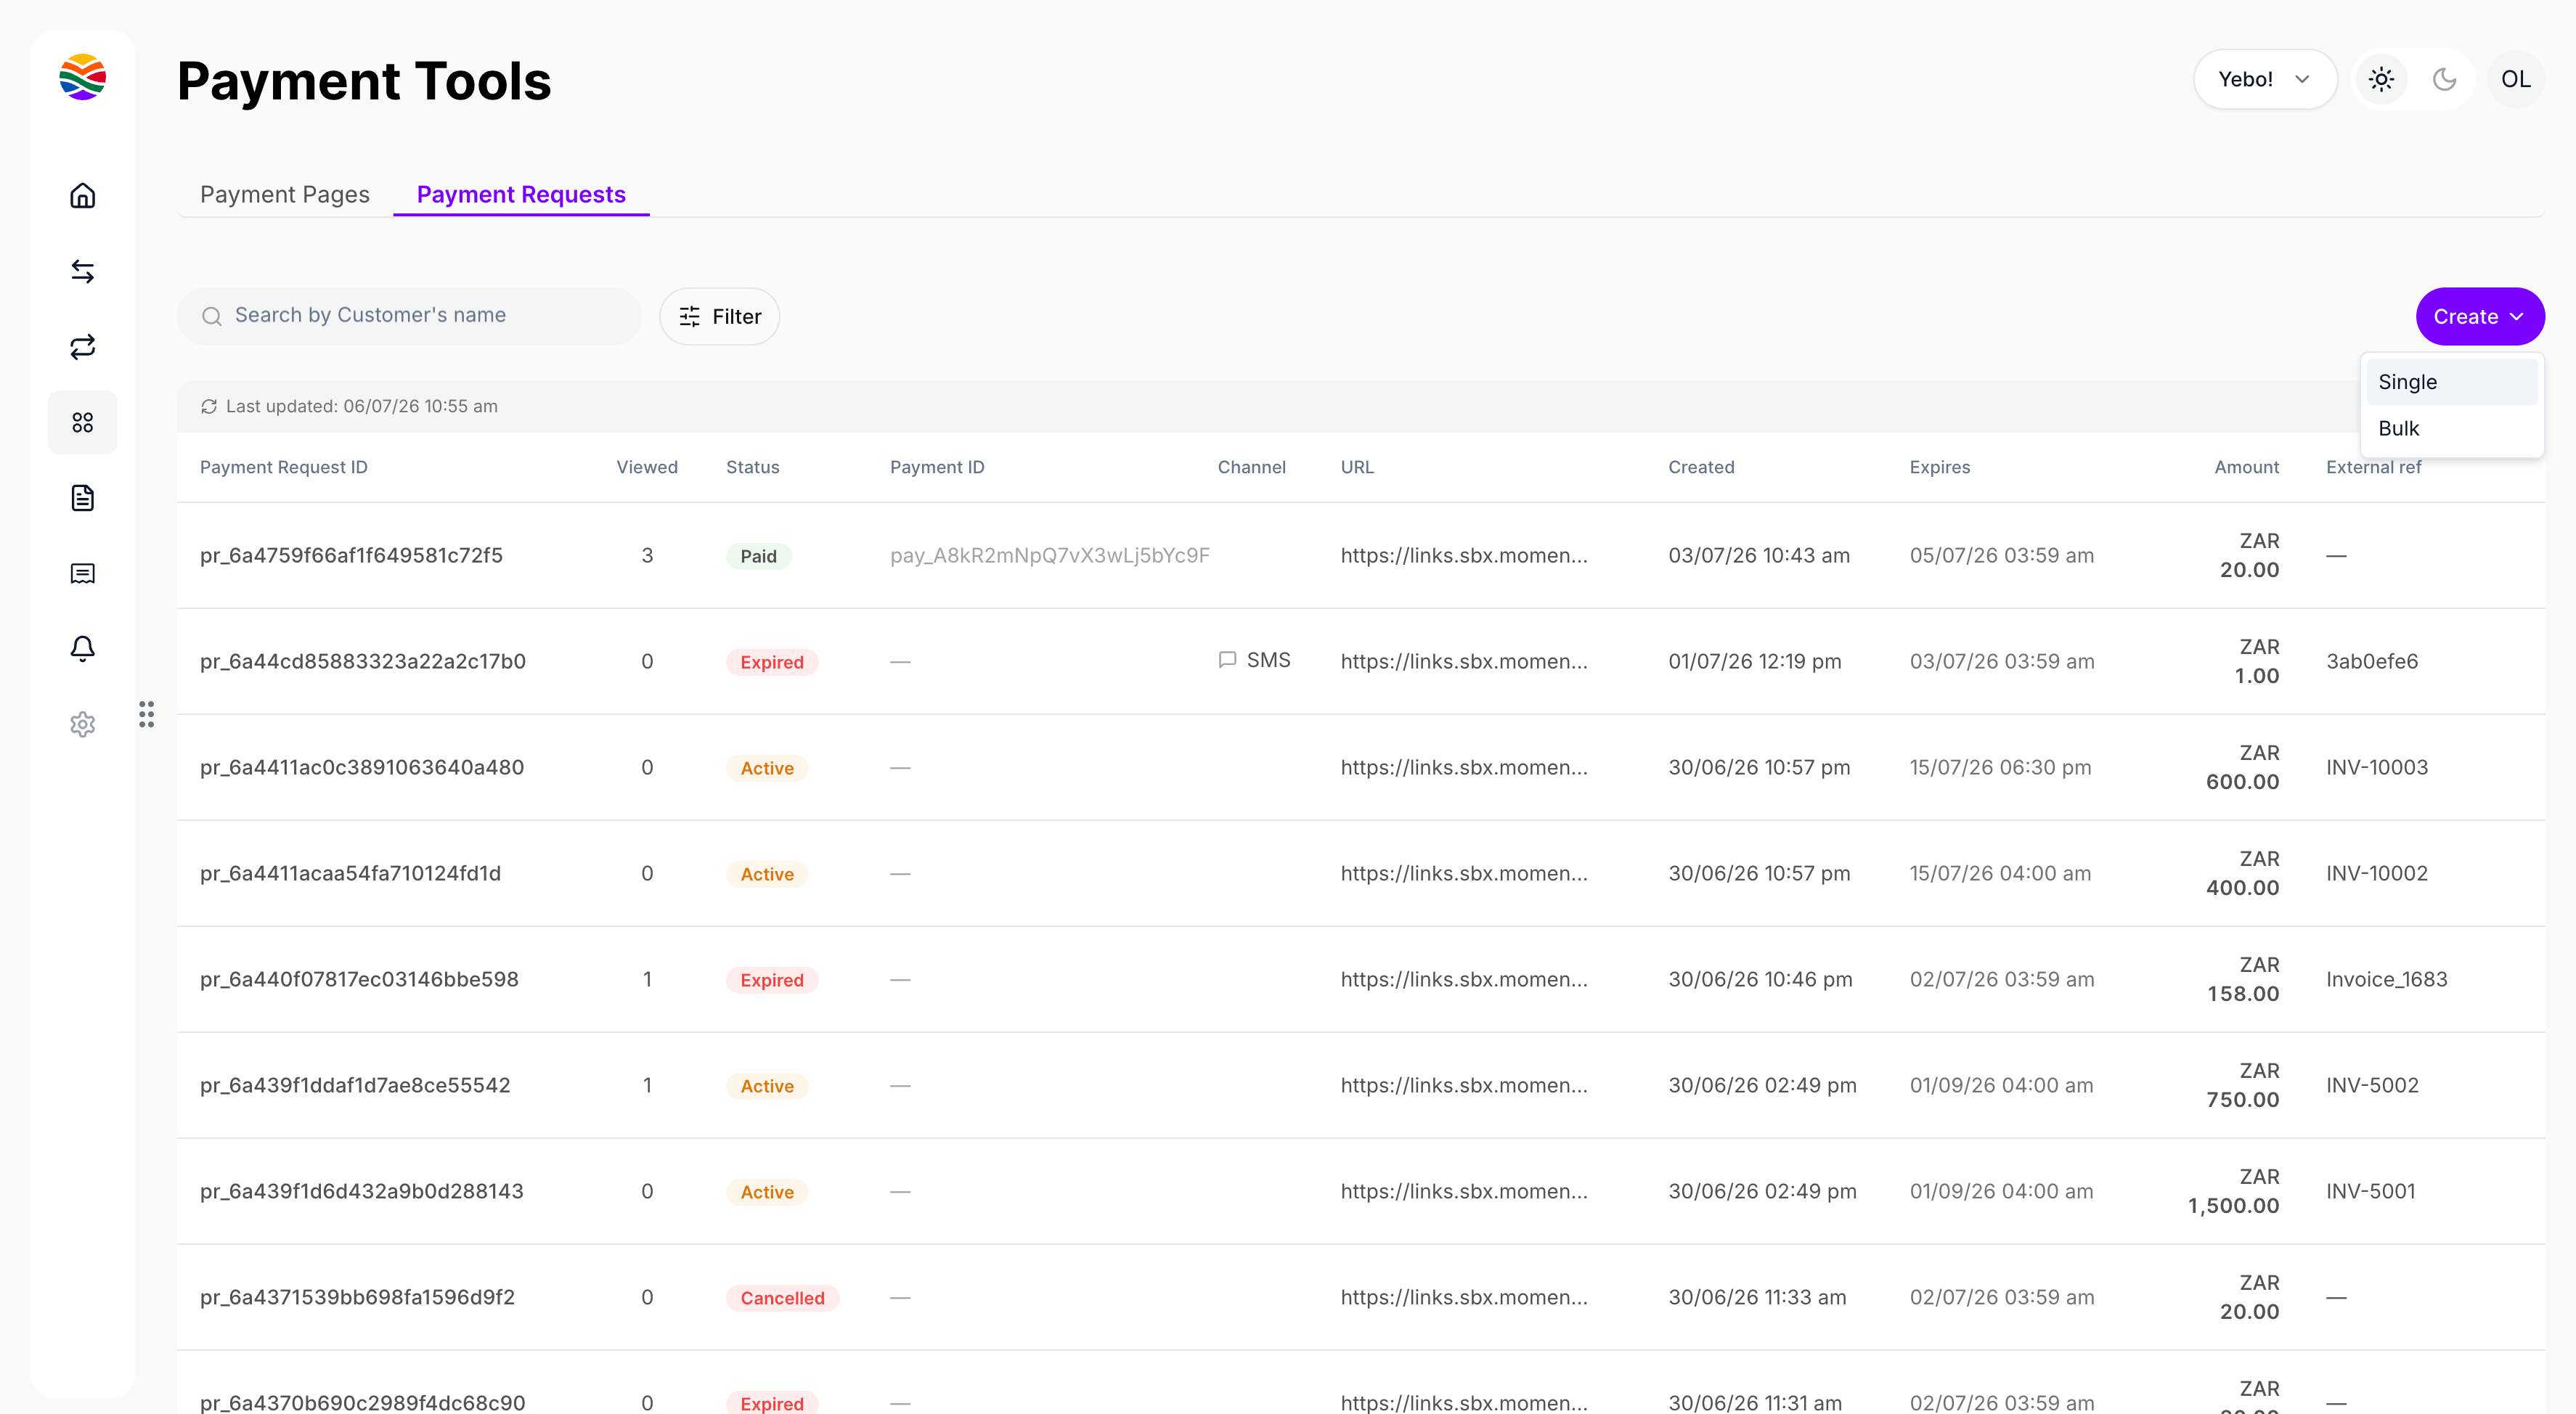
Step 3: To create a new payment request, choose whether you want to make a single request or create them in bulk.
Managing payment requests with Moment keeps your collections simple, organized, and trackable — whether it’s just one payment or hundreds at once. Enjoy faster, smoother payment collection!