How to Create and Manage a Payment Page
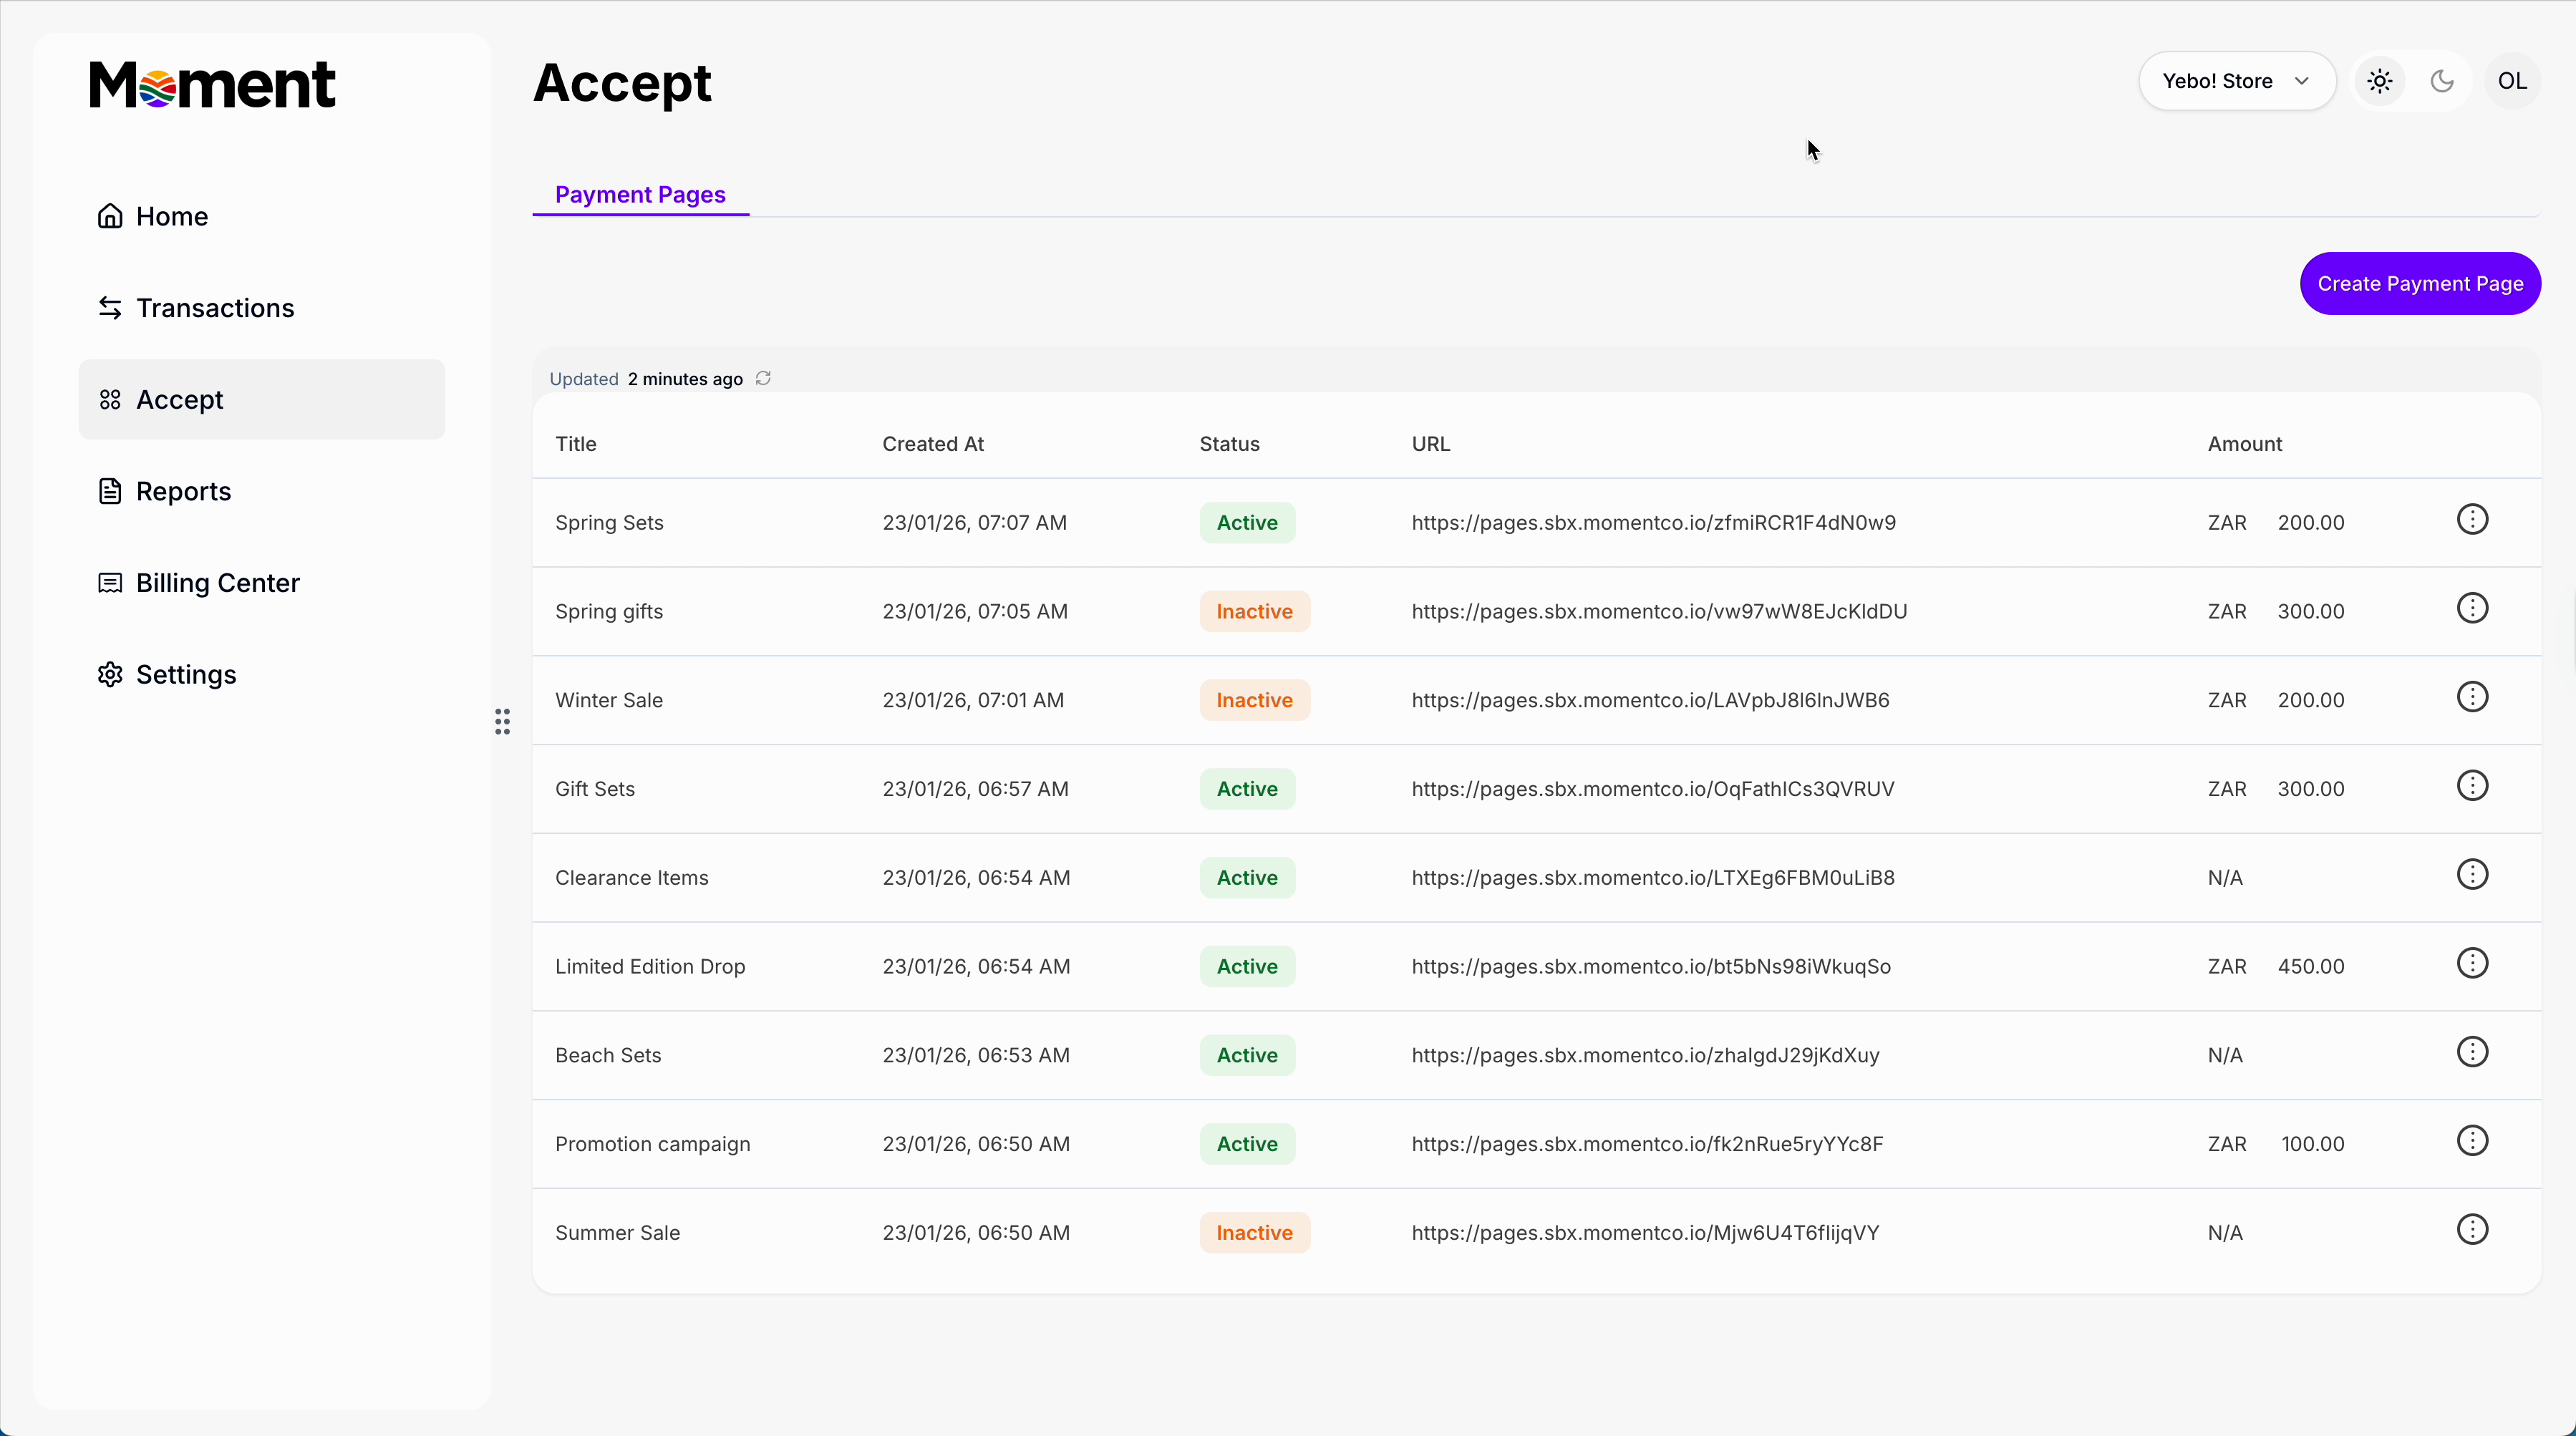
Step 1: View all your existing payment pages in the summary table. Quickly see which pages are active and ready to accept payments.
Step 2: Click Create New Page to set up a new payment page. Add a title: this is what customers will see at checkout.
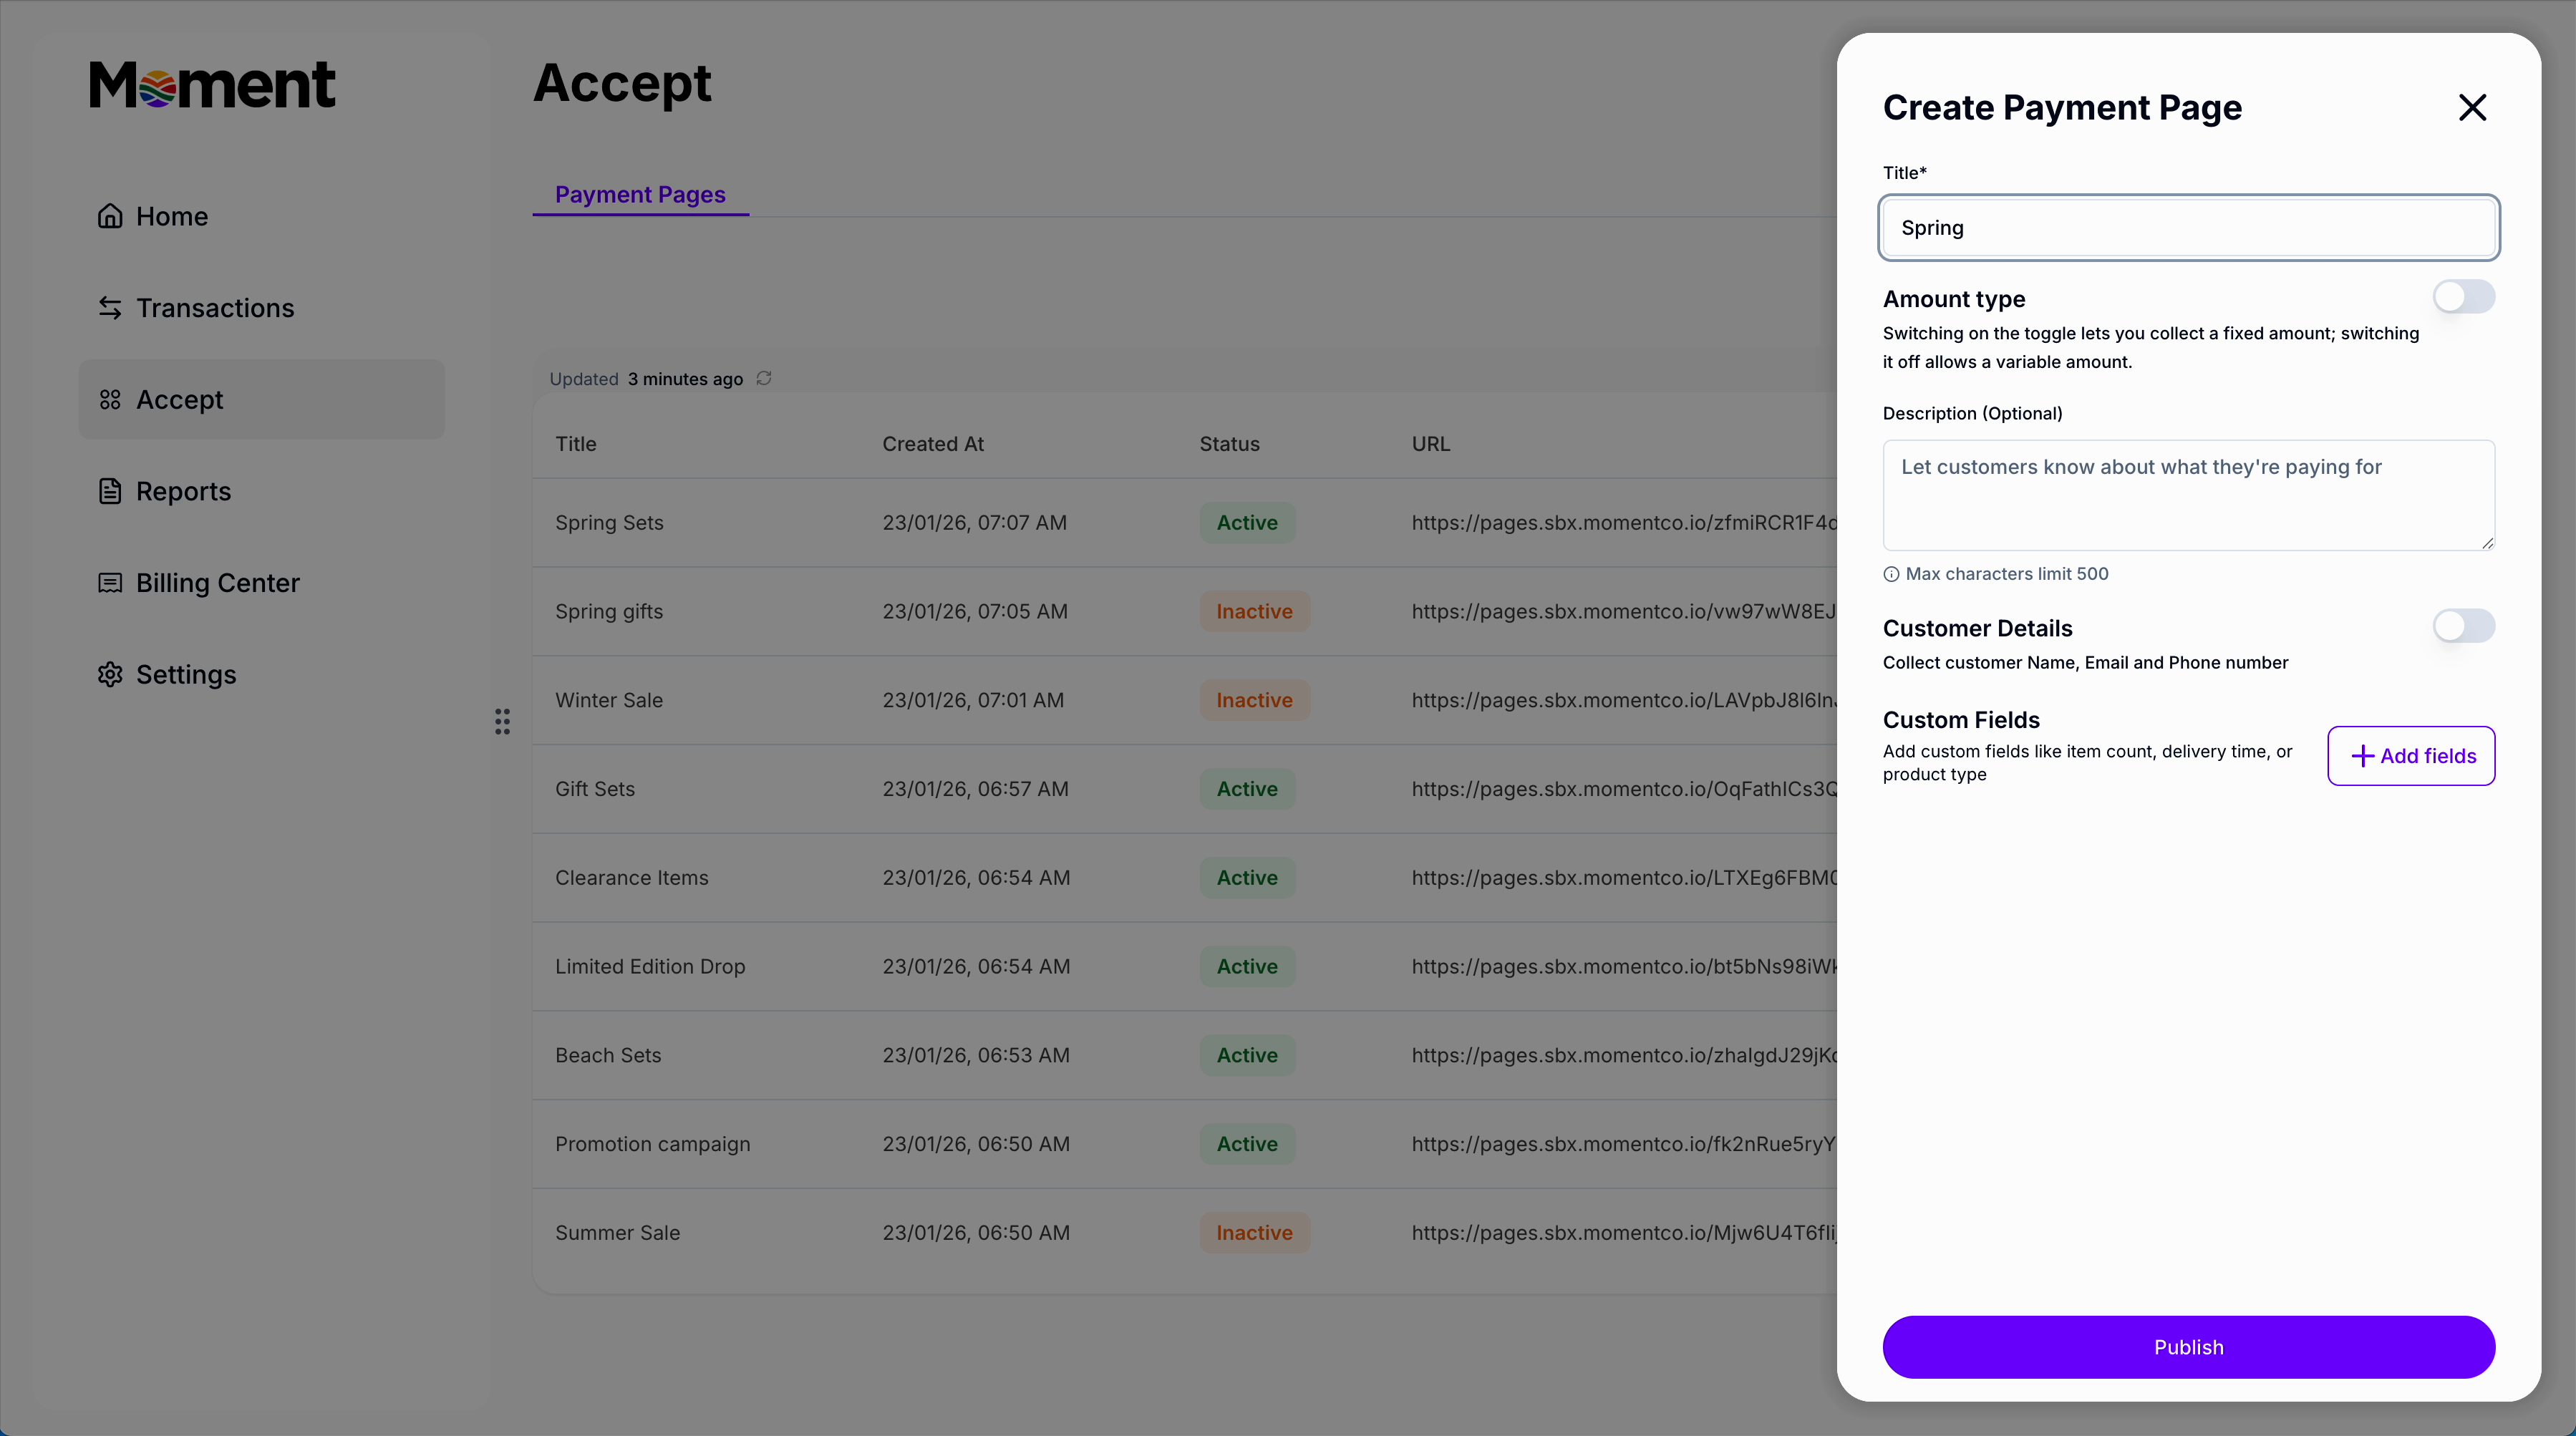
Step 3:Choose the amount type:
- Open amount — let customers enter how much they want to pay
- Fixed amount — set a specific price


Step 4: Add a clear description so customers understand what the payment is for.

Step 5: Choose which customer details to collect.

Use toggles to collect basic details: name, email, and phone numberAdd custom fields such as text input, text area, dropdown, checkboxes, or radio buttons

For dropdowns and radio buttons, add the options customers can choose from.All submitted information will appear in the transaction details.

Step 6: Click Publish to make your payment page live.
Step 7: Preview the page to see exactly how it looks for customers, including all custom fields.
Step 8: Copy the payment link and share it:
- Send directly to customers
- Add to your website
- Post on social media

Step 9: Track all payments made through your page. View transaction details, edit the page, or disable it at any time.
